Build Your Dream Cabin!
Details and information on this website are provided for information only and are not professional advice. Consult an architect or engineer for structural design.
For info on my dovetail jig system and building log cabins, a good place to start is my Log Cabin Playlist on Youtube...

Below are some articles log cabin construction:
Cabin Design - How big?
Details and information on this website are provided for information only and are not professional advice. Consult an architect or engineer for structural design.
Log buildings range in size from a small trappers cabin up to very large lodge style structures. The size of your building should be determined by your needs rather than being limited by available log size. This article will discuss various basic cabin designs that will enable you to build cabins larger than your longest log length.
Splices- Can't I just splice short logs together to make long ones?
It is best if splices can be avoided. The splice is structurally weaker than a continuous log so splices need to be supported by the log below. The image below shows a lap splice with blocking to provide the needed support. The lap length should be 12-24 inches in length. Note that the blocks do not extend all the way out to the face. This way, the chinking will hide them.
The joints should be bolted. The bolt holes should be countersunk and wooden dowel plugs installed to hide the bolts/nuts. Joints should be staggered at least 4 feet. It would also be good to drill vertical holes near the joint and drive a long rod or rebar through to strengthen the joint. Locating splices near intersecting walls can sometimes eliminate the need for blocking and rebar.
Log "Pens" for modular construction.
The pioneers knew a thing or two about log cabins. Although they probably wouldn't recognize the term "modular construction", many homesteaders used this approach to build their homes. Likely, upon arrival to their new land, the priority was to get a permanent shelter built as soon as possible. Later, as time permitted and the family grew larger, additions were constructed to enlarge the space.
A "pen" is a term used to describe four log walls arranged in a rectangle or square.
A pioneer might build a single pen cabin and later may enlarge it to a "dogtrot" or an "L".
Let's look at options available to a modern builder who has logs up to 16 feet long and who wants to avoid splicing logs...
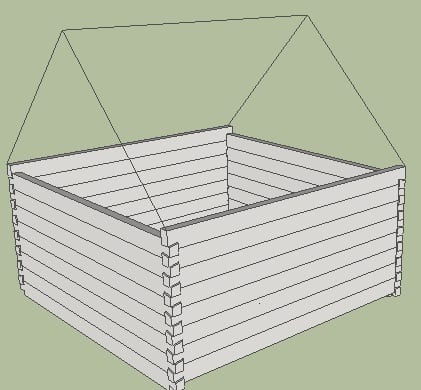
Single Pen Single Story - The most basic building, 16' x 16'. With this cabin the builder would end up with less than 250 square feet of space (deducting for wall thickness).
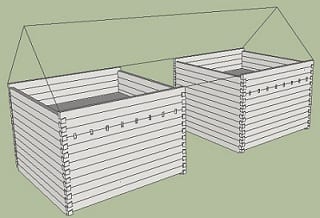
 Double Pen Single Story - The double pen cabin is actually two single pens separated by a space of 8-16 feet. A common roof is constructed over the both pens and the in-begtween space. For this example, let' say the builder used two 16x16 pens separated by 14 feet. The square footage for this building is about 720.
Some opted to leave the middle space open. This style is referred to as a "dogtrot". Most would probably want to enclose this area by adding two additional walls. These could be log or conventionally framed and sided with board and batten siding or lap siding. If logs are used, it may be a good idea to recess these walls by two feet or so to make it easier to connect to the two interior walls.
 Double Pen Story and a half- With a steep roof pitch such as a 12:12, an additional floor can be built. To increase the usability of this loft area, many cabins were built as a "story and a half". To do this, a builder might construct the two pens 12 or 13 feet tall. With the upstairs floor at 8 feet, a 3 or 4 foot kneewall helps create more upstairs "walking space".
 Even more space can be created by using additional pens. A third pen could be added to form an "L"
Keep in mind that the roof oultines above are generic. This article did not cover roof framing, dormers, porches, etc. Look for that information in a future article.
Framing the openings
Details and information on this website are provided for information only and are not professional advice. Consult an architect or engineer for structural design.
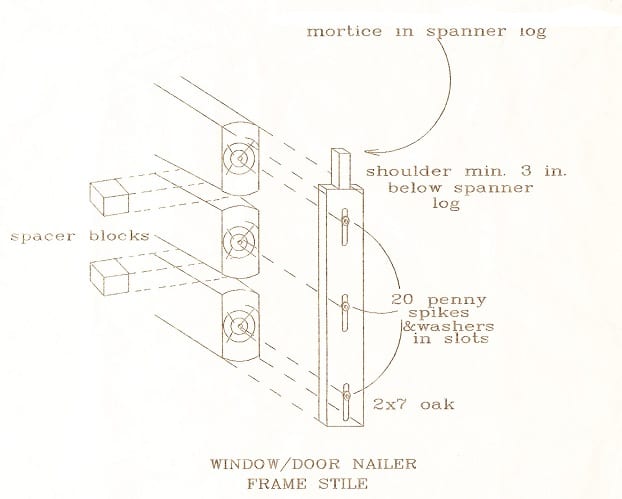
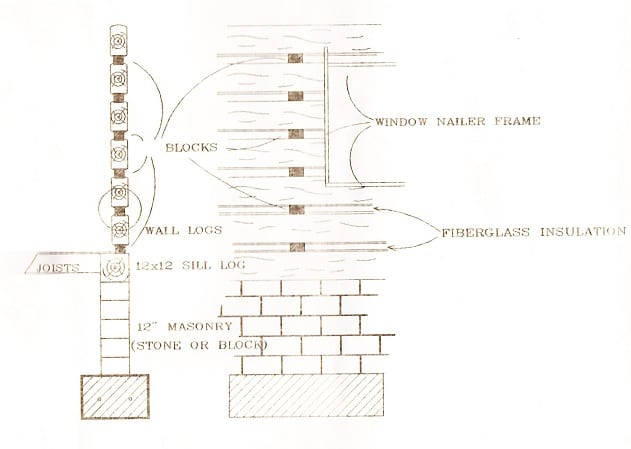
Unless the logs are very dry and sealed, it is recommended to frame openings in such a way as to allow the logs to settle without bearing on the frame. The following details show one method of framing openings. It is a good idea to use spacer blocks that are made from the same wood and that have a similar moisture content as the logs.
(click to enlarge)
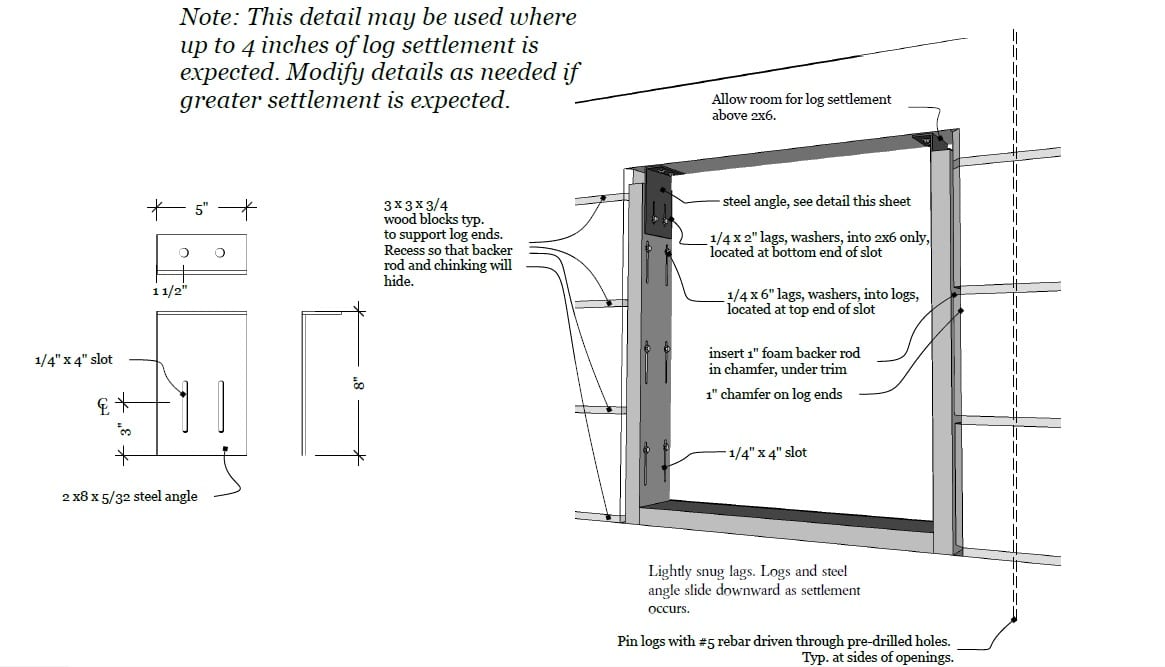
Here is a similar method:
Choosing your gap size
Sometimes I am asked about building with no gap between the logs (zero gap). Although this is definitely possible, it is generally not recommended. Instead, I suggest that you use at least a 1/4" gap.
Having at least a minimal gap(with chinking) allows for the logs to settle while keeping the notches tight. Also, some logs are sure to shrink, twist or bow after some time. If there is no gap to begin with, gaps would open up in various places and it would be difficult to seal them. Chinking a gap of 1/4" or more is much easier than trying to fill alot of thin gaps here and there.
Generally, the gap size should be selected based on how much shrinkage/bowing/settling is anticipated. If your logs are fairly green then it is better to have a bigger gap in order to accomodate more movement. 1 inch would probably be about the minimum in that case.
If the logs are kiln dried, resawn and then sealed, they should be very stable and a 1/4" gap should be fine.
Many cabins have fairly wide chinking and some people prefer that look. Gaps of 3-6 inches are not uncommon. A side benefit to using larger gaps is that it makes it easier to run wiring and mount electrical boxes.
How to Chink Your Cabin
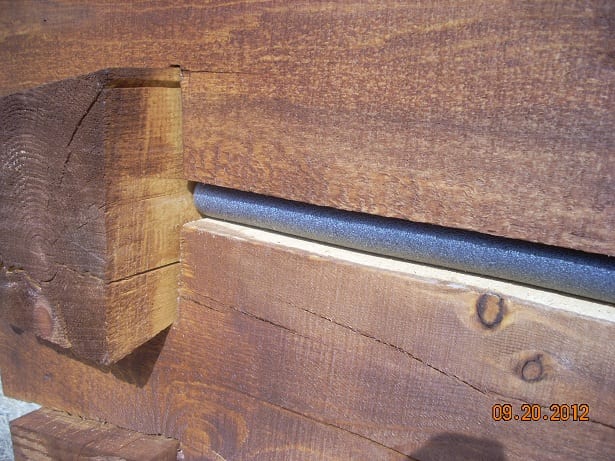
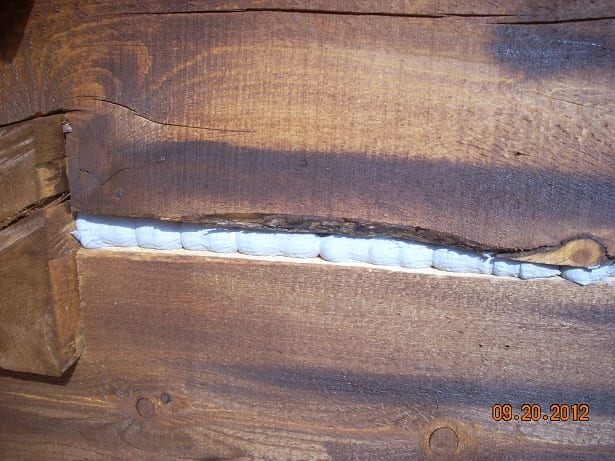
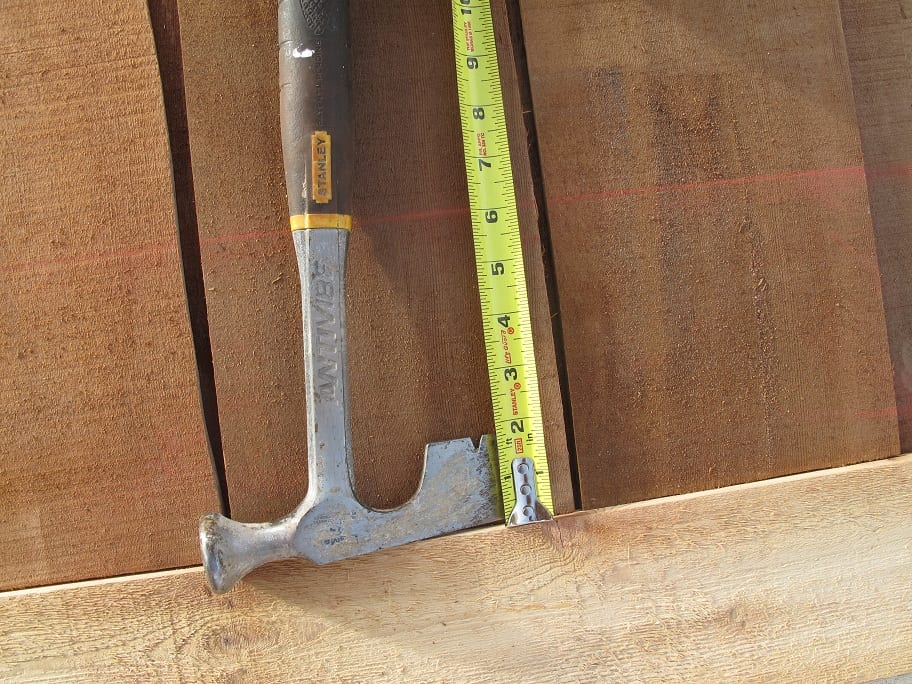
A gap of 1/2" to 1" is generally good for chinking. The gap shown here is about 1 3/4". The larger the gap, the more expensive and time consuming it is to chink. I recommend using the modern flexible chinking products rather than mortar based. As the logs naturally move over time, the elastic sealant will maintain a good seal with no cracking.
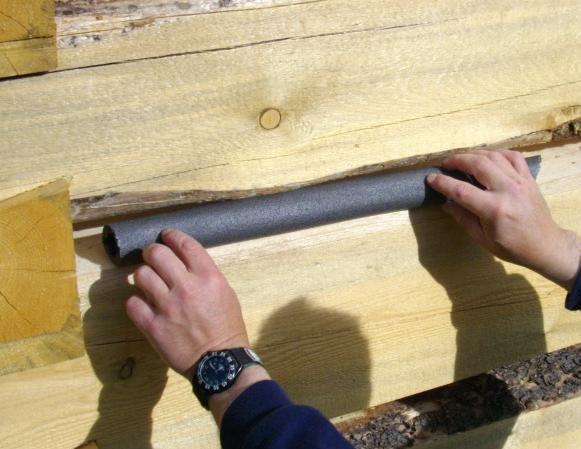
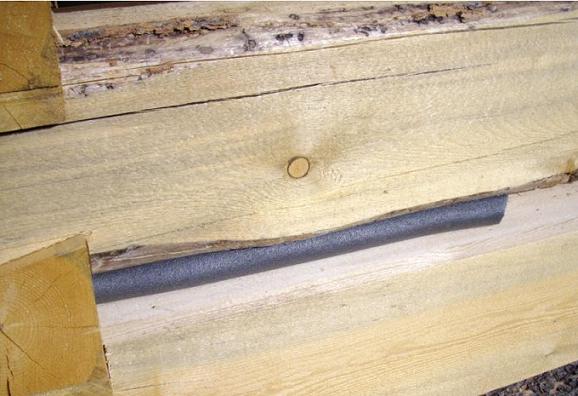
Insert foam backer rod. The backer rod can be purchased in various diameters. It just needs to fit snugly. Recess it about 1/2". No need to nail it.
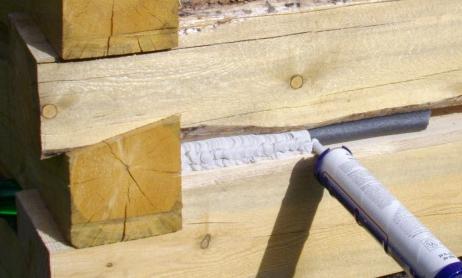
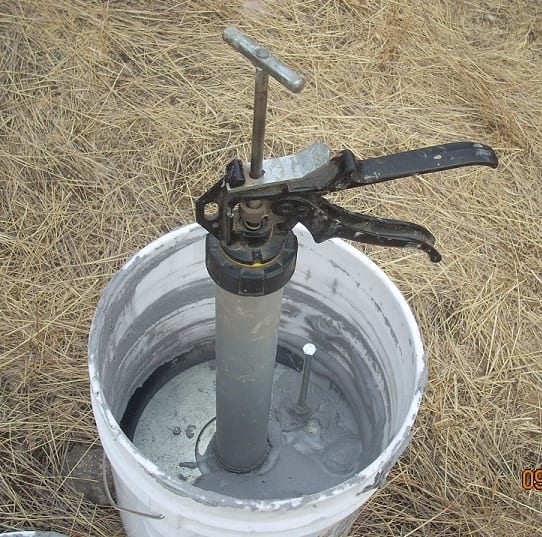
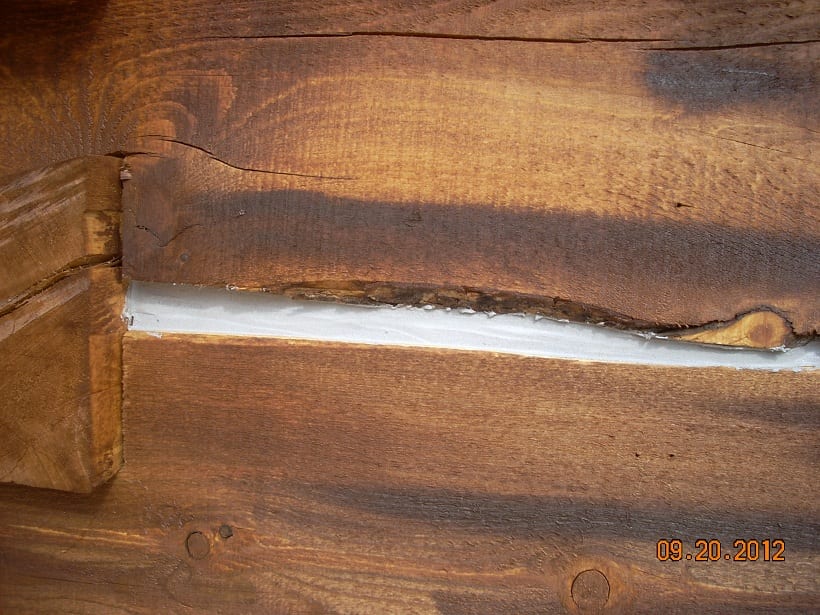
Apply the chinking (Log Jam, Perma Chink, etc.) using an air powered caulk gun. The standard caulk gun is really only practical for very small jobs and not recommended for a full cabin. I have used the bulk gun and 5 gallon buckets of chinking but found it is very difficult to draw the product into the gun and requires a lot of cleanup after each use. Now I only buy the chinking in 29 oz. tubes and use a pneumatic gun which eliminates both problems altogether. This is the one I have:
COX 63002 Berkshire 29-Ounce Cartridge Pneumatic Caulk Gun
(In fact, I even used it to chink a remote cabin that had no electricity to power an air compressor. I brought in a small portable air tank and used a bicycle pump to pressurize it.)

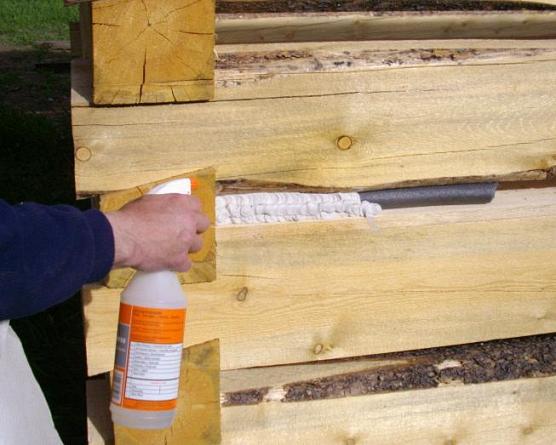
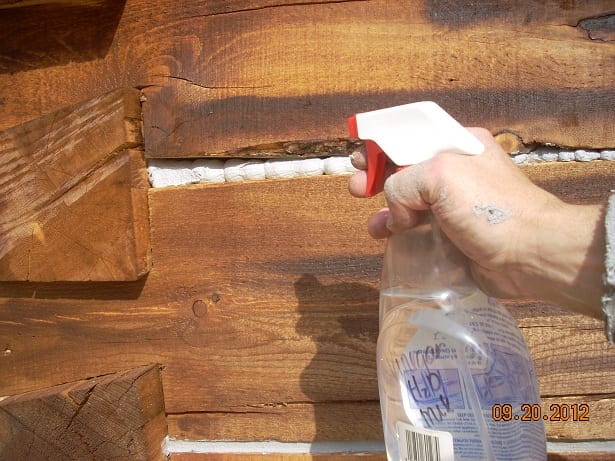
Use a spray bottle to lightly moisten the chinking with water.
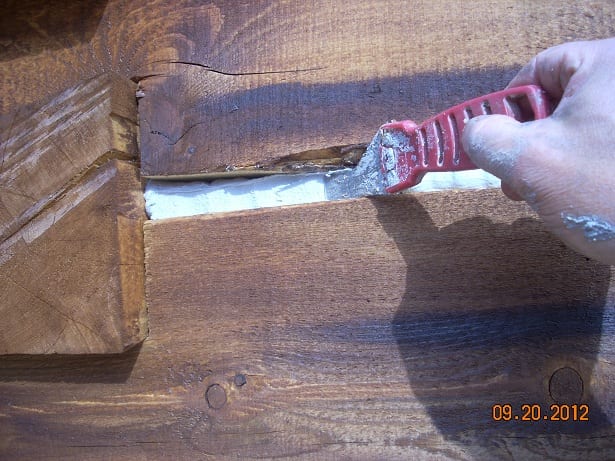
You can buy tools specifically made for smoothing out the chinking. Here, I am using a modified putty knife. It is pretty easy to spread and smooth the chinking. Be sure to force it against the wood along the top and bottom edges so it will form a good bond.

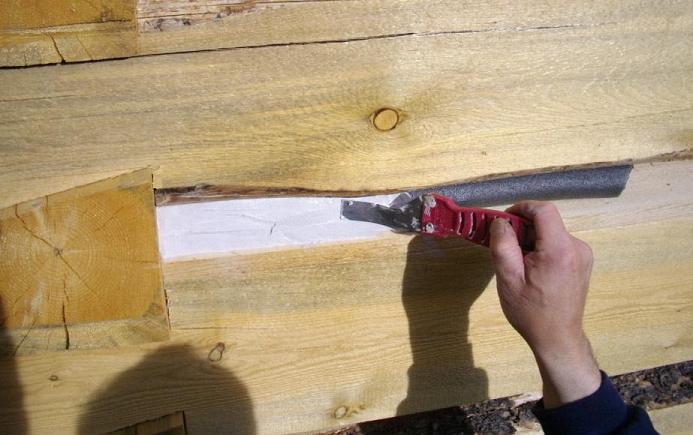
See the chinking product instructions for additional information.
July 28, 2012
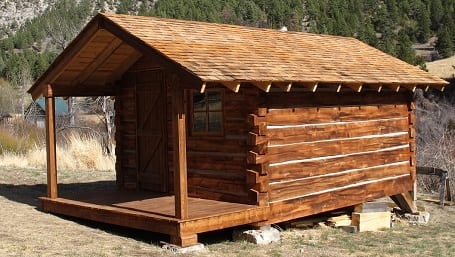
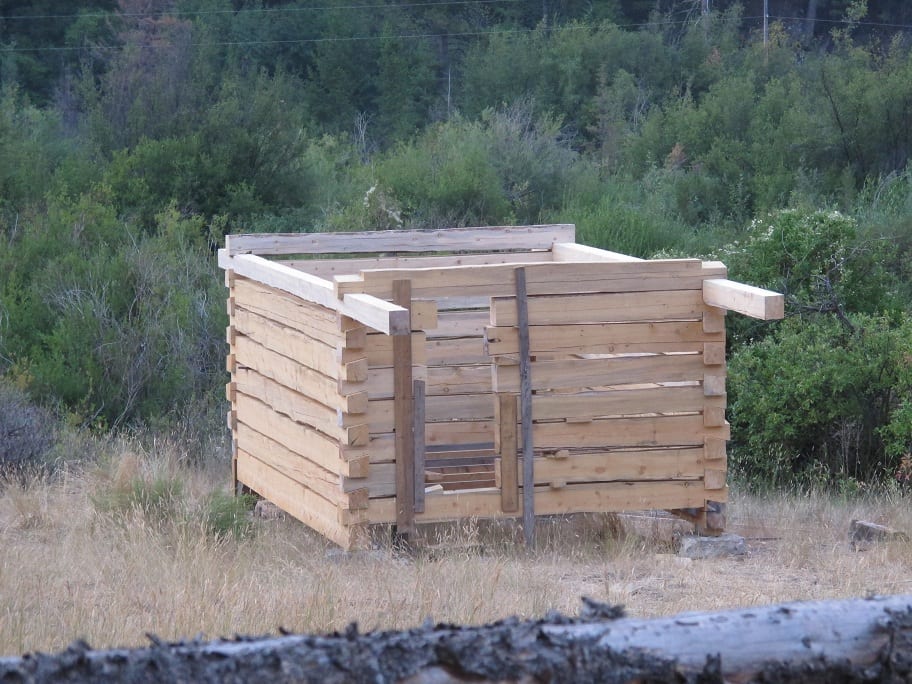
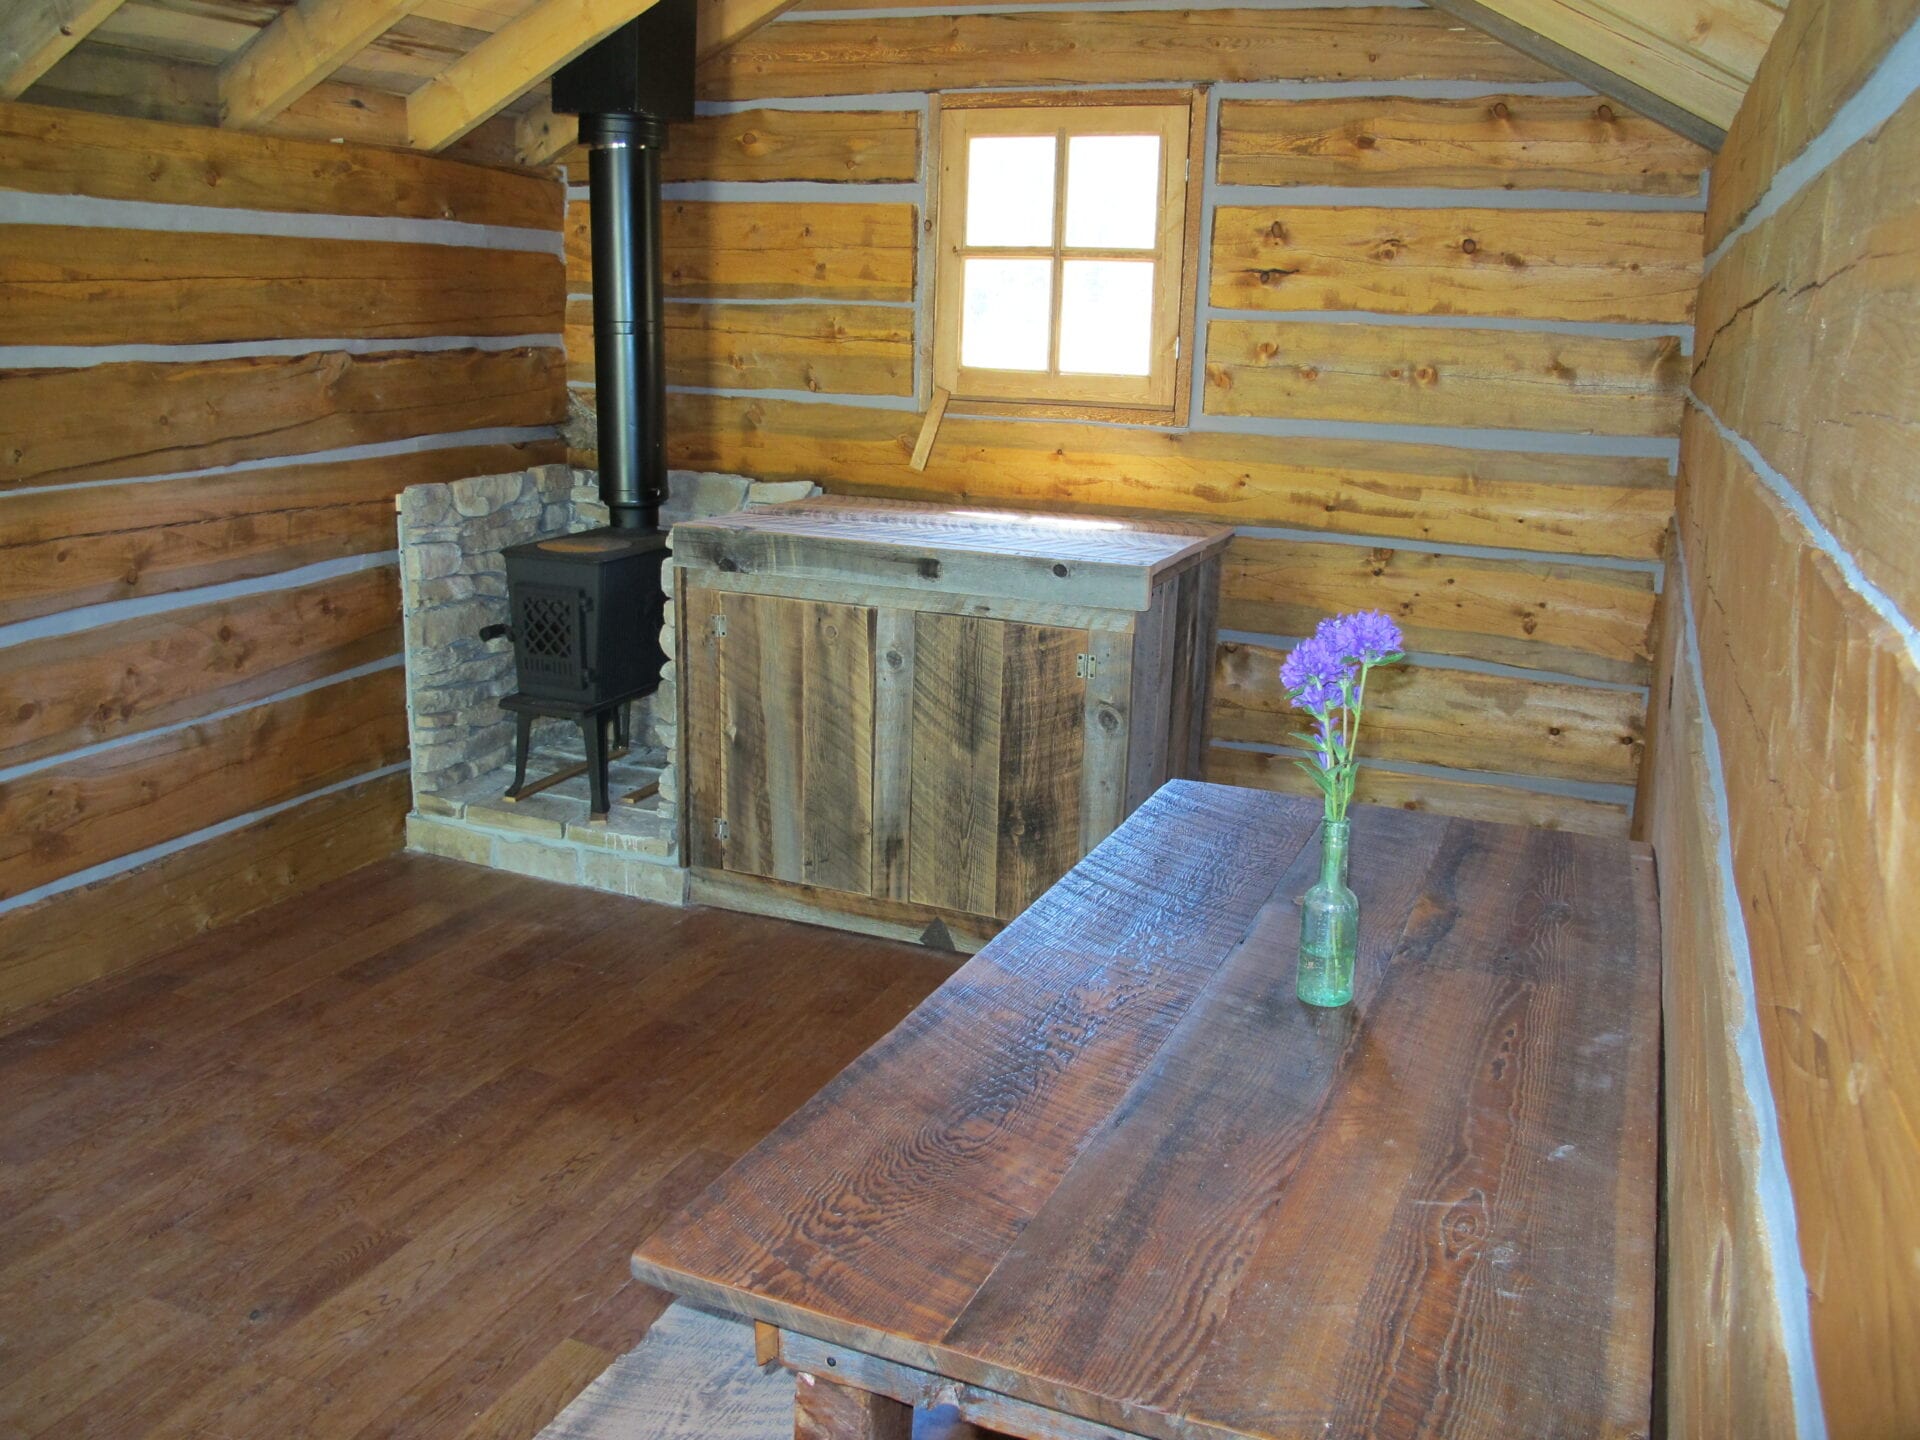
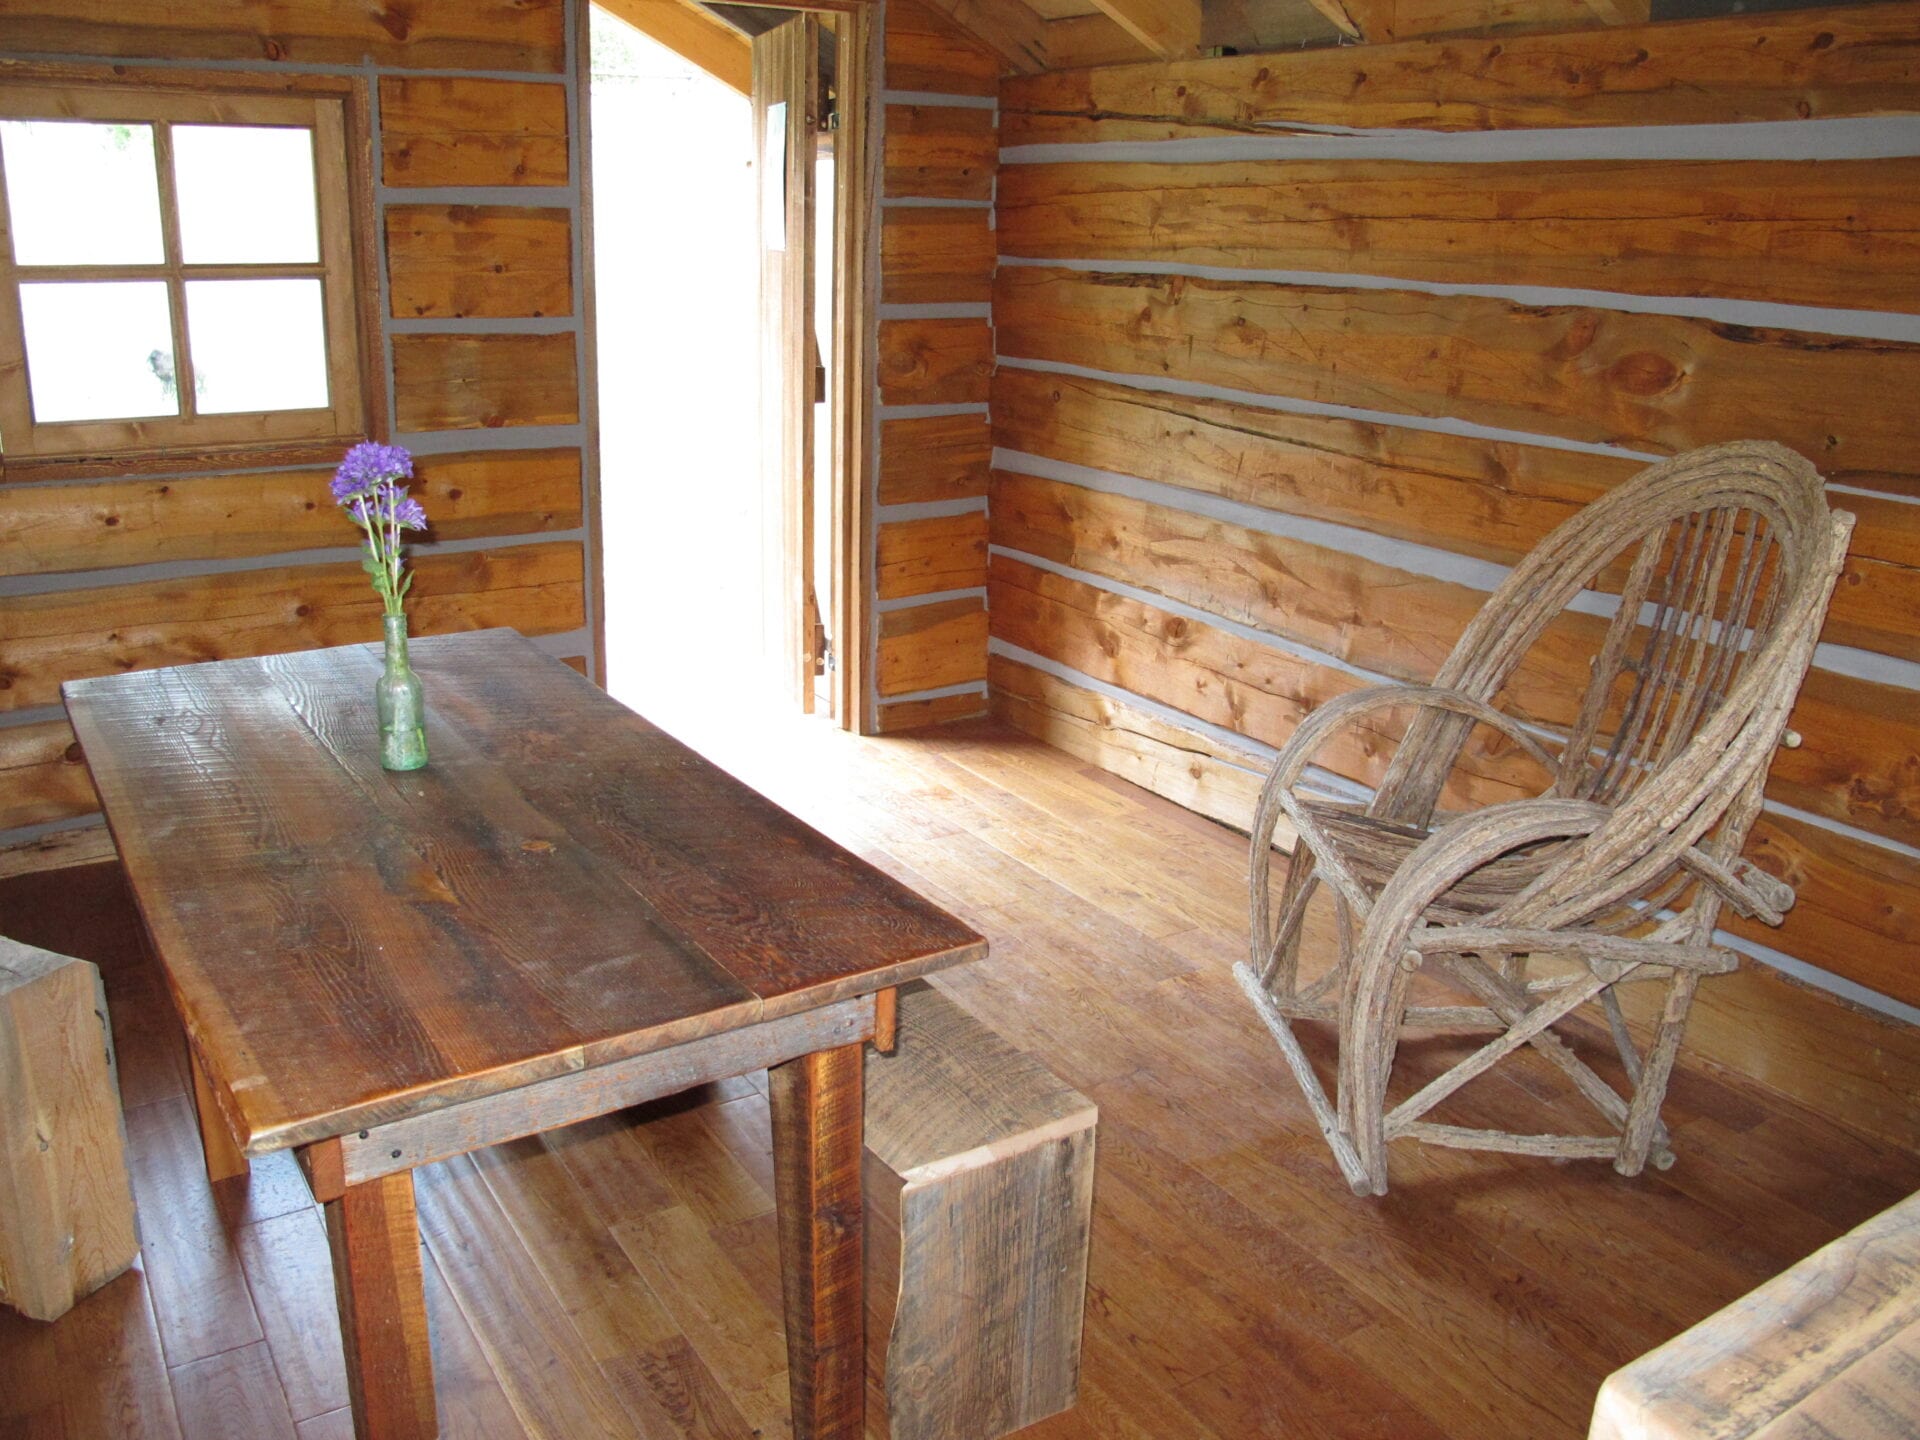
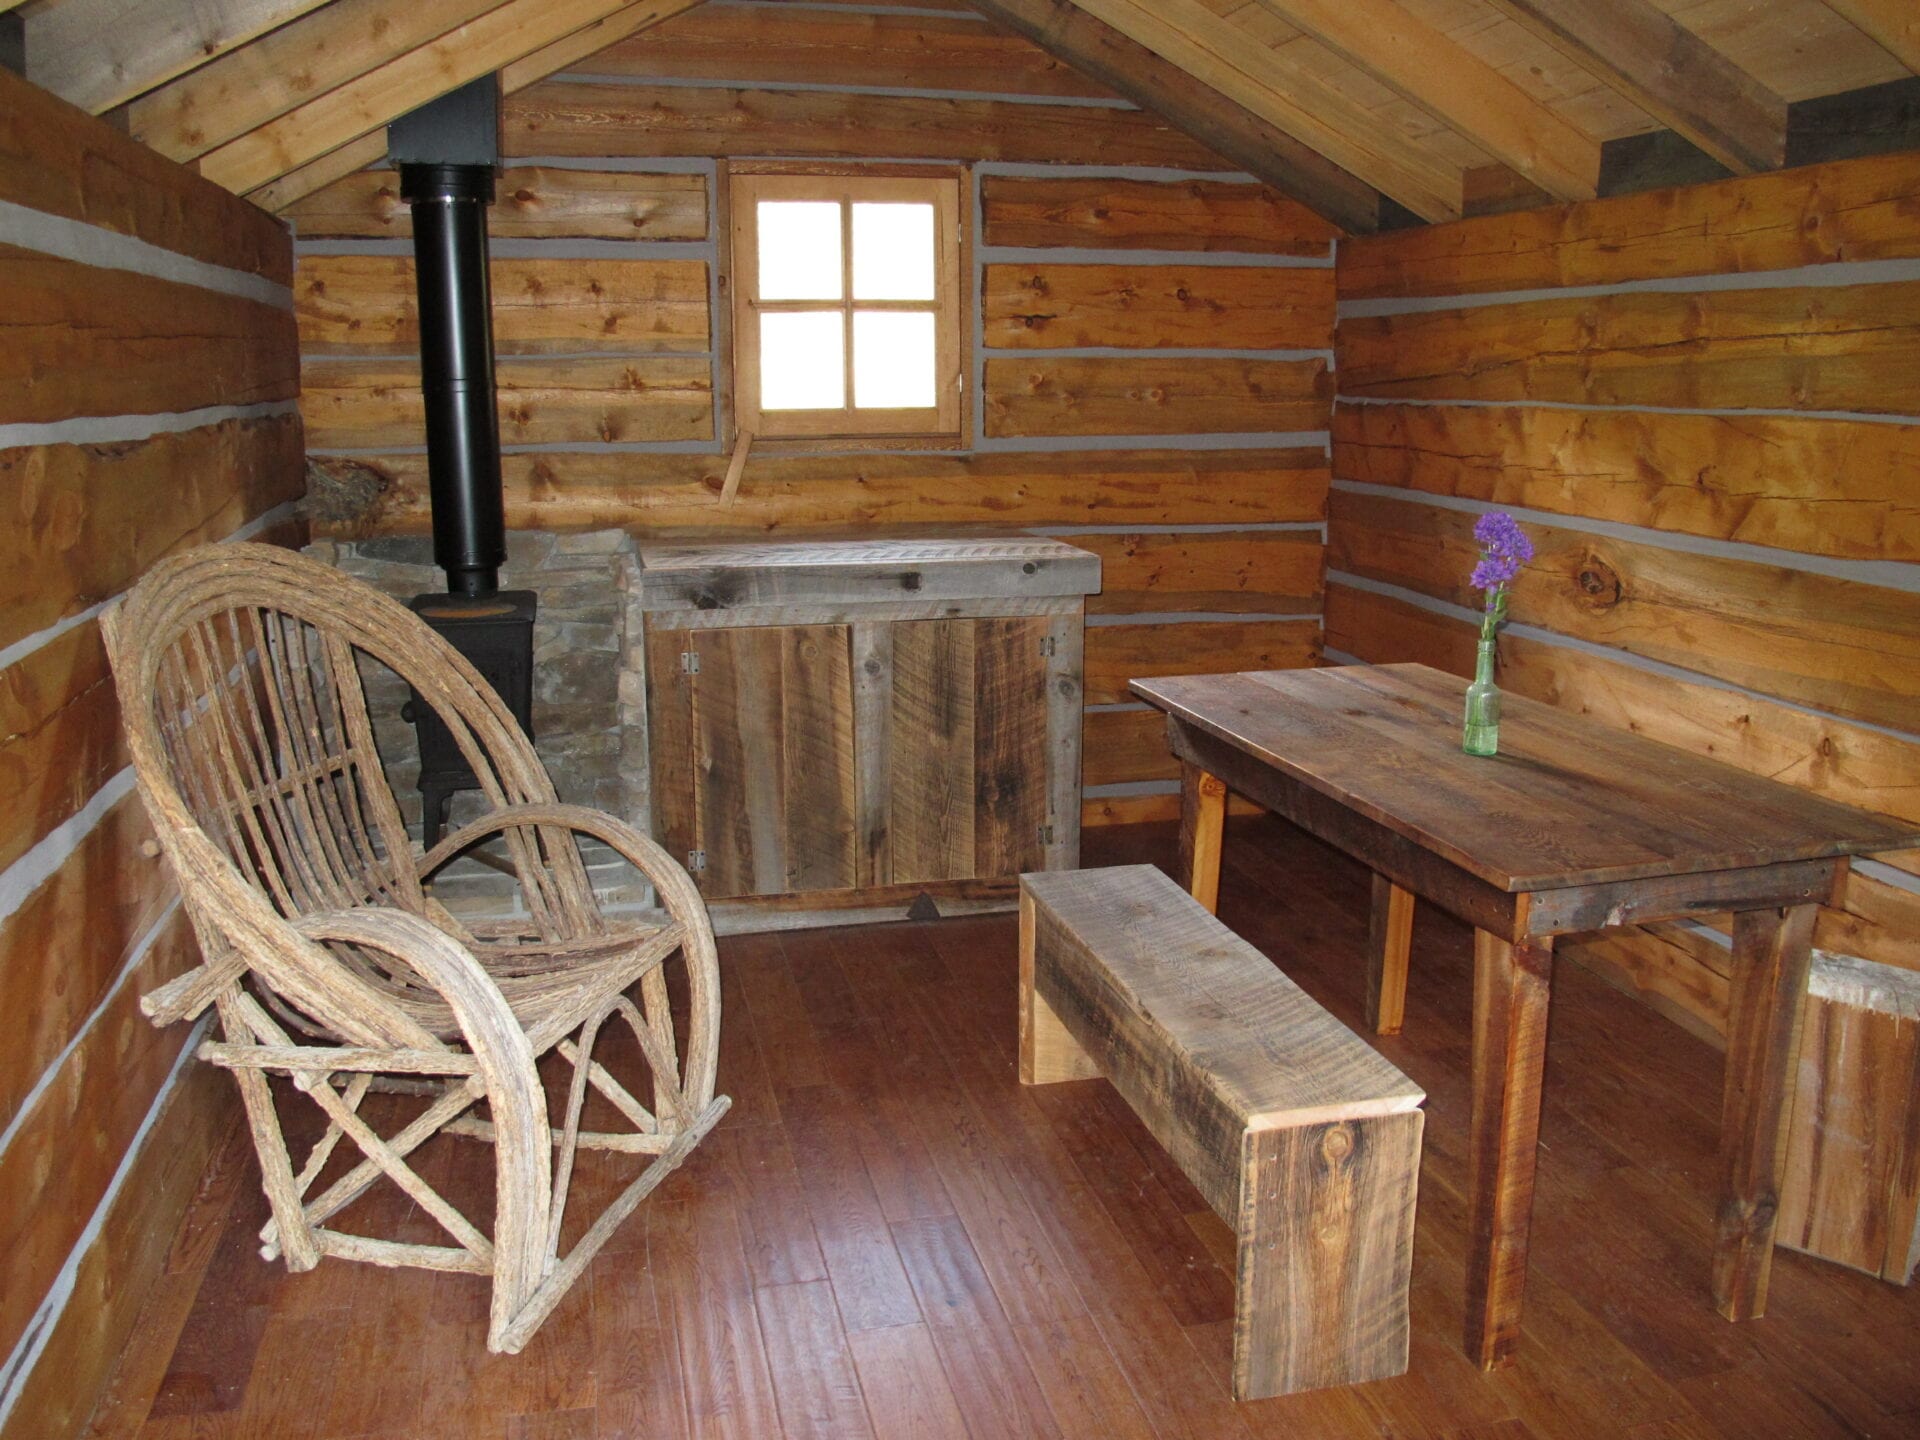
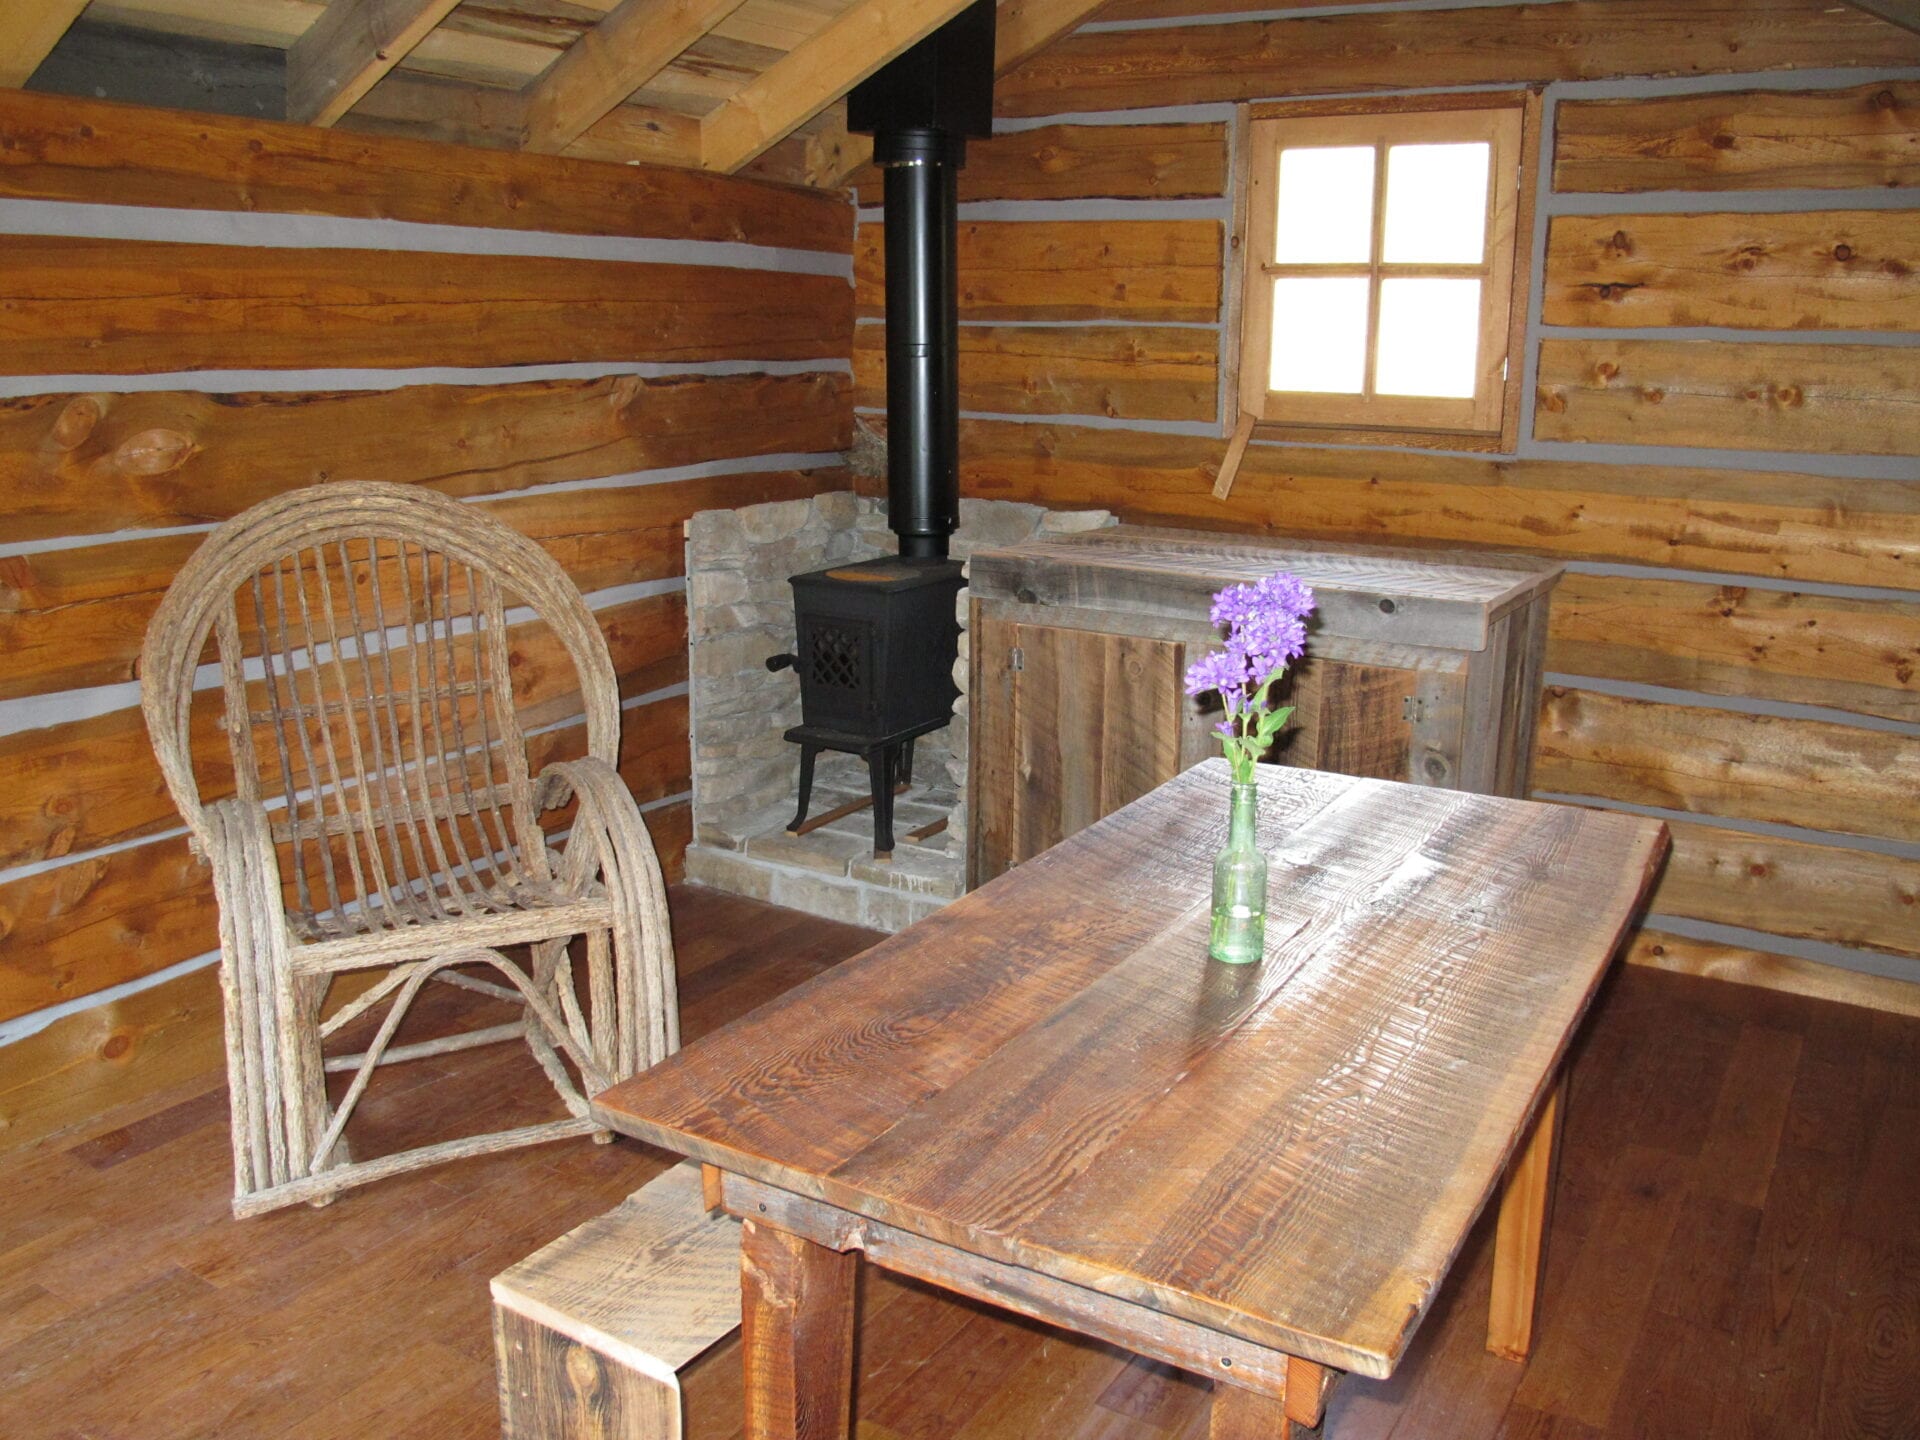
I have been wanting to build a small guest cabin for quite some time. The plan was to build a small, simple inexpensive cabin that could be moved to another location in the future. I settled on an 11 foot by 15 foot cabin. It will be primitive, no running water or electricity is planned.
I have some lodgepole pine logs that are 18' long that I purchased from a logging outfit two years ago. The cost per log worked out to about $20 each. These logs are very dry so that will minimize twisting and shrinking.
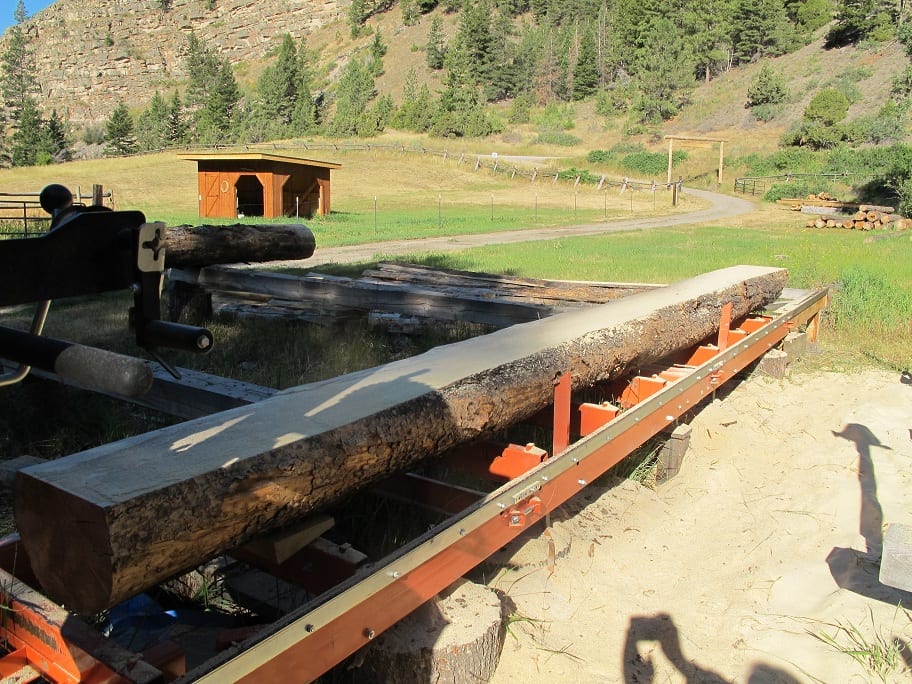
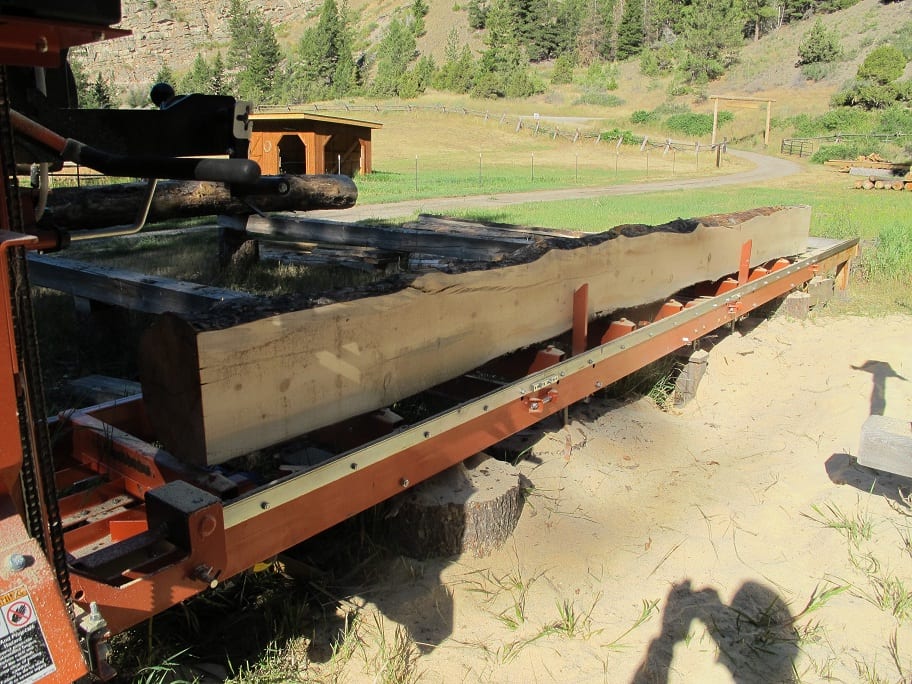
I have a woodmizer LT15 sawmill that I will use to "square" the logs and an old tractor to move them around.
The thickness of the logs (wall thickness) will be 7 inches. I checked the log diameters and most are in the 10-13 inch range at the small end. I could saw all the logs to be the same dimension. If I did that, the height would have to be about 9 inches to work with the smaller diameters. This would work but I really don't want the logs to look identical. With the bandsawmill, it is possible to raise/lower the sawhead while it is being pushed through the log. This way, I can vary the vertical dimension of the log depending on the log size. I will waste less wood this way and will have a more rustic looking cabin. I estimate that after sawing my log height will be up to 10 inches in height. So, I am using jigs that are designed for 7x10 logs and a gap of .25 inches. Where the logs are smaller than 10 inches, there will of course be a larger gap.
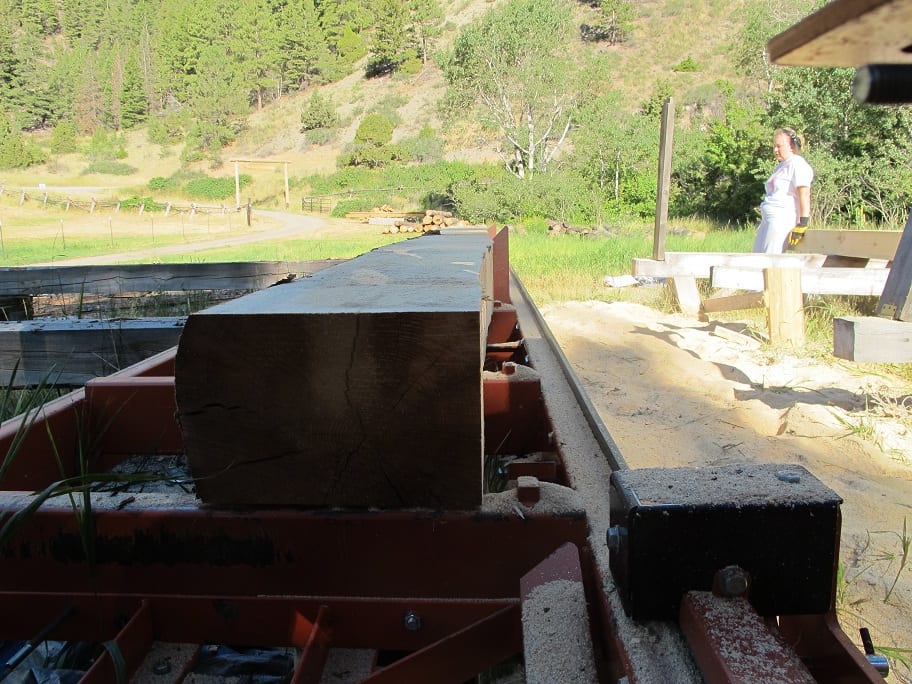
I did have a couple of large logs available so I decided to saw out two 7x12 beams for the bottom two logs. These will act as "skids" and will rest on some foundation stones.
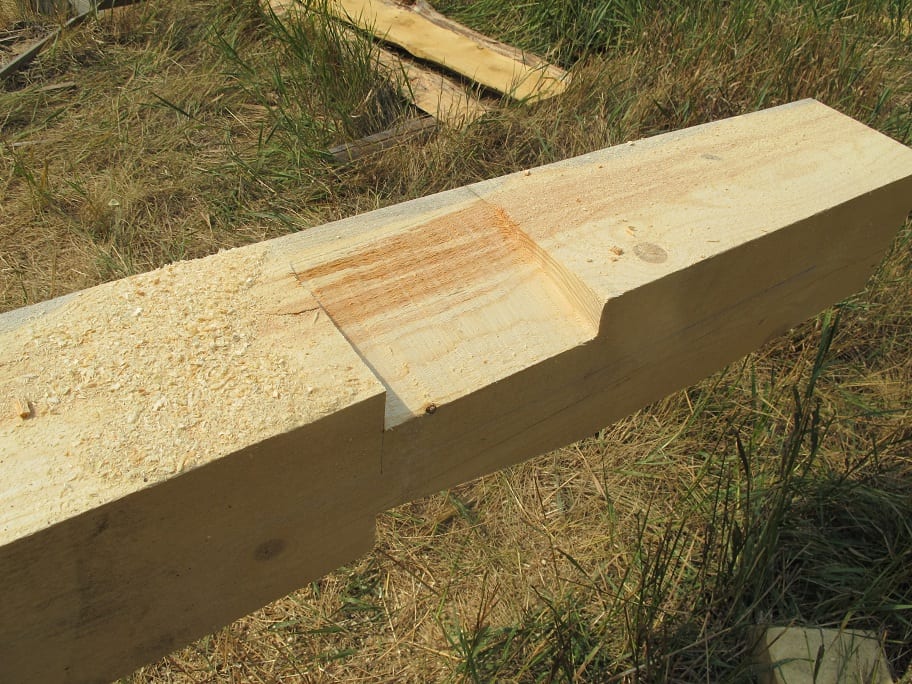
 The skids only need the top half of the dovetail notch. Normally, a chalkline is snapped down the center of the log face. For the 12 inch tall skids, I snapped the line 5 inches down from the top edge. This way, the excess wood will be on the underside of the skid and won't be crowding the log above.
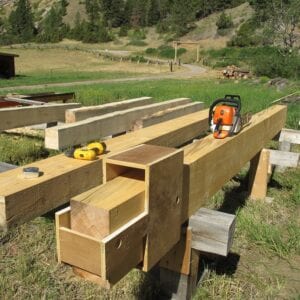 In the picture below, you can see the skids after notching. The tool is a called a peavey and is indispensible for turning logs. There is a similar tool called a cant hook that performs the same function; however, the peavey has the advantage of the sharp point on the end. This probably has several uses but I find it very handy for stabbing the tool in the ground so that it is within arms reach when needed.
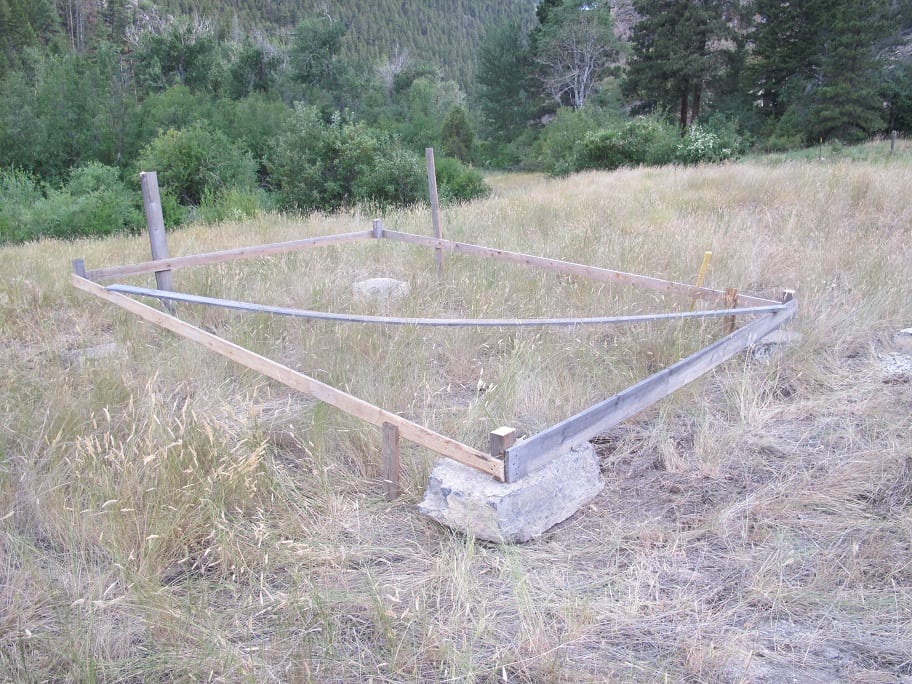
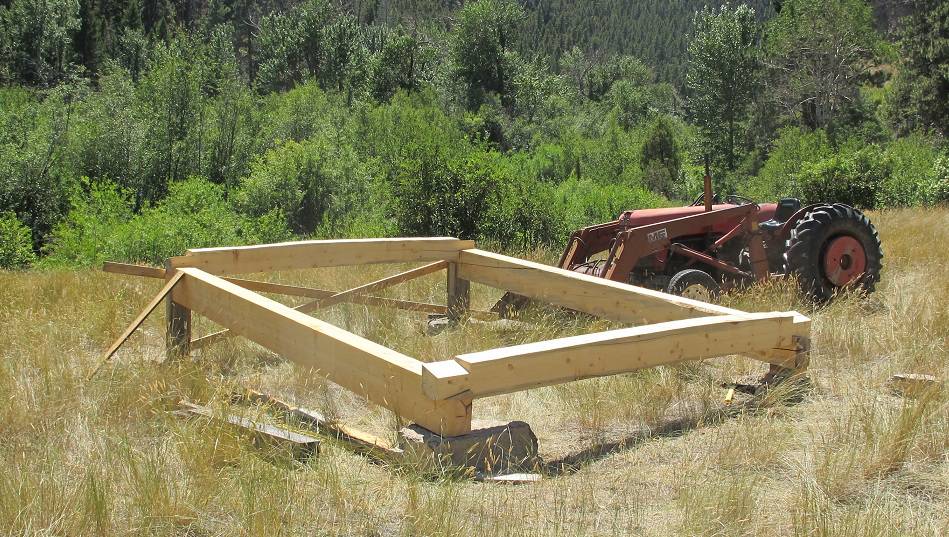
 I wan't sure exactly how I wanted to situate the cabin at the site so I built this simple lightweight frame from 1x4s to be the same size as the cabin. I could then move it around until I was happy with the location. I then used it locate the foundation stones. The stones are just some local rock I found on the roadside and hauled over with tractor (Cost: free!)
I leveled the frame using some scrap boards and then used that as a reference to determine the column lengths. (Only one corner of the cabin will bear directly on a rock, the other three will need short lengths of 7x7 columns).
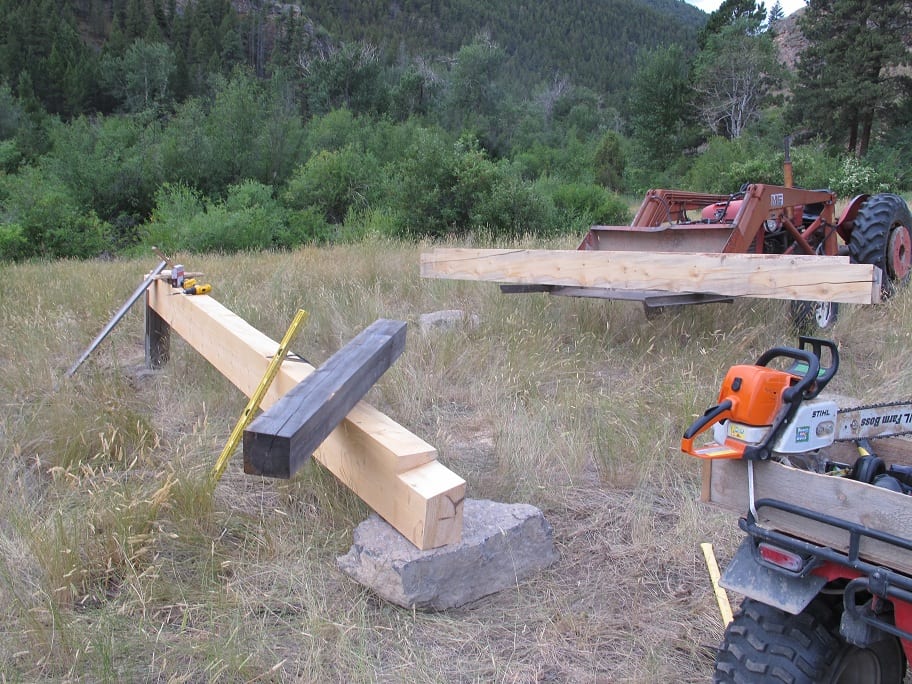
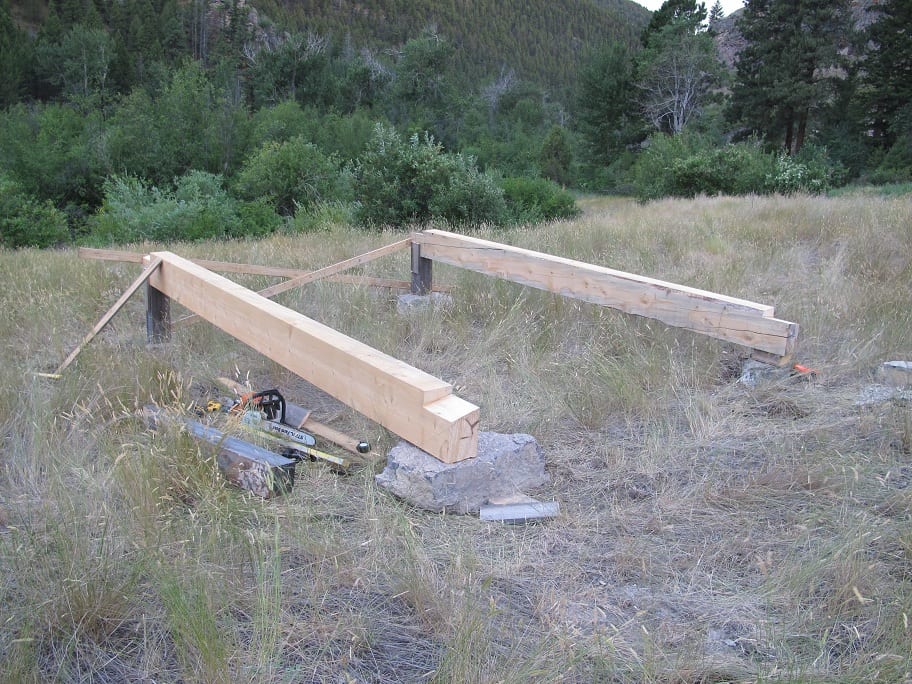
After the skids were placed and braced, I placed the first two 11' logs. Note how these are not uniform in height. I will show the sawing process in a future posting.
Not bad progress for the first day.
11x15 cabin build part 2
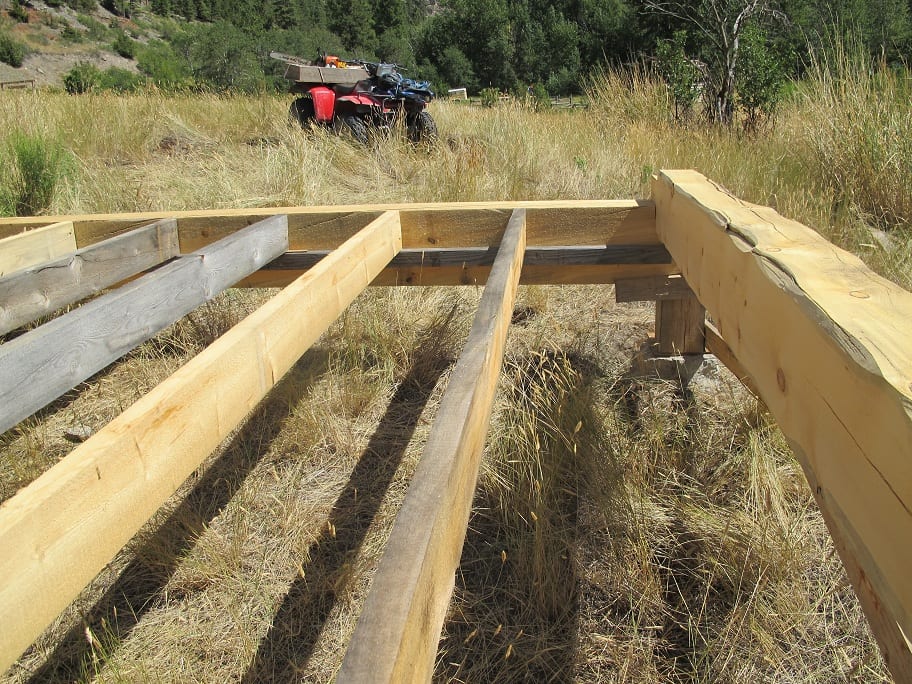
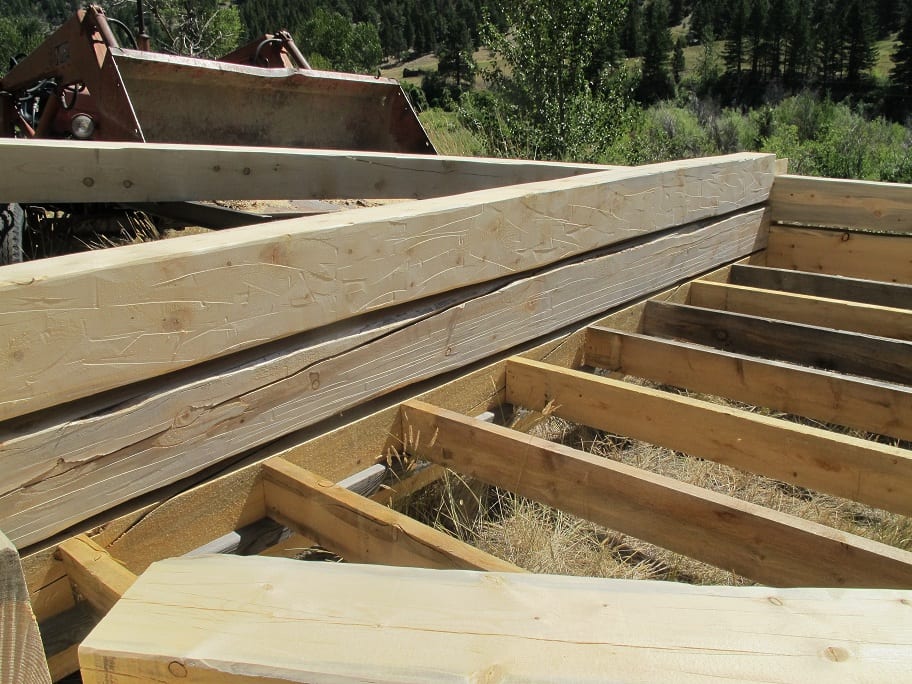
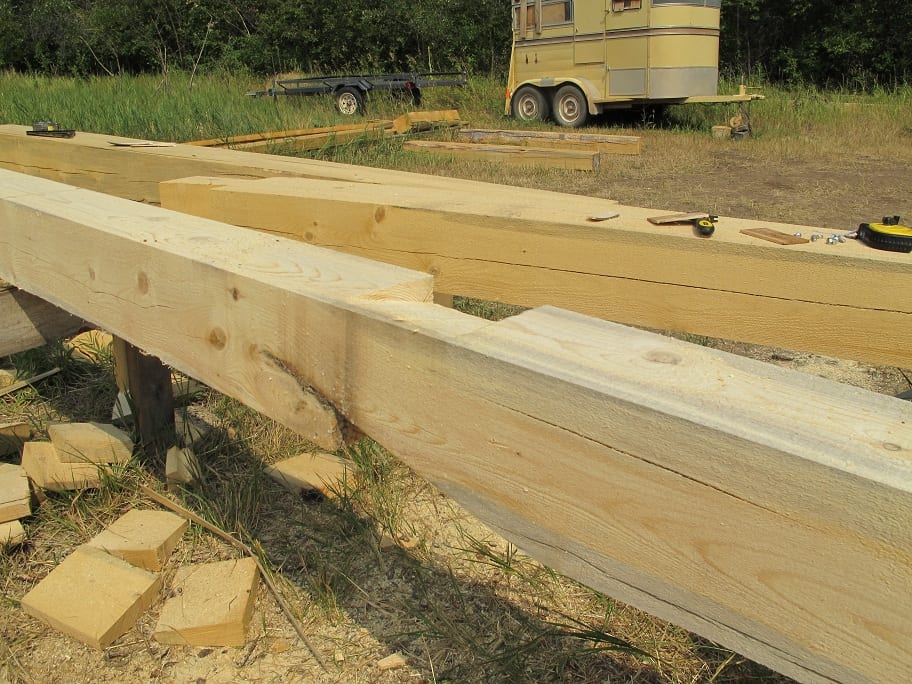
Once all 4 bottom logs were set, the floor joist go in. The two long logs on the sides are sawn to be 7"x10" beams. The tops of the floor joists are flush with the top of these logs.
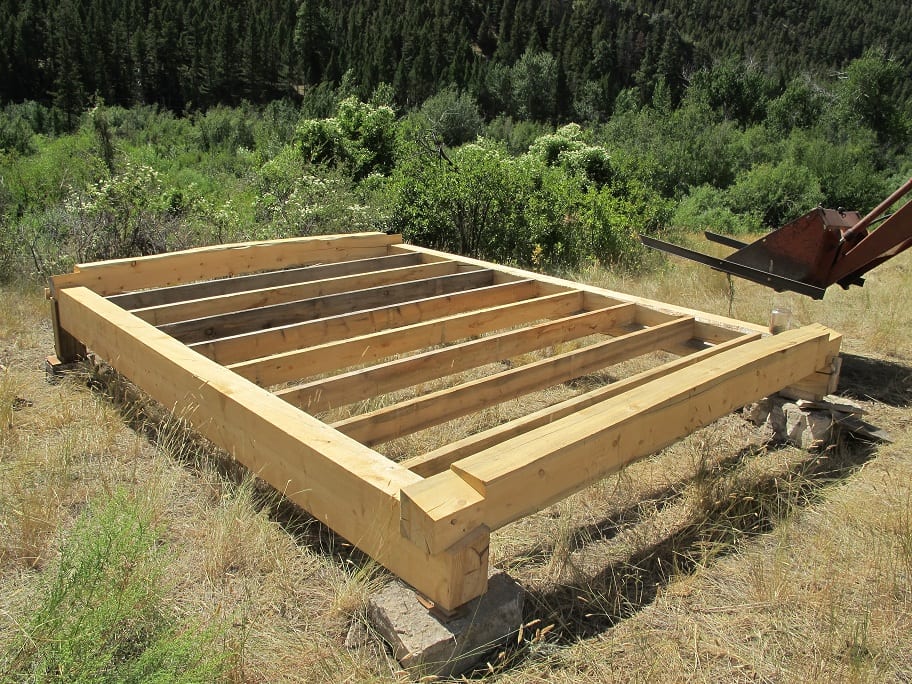
The joists are supported on a 2x4 ledger. Three nails in the ledger under each joist and three nails toenail the joist into the beam.
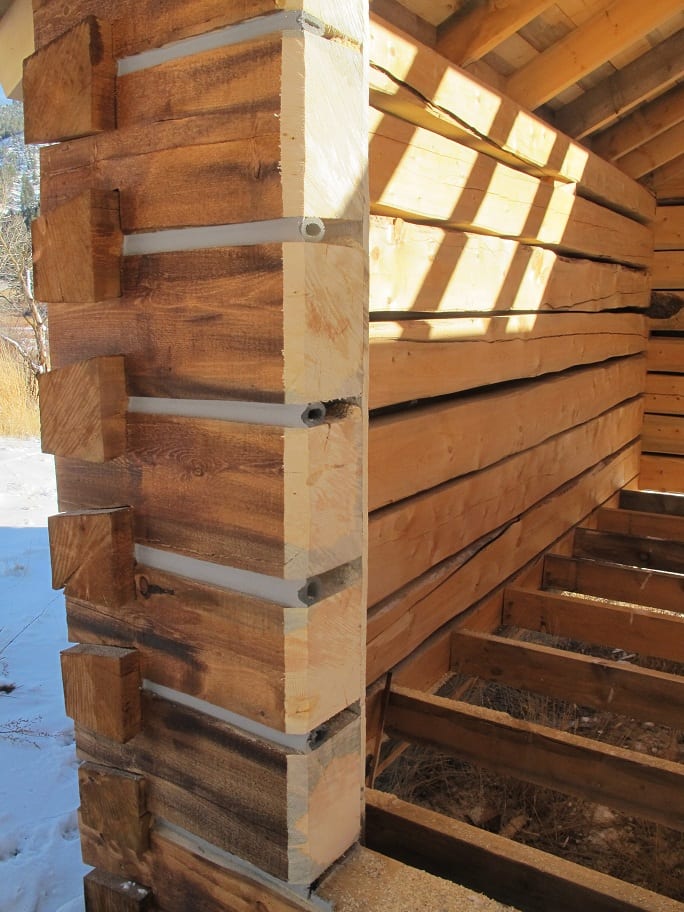
Since I wanted a rustic look for the cabin, I did not want all the logs to be uniform dimension. All of the logs are 7" thick but the vertical dimension varies. I used the sawmill to cut all 4 sides. Another option would have been to just cut two sides and leave the other two round.
Here is the way the logs were sawn for this cabin:
The first cut opens up one flat face of the log.
The log is then turned 90 degrees on the sawmill
As I make this second pass, I am slowly raising and lowering the sawhead at random.
The log is then rolled 90 degrees again and the second flat cut is made. In the photo above you can see the two flat faces and the one wavy side. The 4th cut is also a wavy cut.
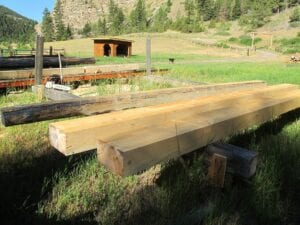
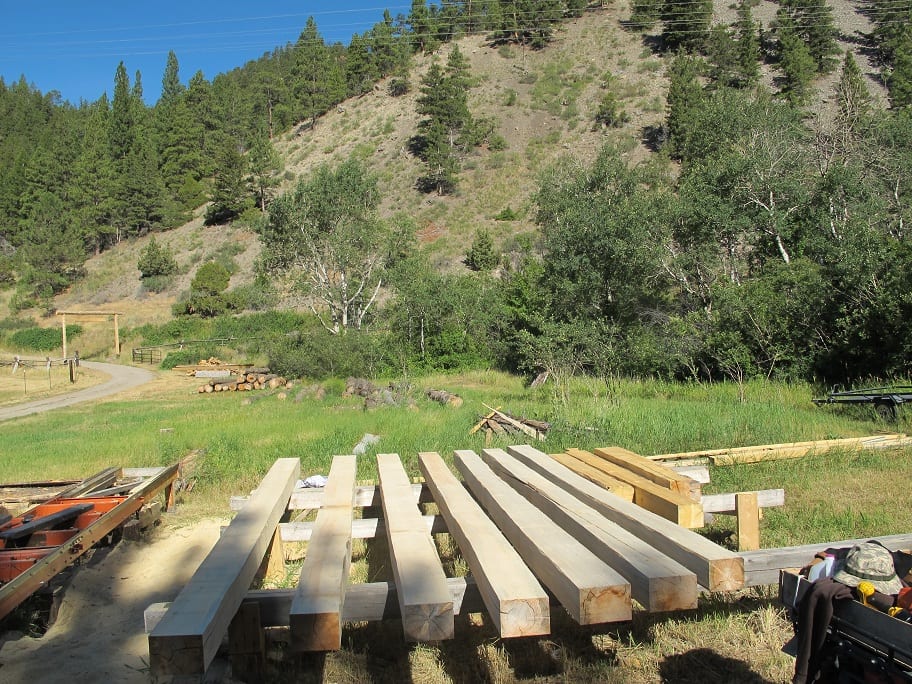
Below are a few logs sawn and ready for notching.

After the logs were notched, I used a small hand held electric planer to plane the inside faces. I used kind of a gouging technique for a rustic look. It will be easier to dust the inside of the cabin logs since they are mostly smooth.
11x15 cabin build part 3
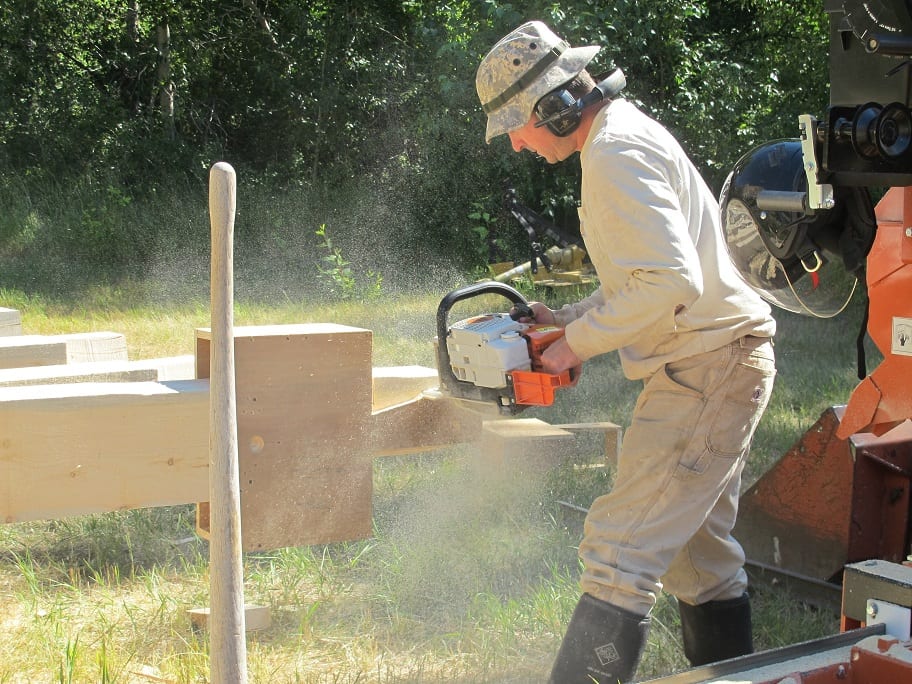
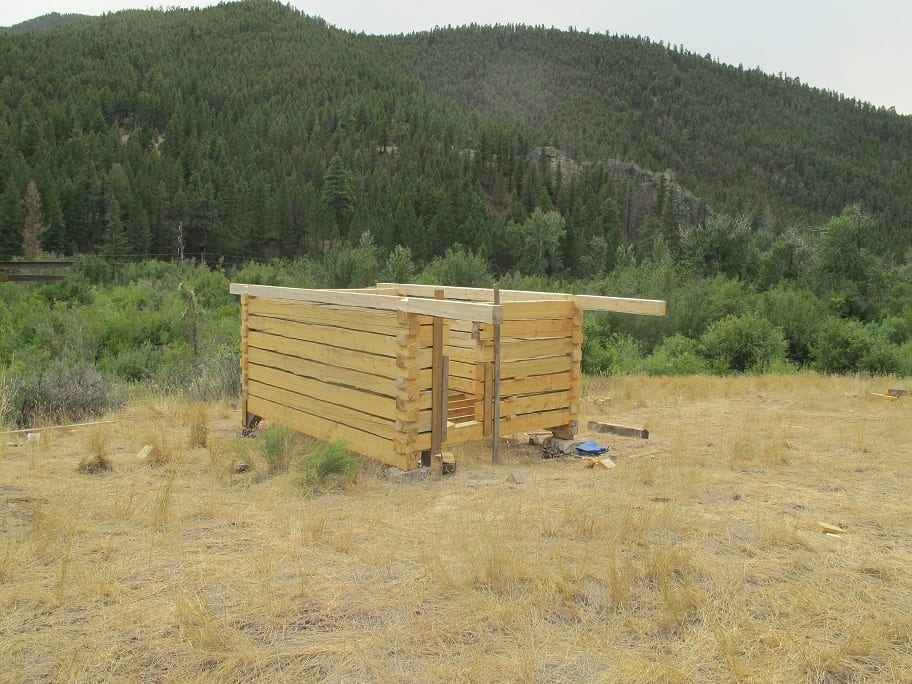
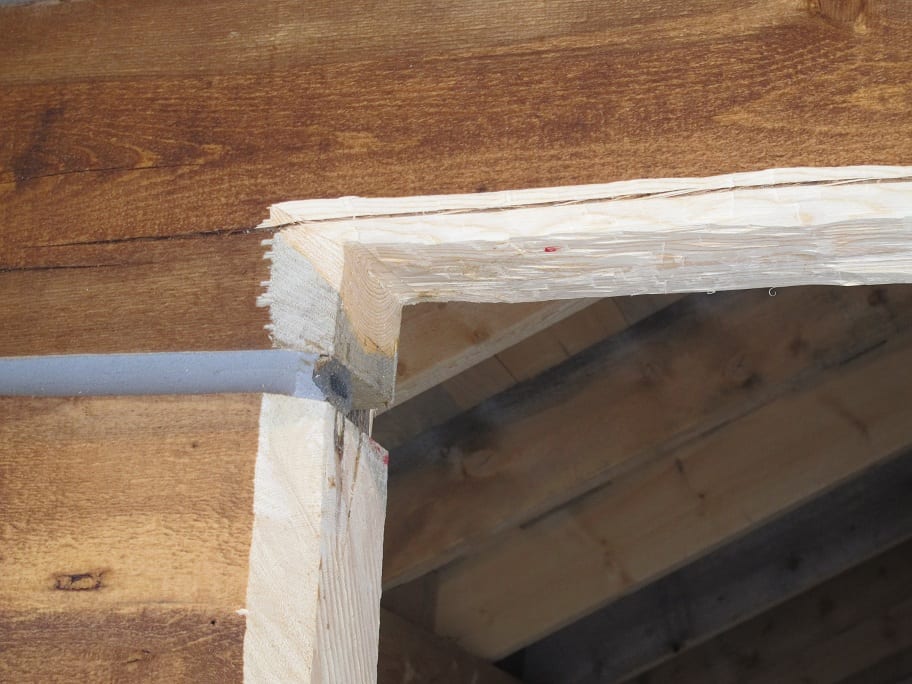
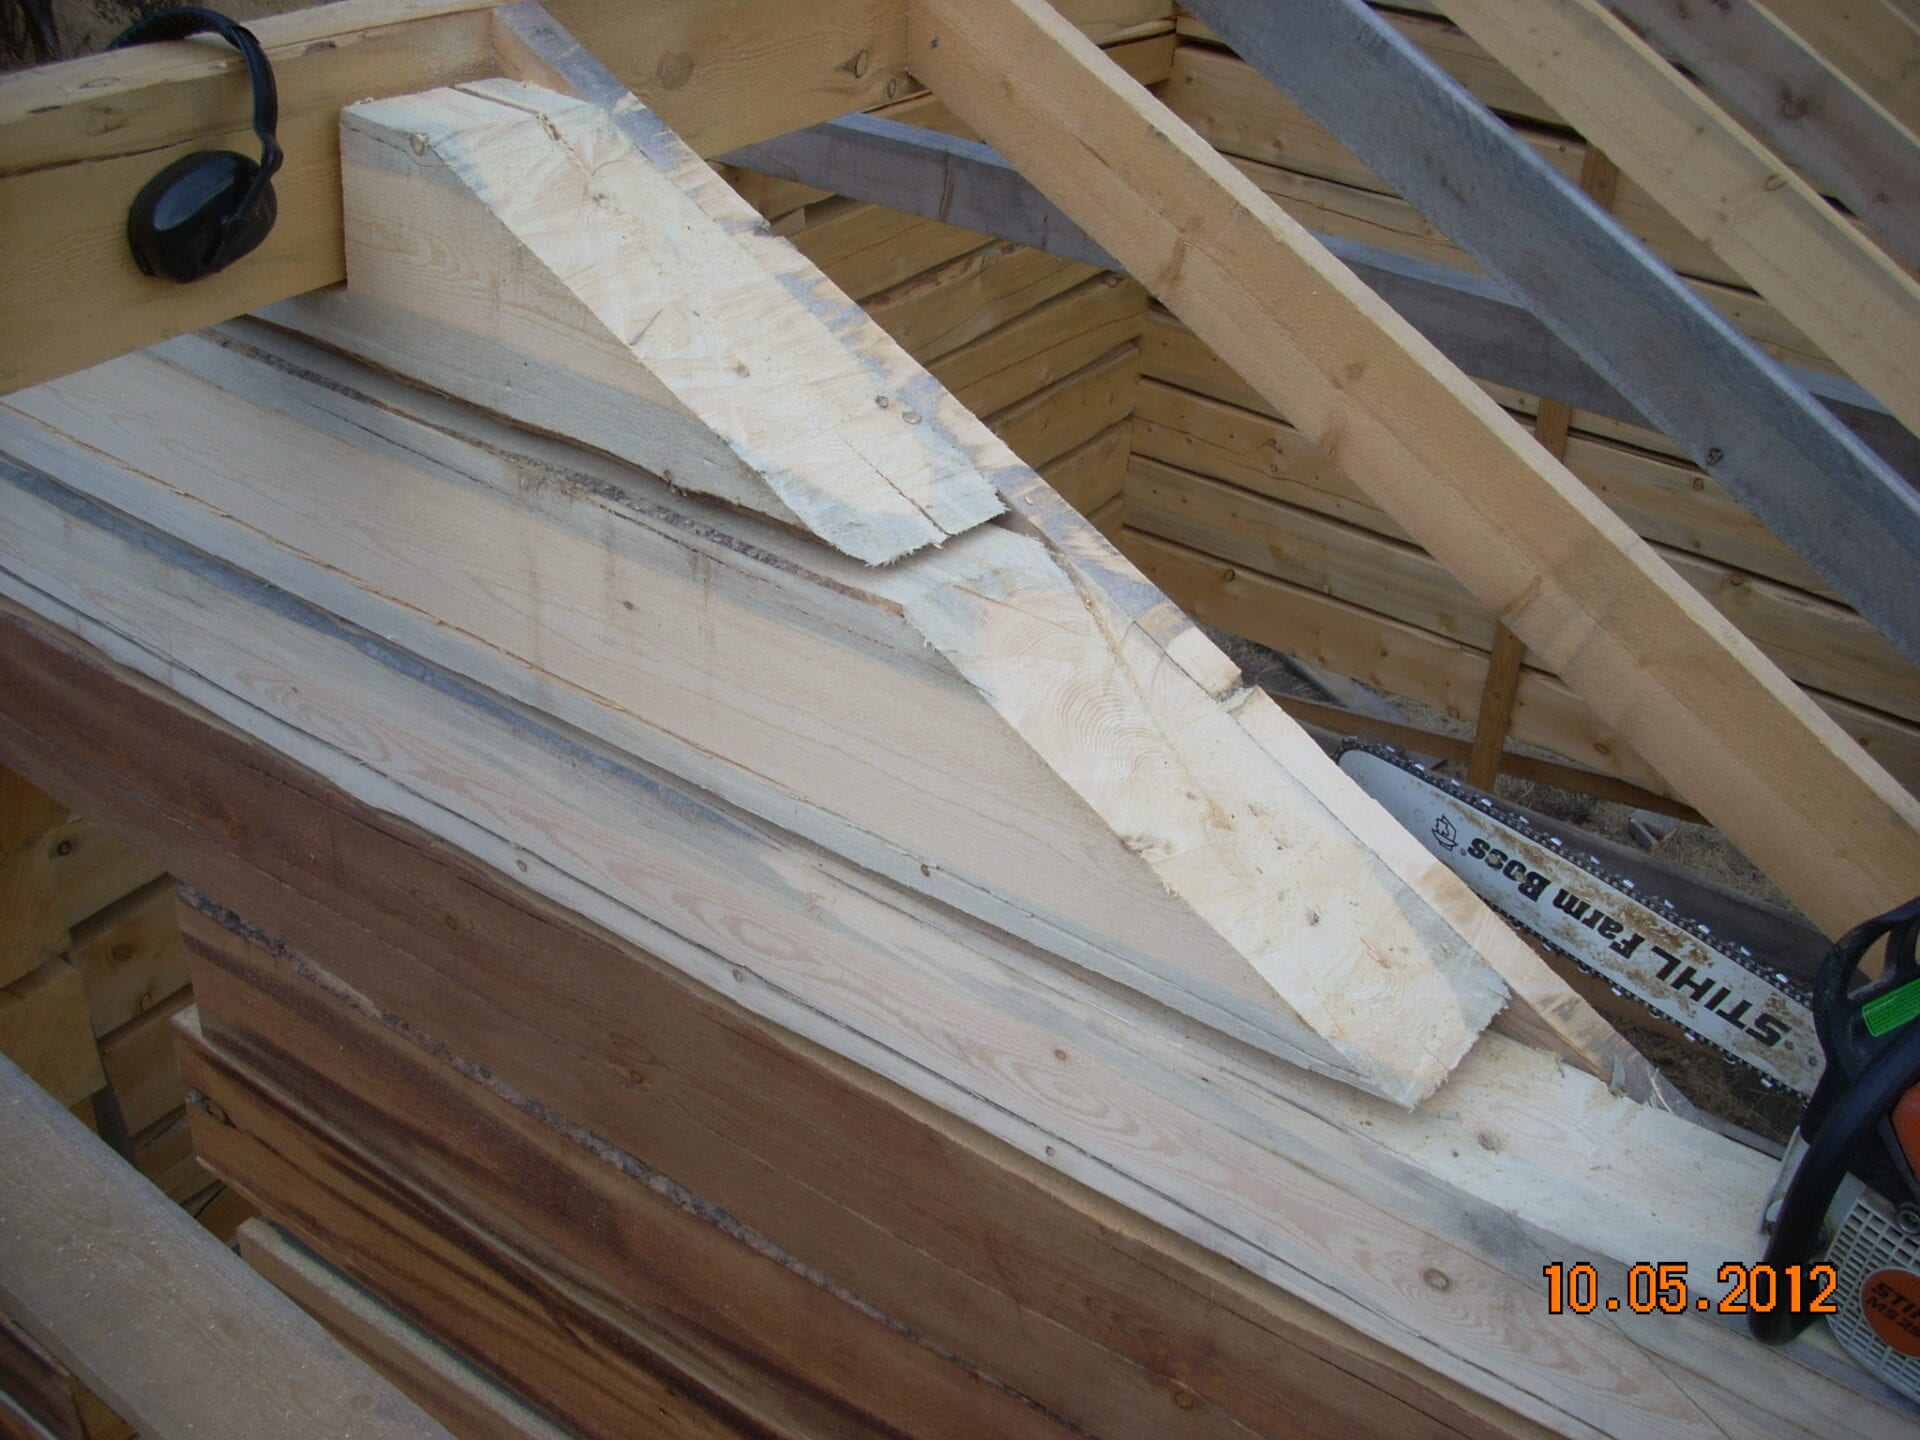
Two logs are 22' feet long. These will extend beyond the front wall about 6 feet for a small porch and beyond the back wall by about 1 foot. The rafters will go on these logs. The notches for these longer logs are not near the end. To make the notches, the plywood end block is removed from the jig which allows it to slide down the log to the proper location. The jigs have to be fastened at the same spacing as was used for all of the 15' logs cut previously.
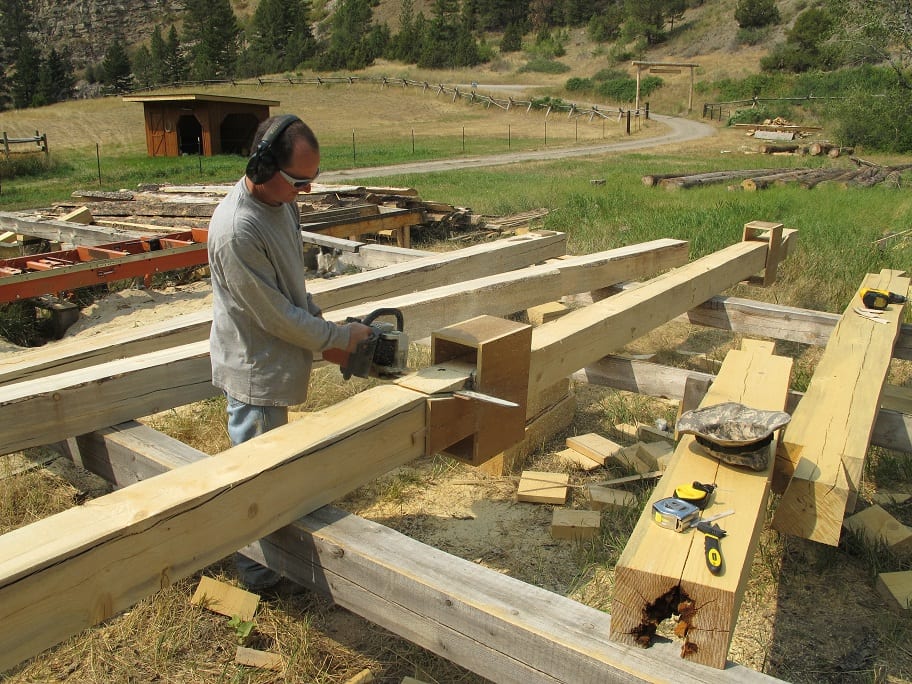
The photo above shows me cutting the underside notch. Nothing different here- this is the same way the other notches were cut.
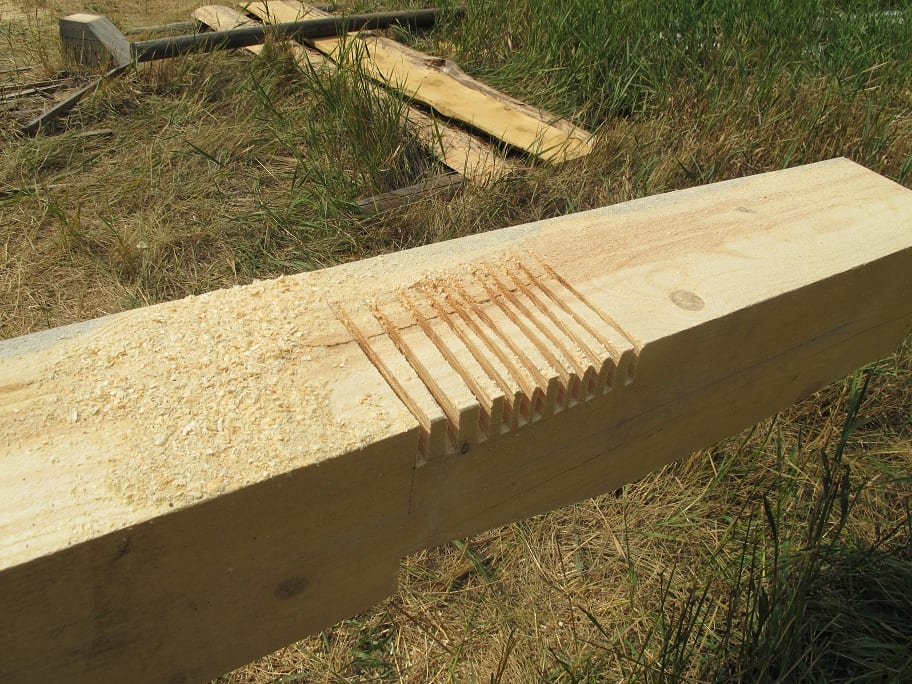
However, for the upper notch, the saw can not enter the log from the end so it is necessary to make multiple cuts perpendicular to the notch surface. The cuts shown above were made with the jig in place. The jig provided a "stop" to keep from cutting too deep.
Some chisel work and the notch is finished.
As luck would have it, this notch happened to be right where a knot was. This is a weak area anyway so I will have to be careful when working on the porch roof to make sure this log is well supported.
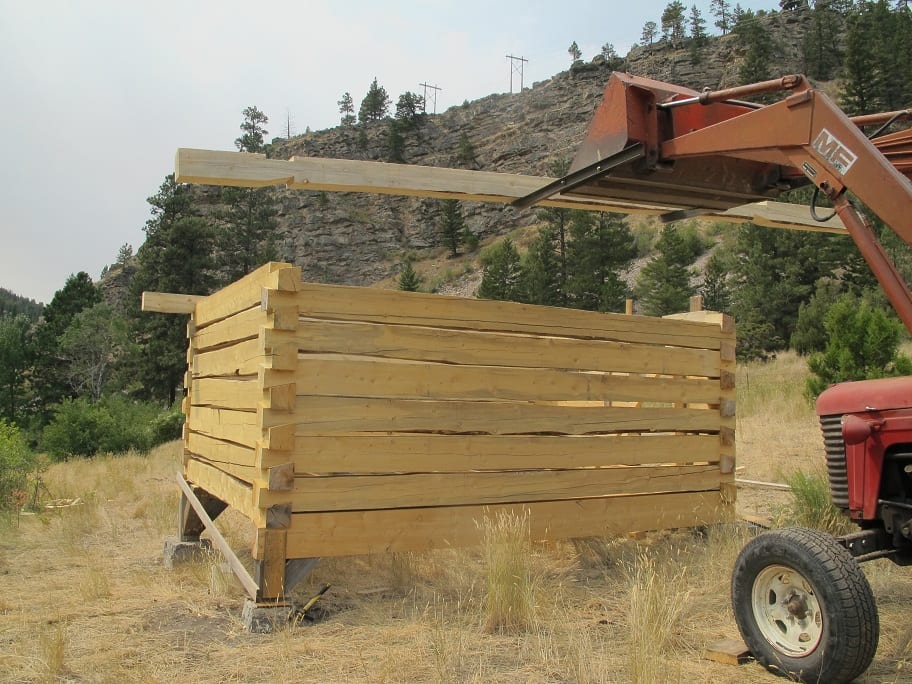
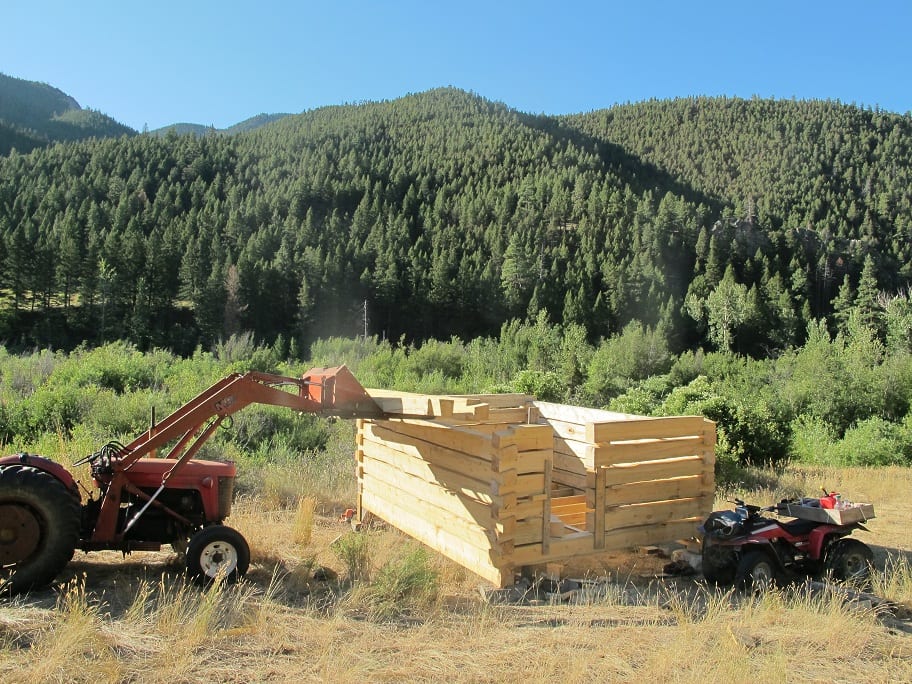
The tractor makes quick work of setting these logs.
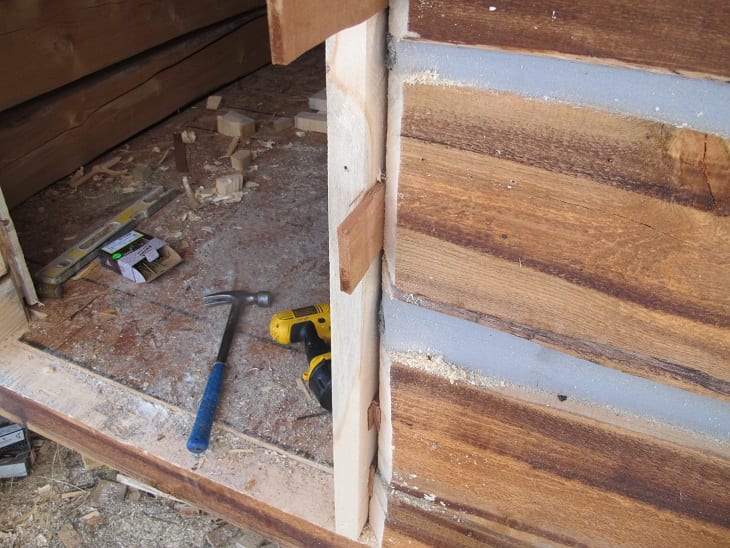
Notice that I did use short logs on the front wall to form a small opening. This allowed me to use some shorter logs I had leftover as well as giving access to the inside. Later, I will enlarge this opening for the door and cut openings for windows.
11x15 cabin build part 4
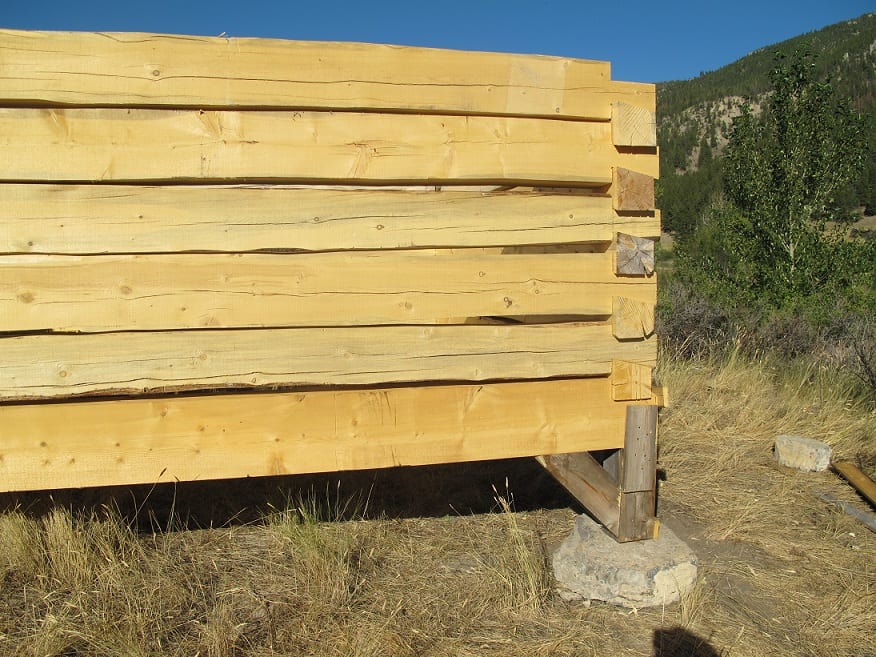
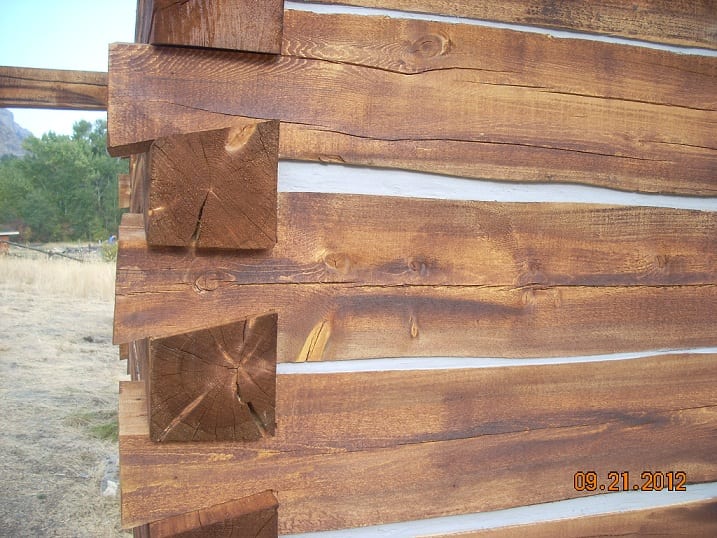
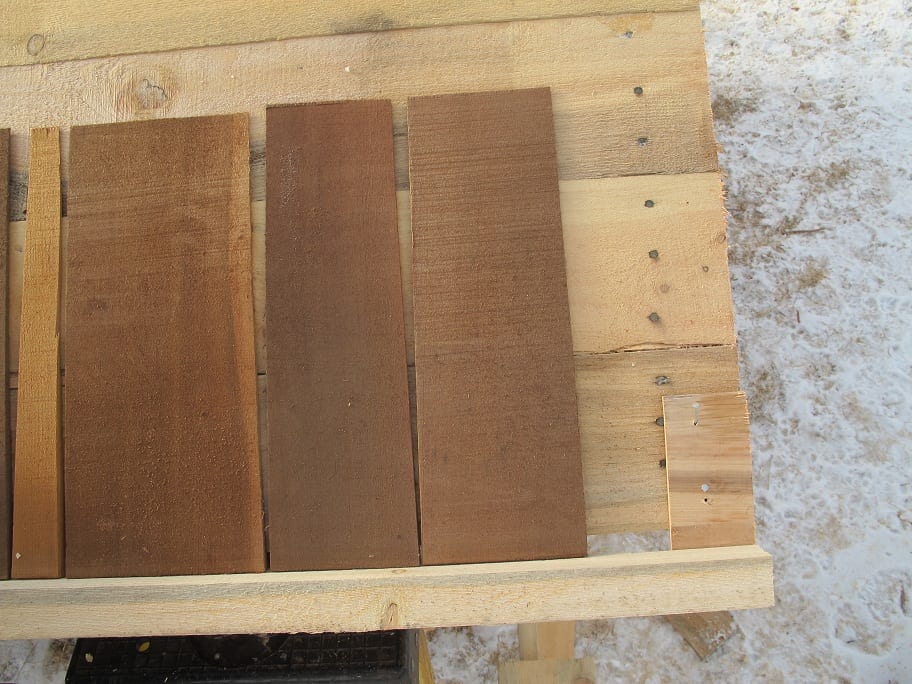
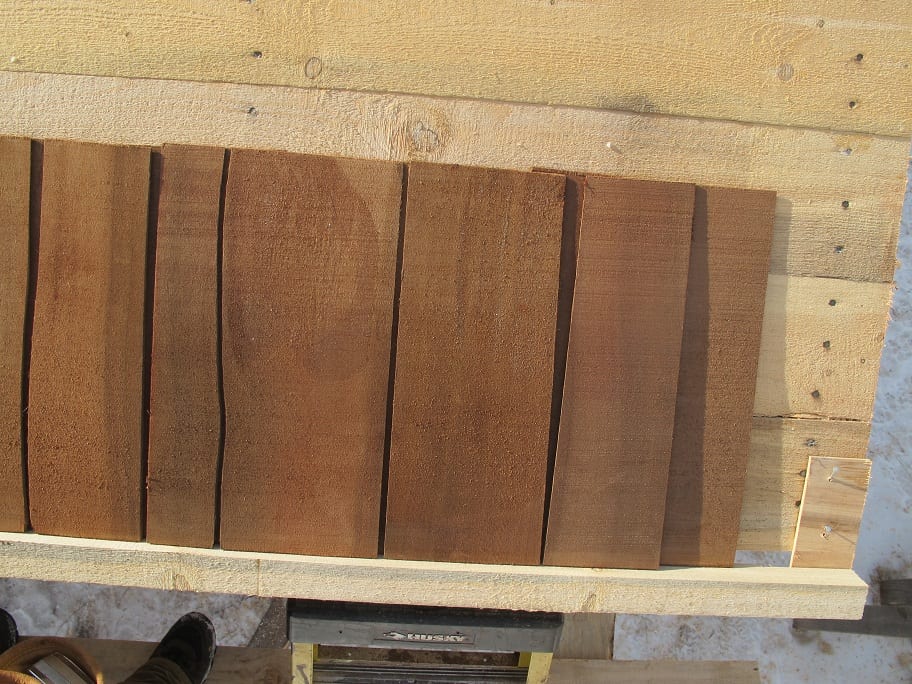
As you can see, the pine logs have a yellow color. Over time this could weather to a lighter gray color but I wanted the cabin to be a darker color and have the look of an old cabin.
I chose this stain from Home Depot. The instructions say to mix it thoroughly. I found that if you do not mix it at all, the color when the can is full will be fairly light and then when you get to the bottom of the can, the color will be much darker since the pigment has settled there.

The next three photos show the sequence I used to get the "old log look" that I was after.
The first coat is rolled on using stain from a full unmixed can of stain. If the can has been sitting for a long time, most of the pigment will be combined into almost a paste at the bottom of the can so it isn't really disturbed when the stain is poured into a roller pan. I used standard paint rollers to apply this first coat.
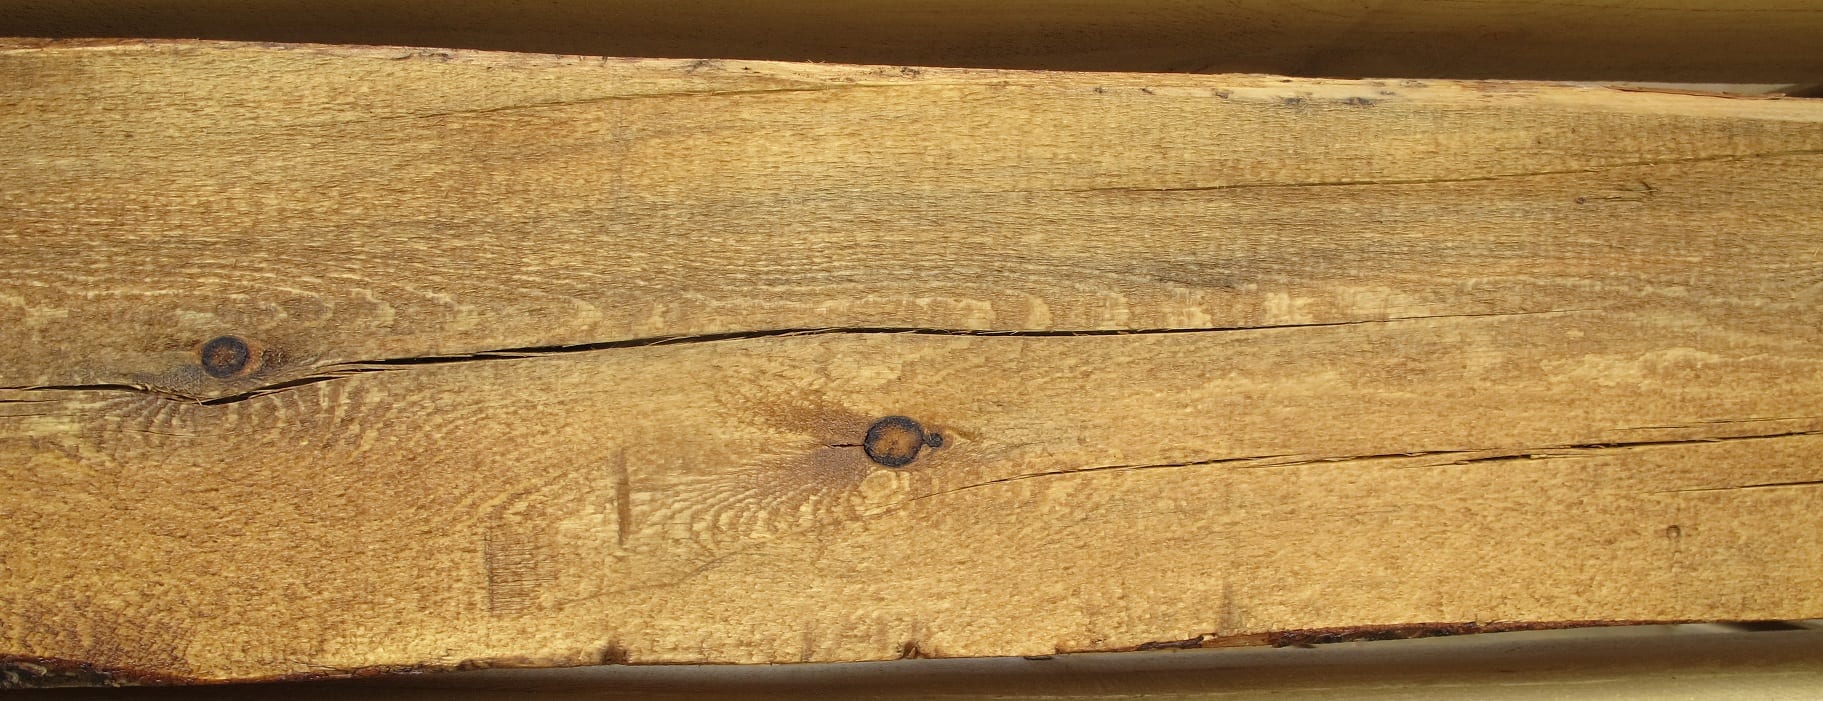
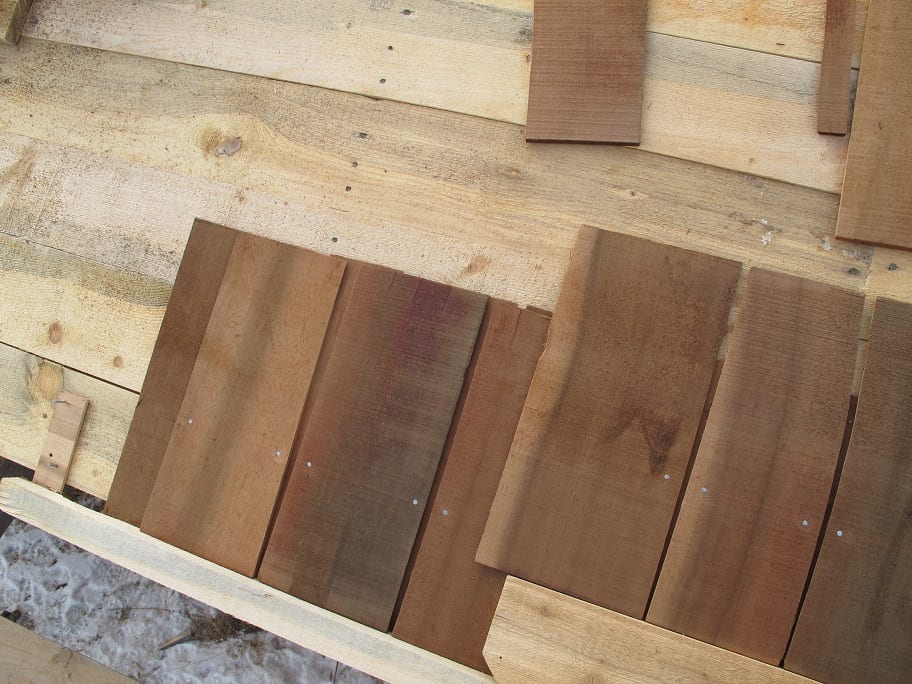
When the can was nearly empty, I used a paint brush dipped in the heavy pigment and randomly brushed on some streaks. No need to wait for the first coat to dry although it doesn't hurt to.
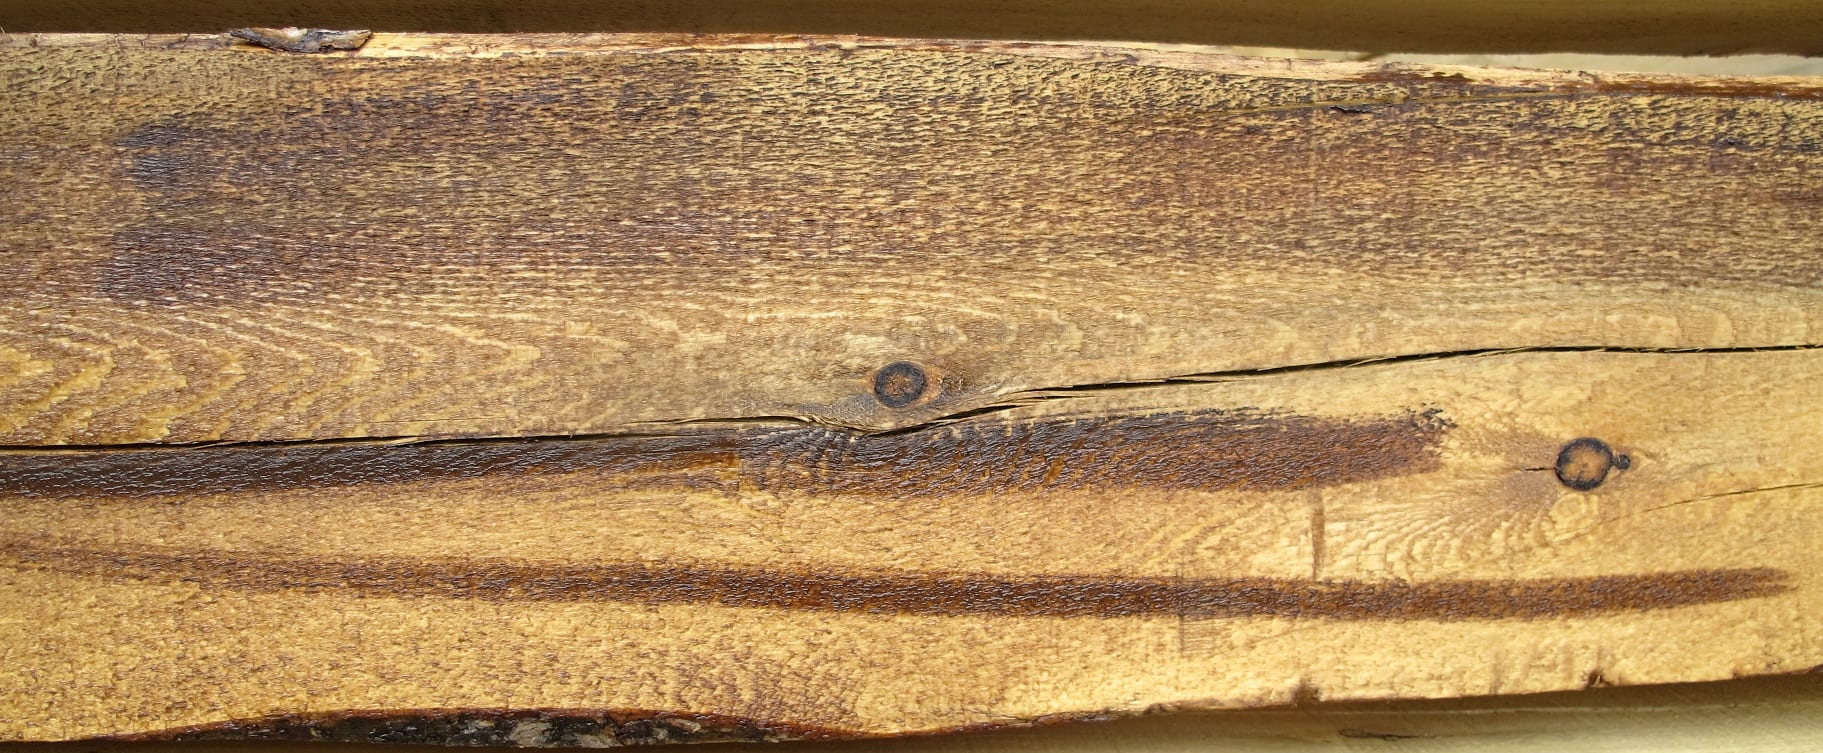
I then used the same brush to soften the streaks. The key is to maintain contrast. If it is over done, the logs will look too uniform.
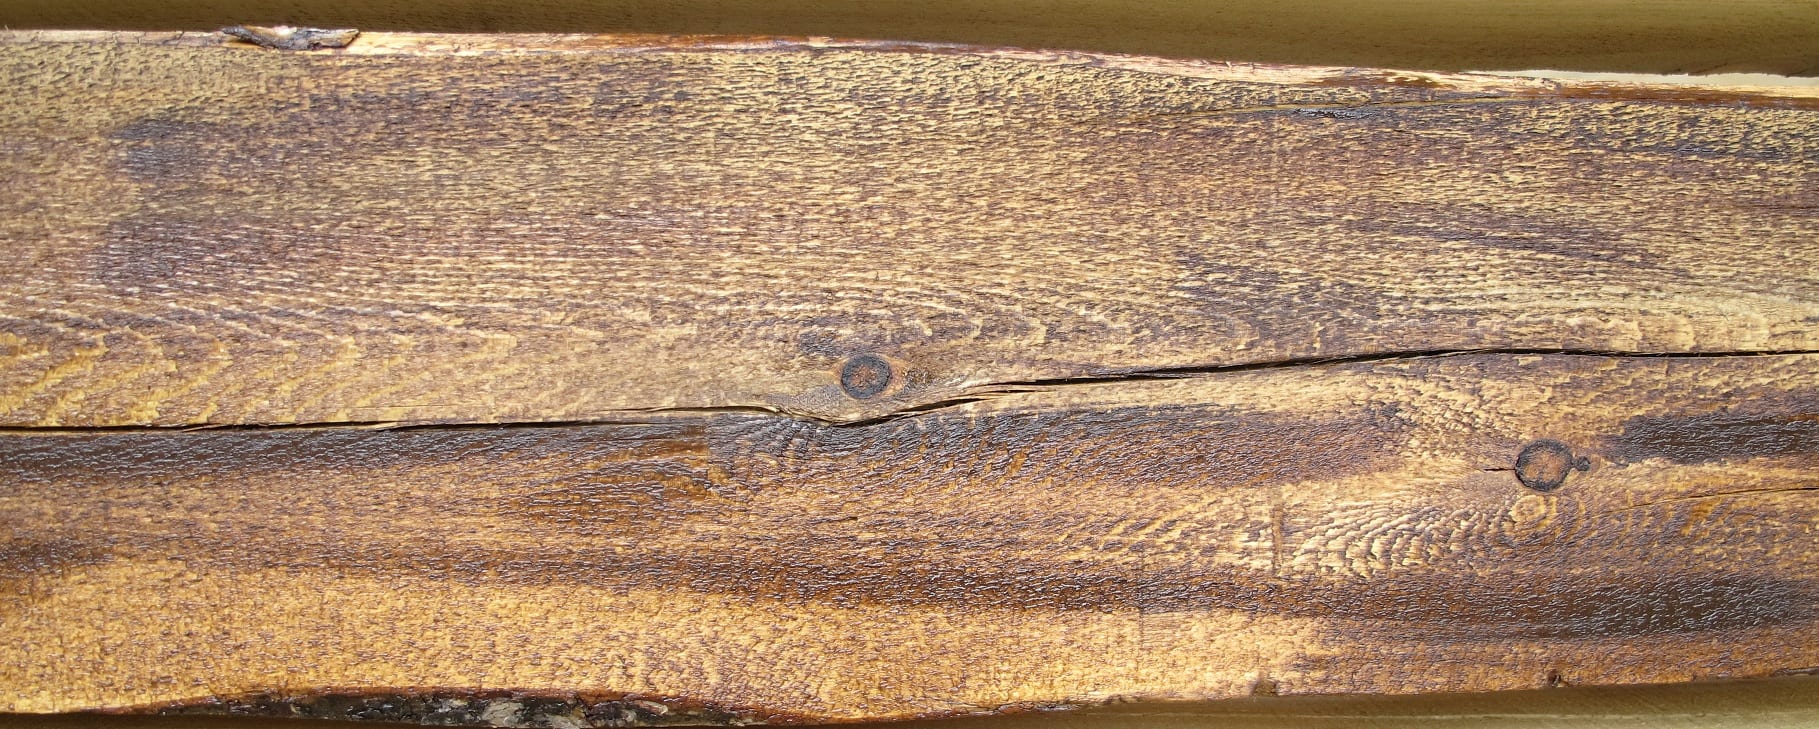
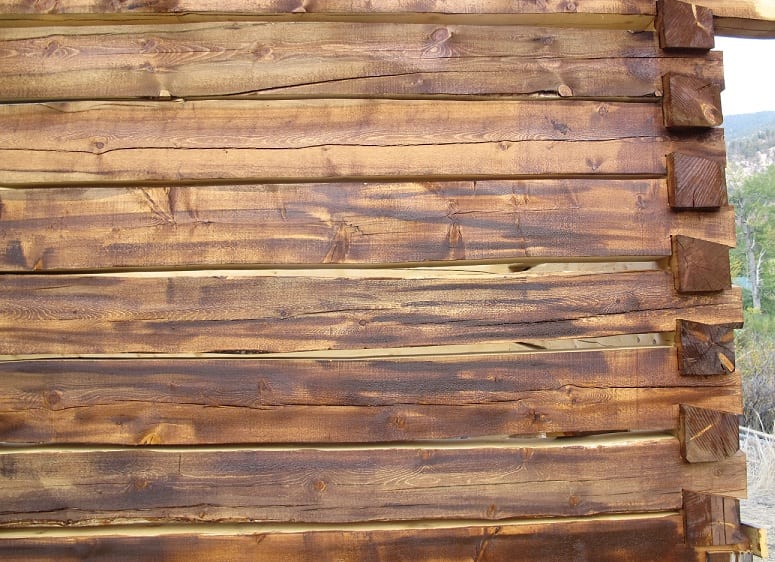
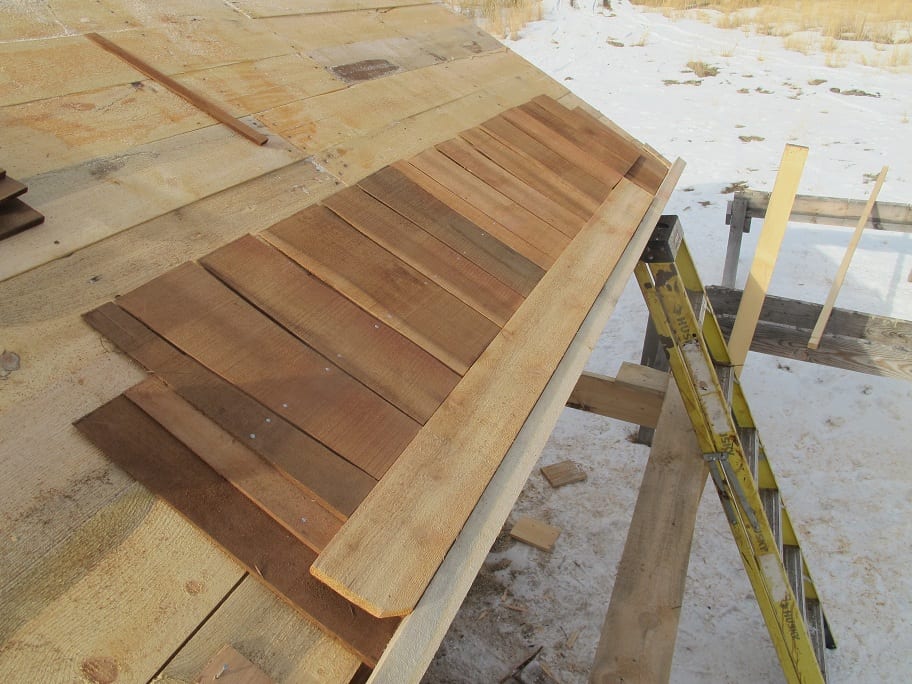
Here you can see the entire wall after getting the two tone stain treatment.
Next comes the chinking.

I used Log Jam on this cabin.
Foam backer rod is wedged into the gaps. I had various diameters 1/2", 1"...
Where the gap was large, I used pipe insulation as the backer.
Chinking applied in about 2 feet of the gaps.
A light spray of water.
Smoothing with a bent putty knife.
Starting to look like a finished cabin!
11x15 cabin build part 5
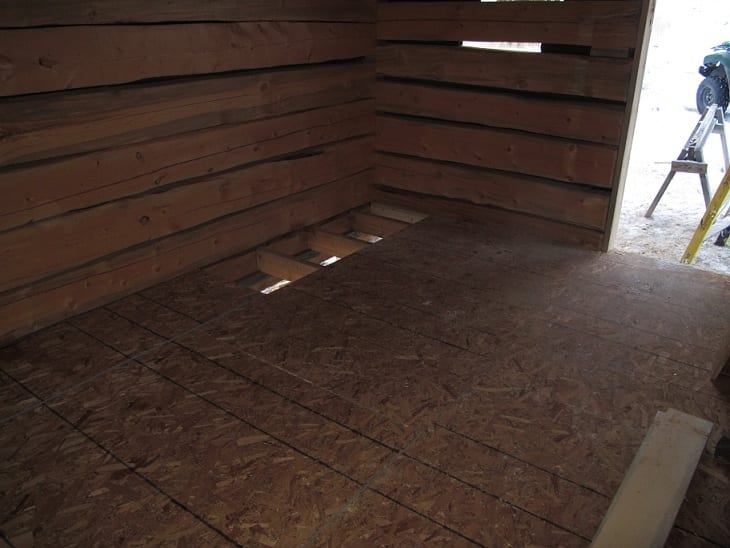
Here are a couple of pictures of the subfloor. It is 3/4 " tounge and groove OSB. I just nailed it down with 8 penny ring shank nails.
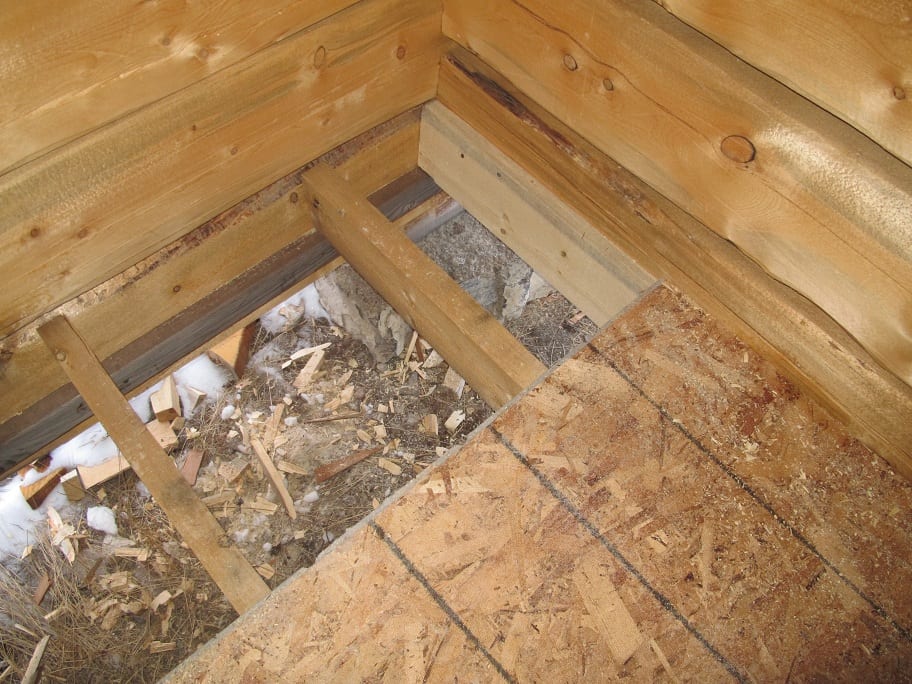
Another picture of the subfloor. Later, I will put down a finish floor.
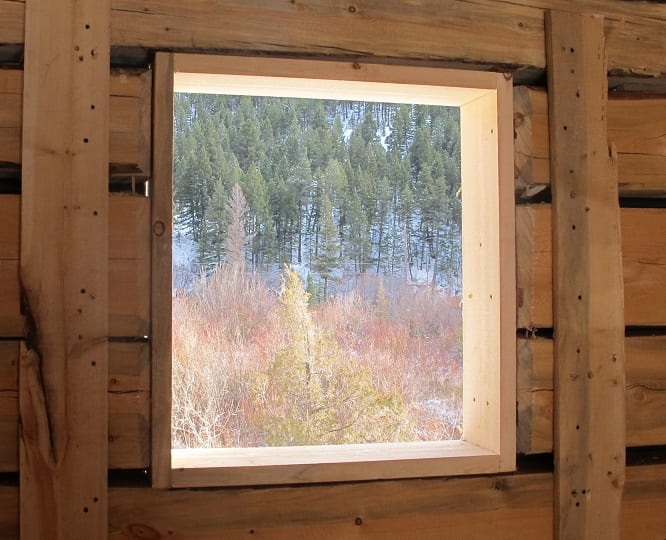
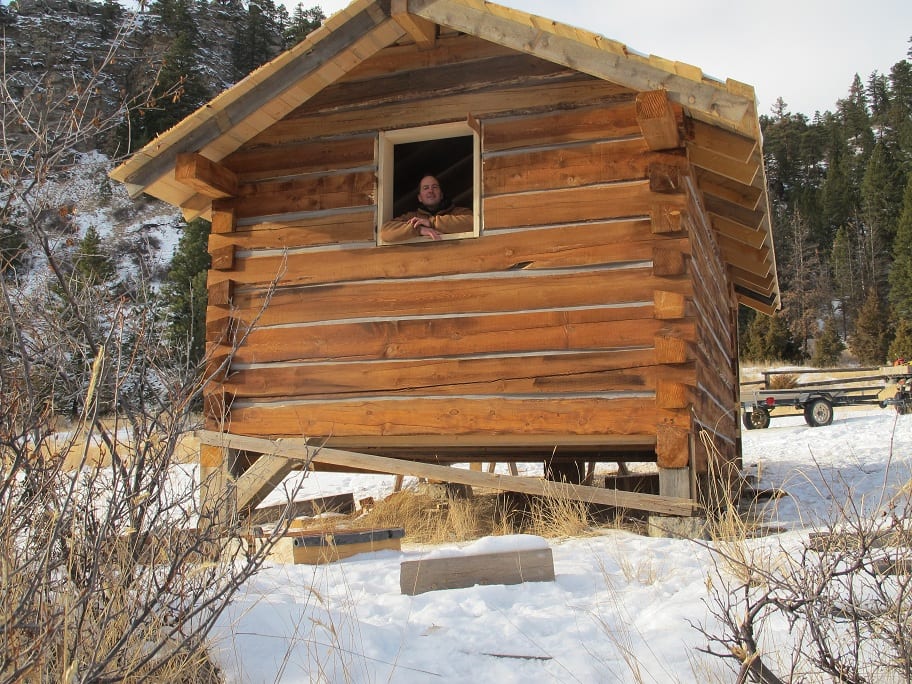
The picture below shows preparation for cutting the window opening in the back wall. A couple of boards screwed to the logs will keep the logs in place after the cuts are made. The logs are very dry so I am not making any allowances for shrinkage.
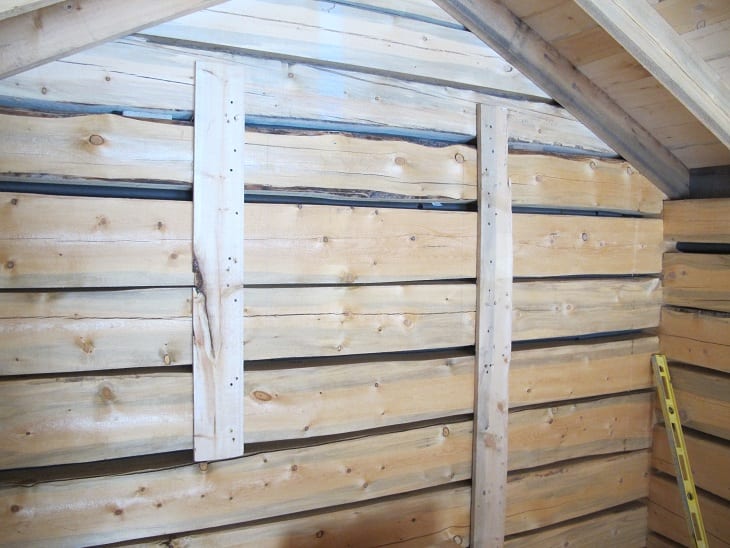
I drew lines on the logs where the cuts would be and just cut them with the chainsaw, keeping the cut perpendicular to the wall as best I could by eye. The hole is slightly larger than the window frame dimensions. I allowed about an extra 1/2 inch in each dimension.
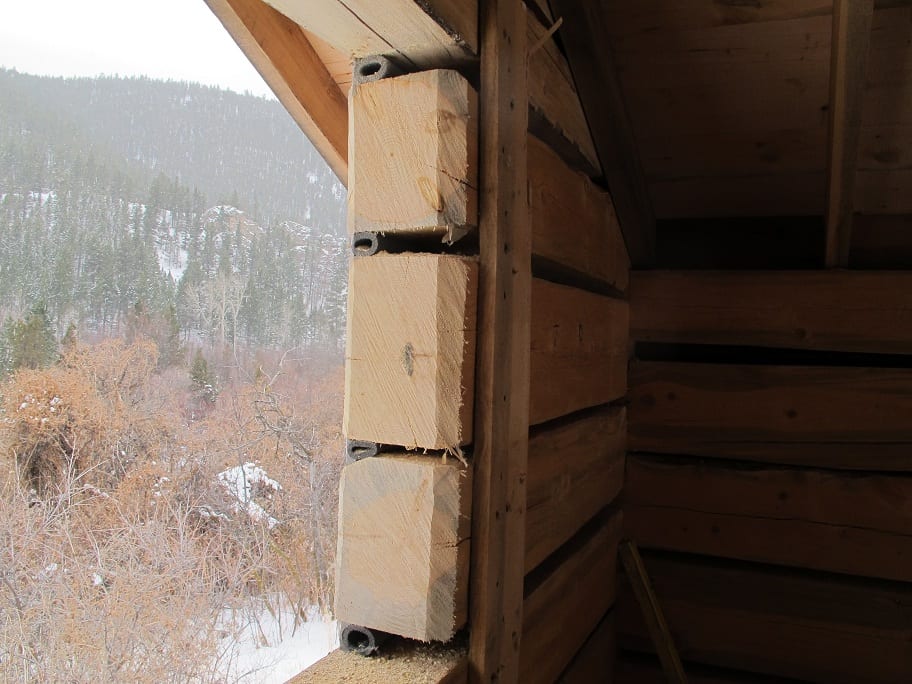
The edges of the logs were beveled with the saw. Later, this area will be chinked or caulked.
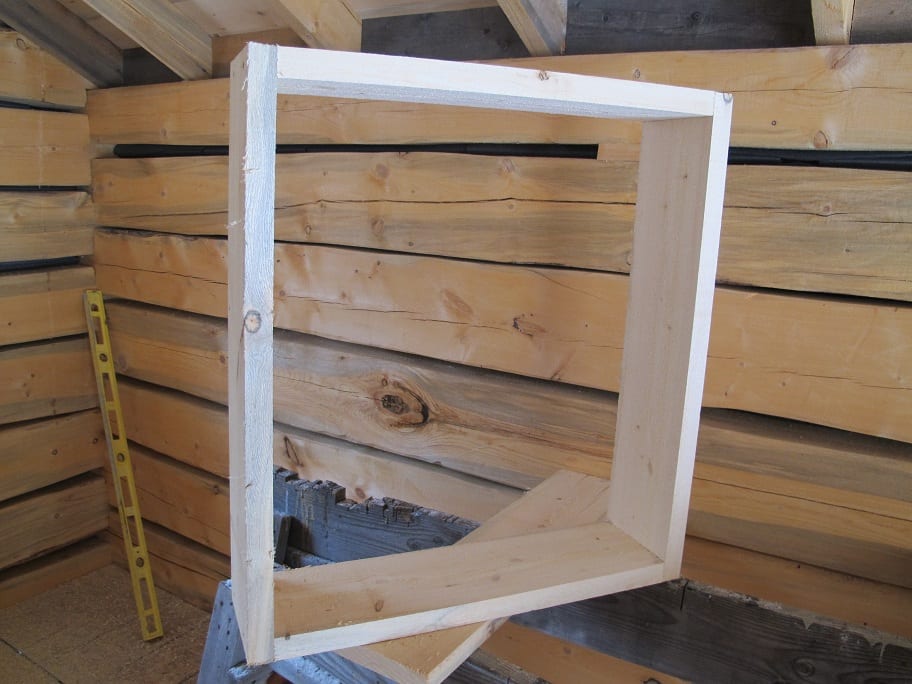
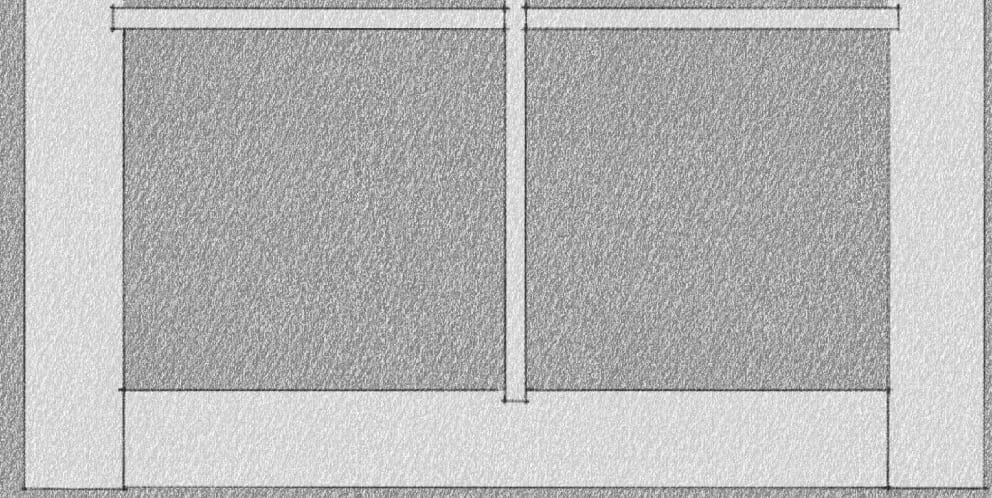
Here is the window frame which is just 4 boards fastened together with screws. The boards are 7 inches wide which is the same dimension as the wall thickness.
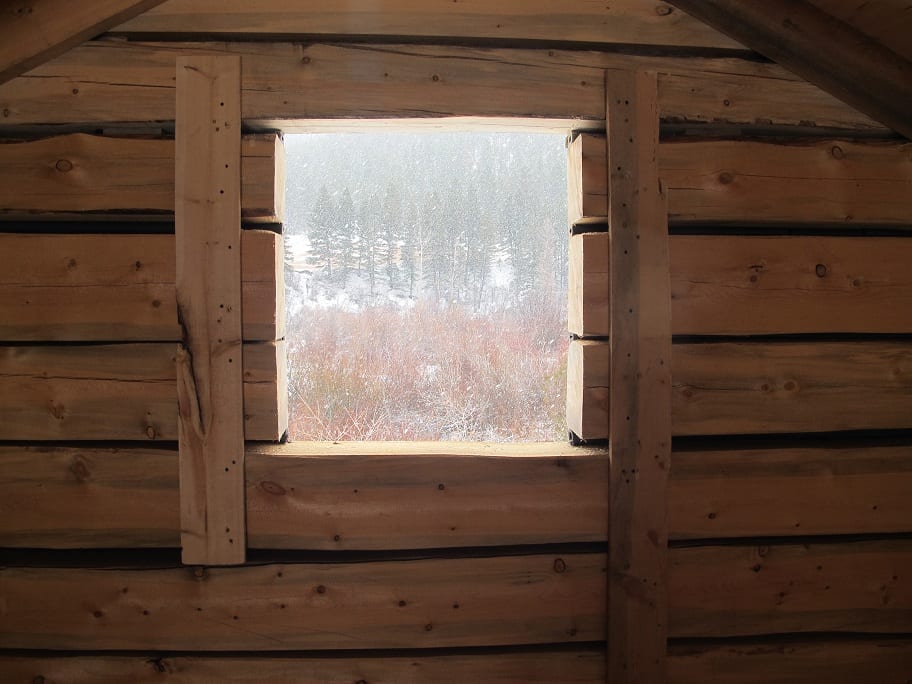
Here is the frame installed. Shims are used to postion the frame so that it will be square and plumb/level. Shims are needed between the fram and each log end. 4 inch screws driven through the frame into the logs will support the log ends after the temporary boards are removed.
The front door opening required cutting part way into this log. This was fairly time consuming and took a lot of hammer and chisel work. The top edges of the openings have a bevel also.
Shimming the door frame.
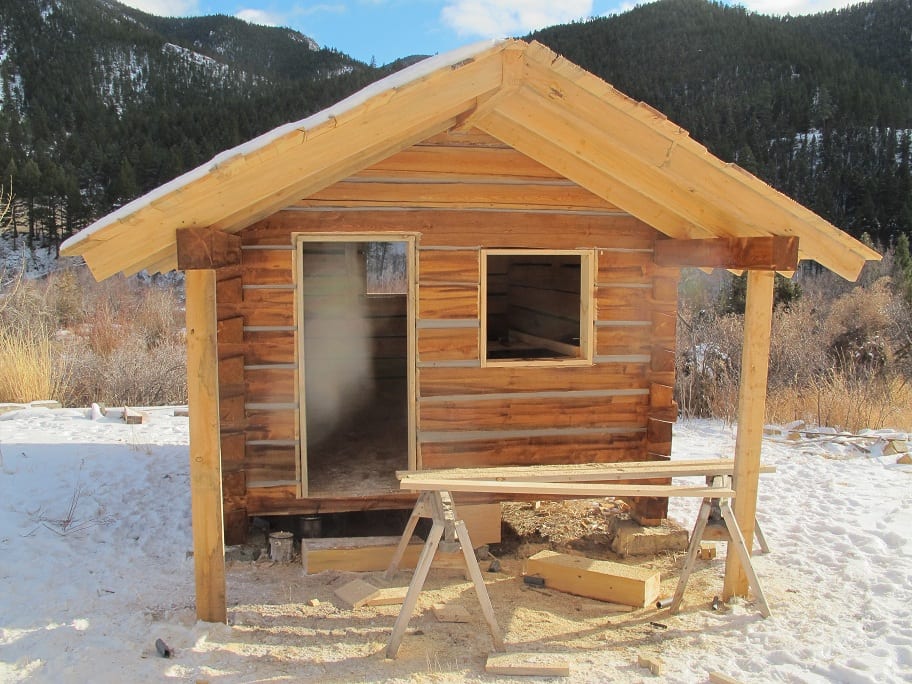
Later, I will build sashes for the windows and a door.
11x15 cabin build part 6
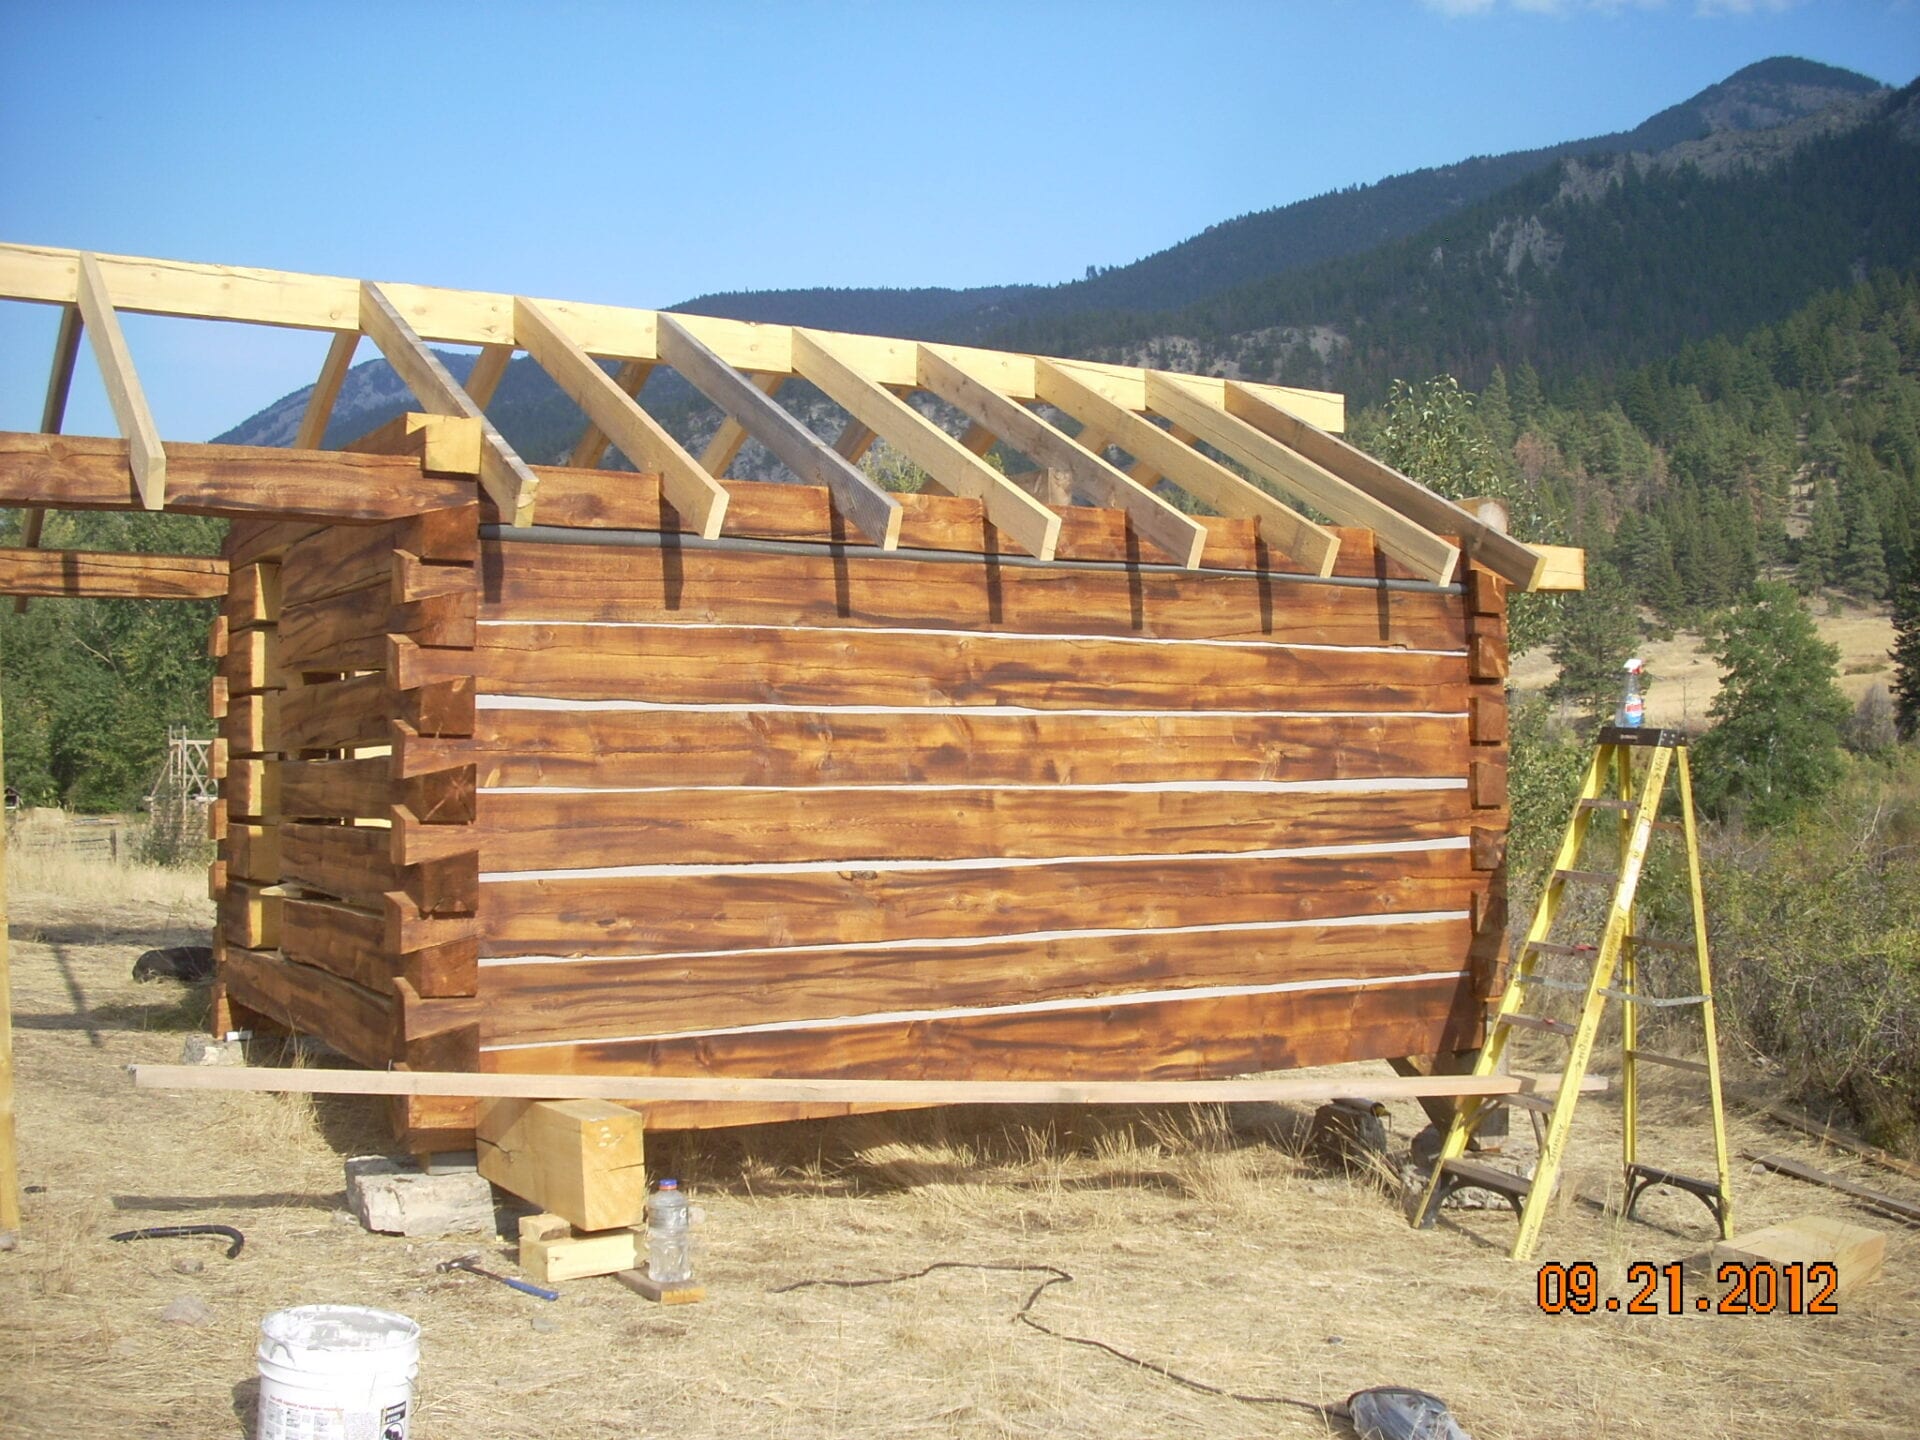
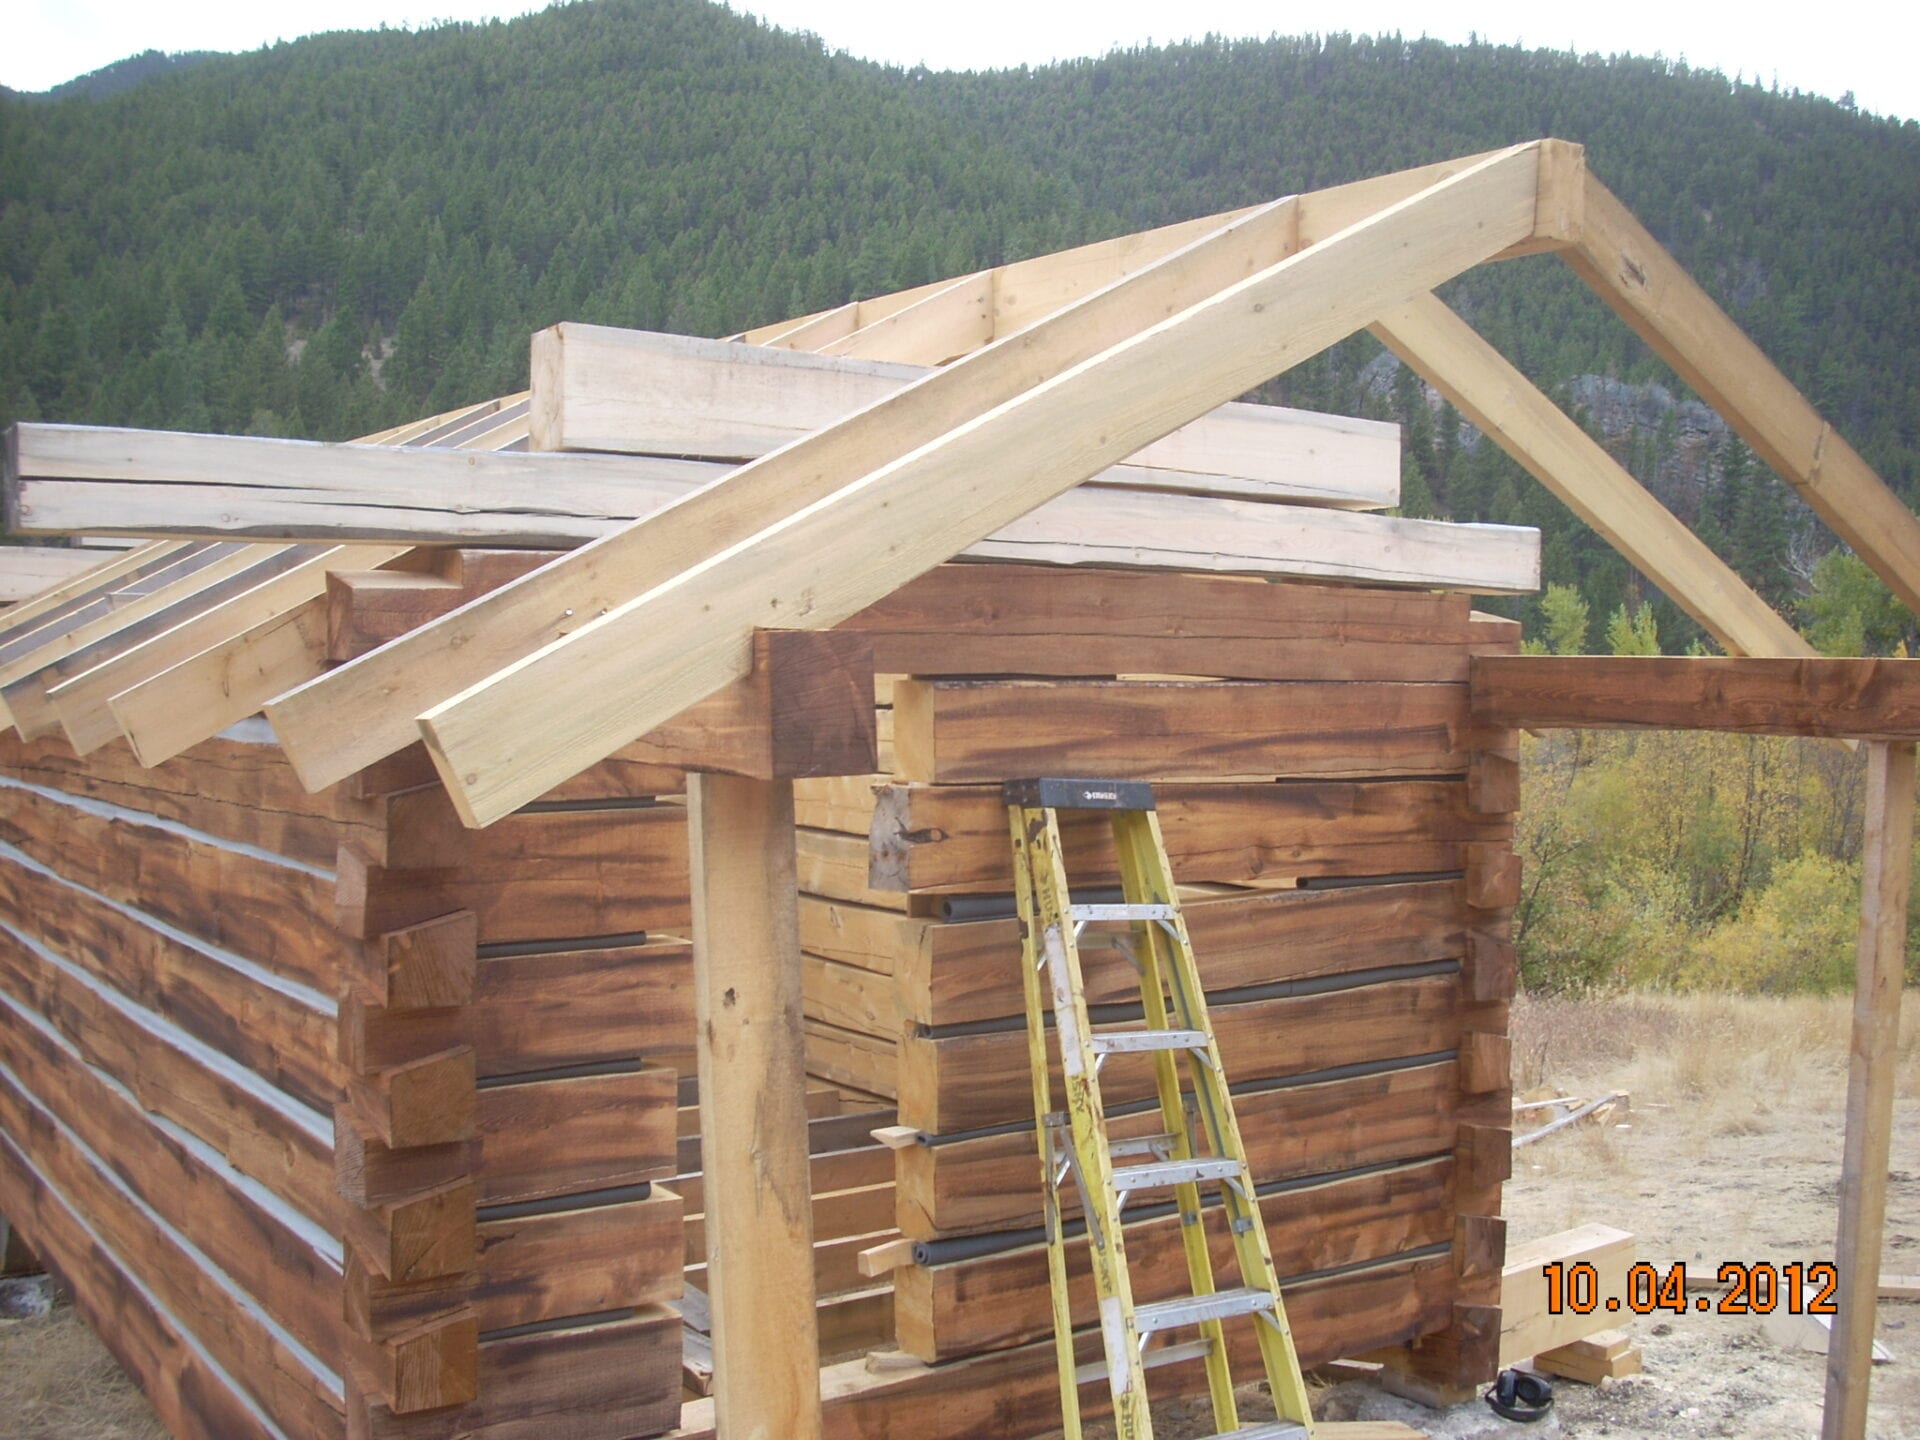
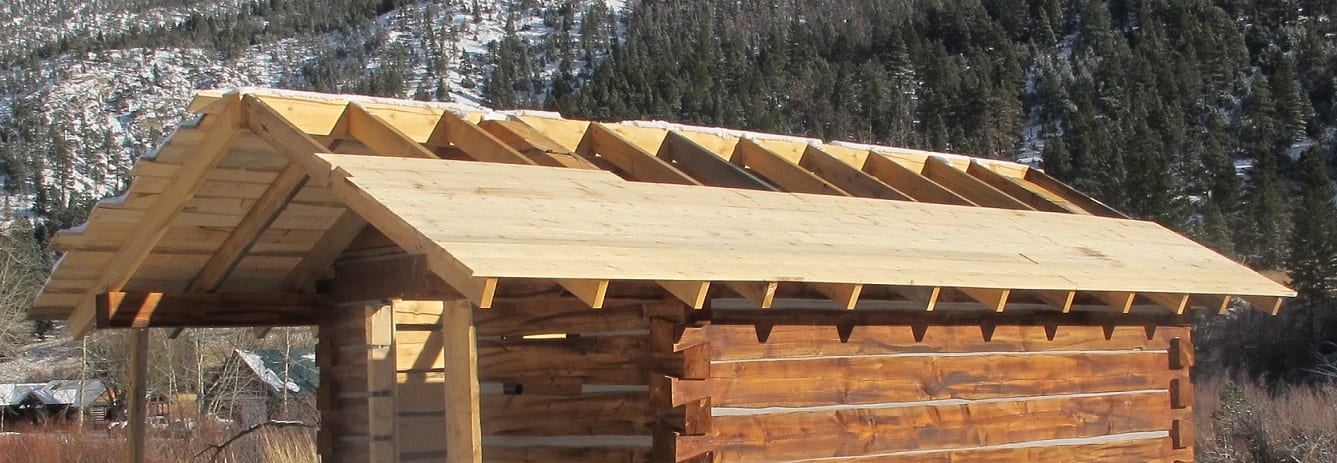
The cabin roof is framed with roughsawn 2x6 rafters and a 3x8 ridge beam. In the photo below some rafters were initially left out to make it easier to set the logs that fill in the gables.
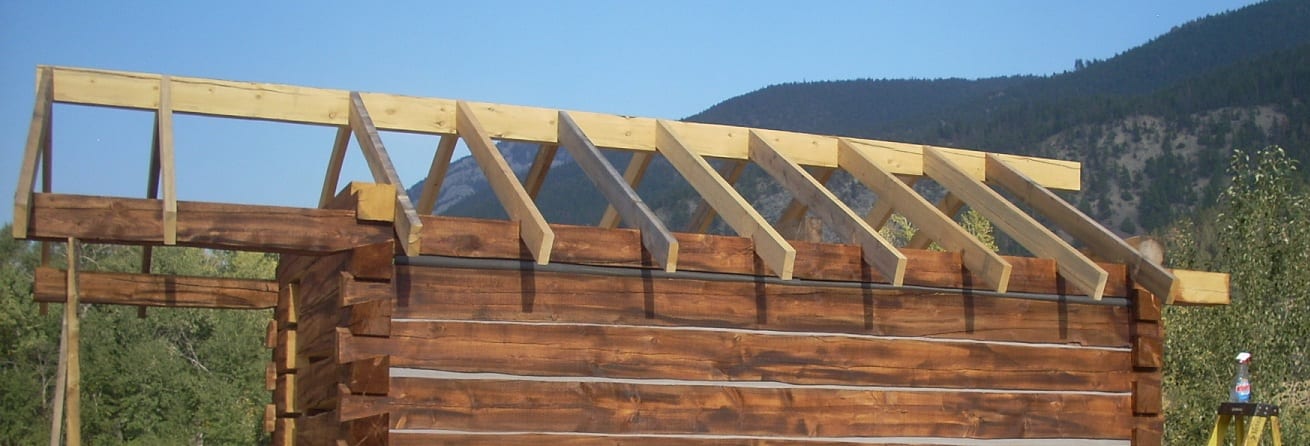
Here the gable logs are going in. They are stacked with just some spacers in between, The first two interior rafters are against the gable logs. The logs are held in place with nails driven through the rafters.
I placed the logs, nailed them and then cut them flush with the chainsaw. It was tough making these cuts yup there. Next time I would mark them and then take them down and cut them on the ground.
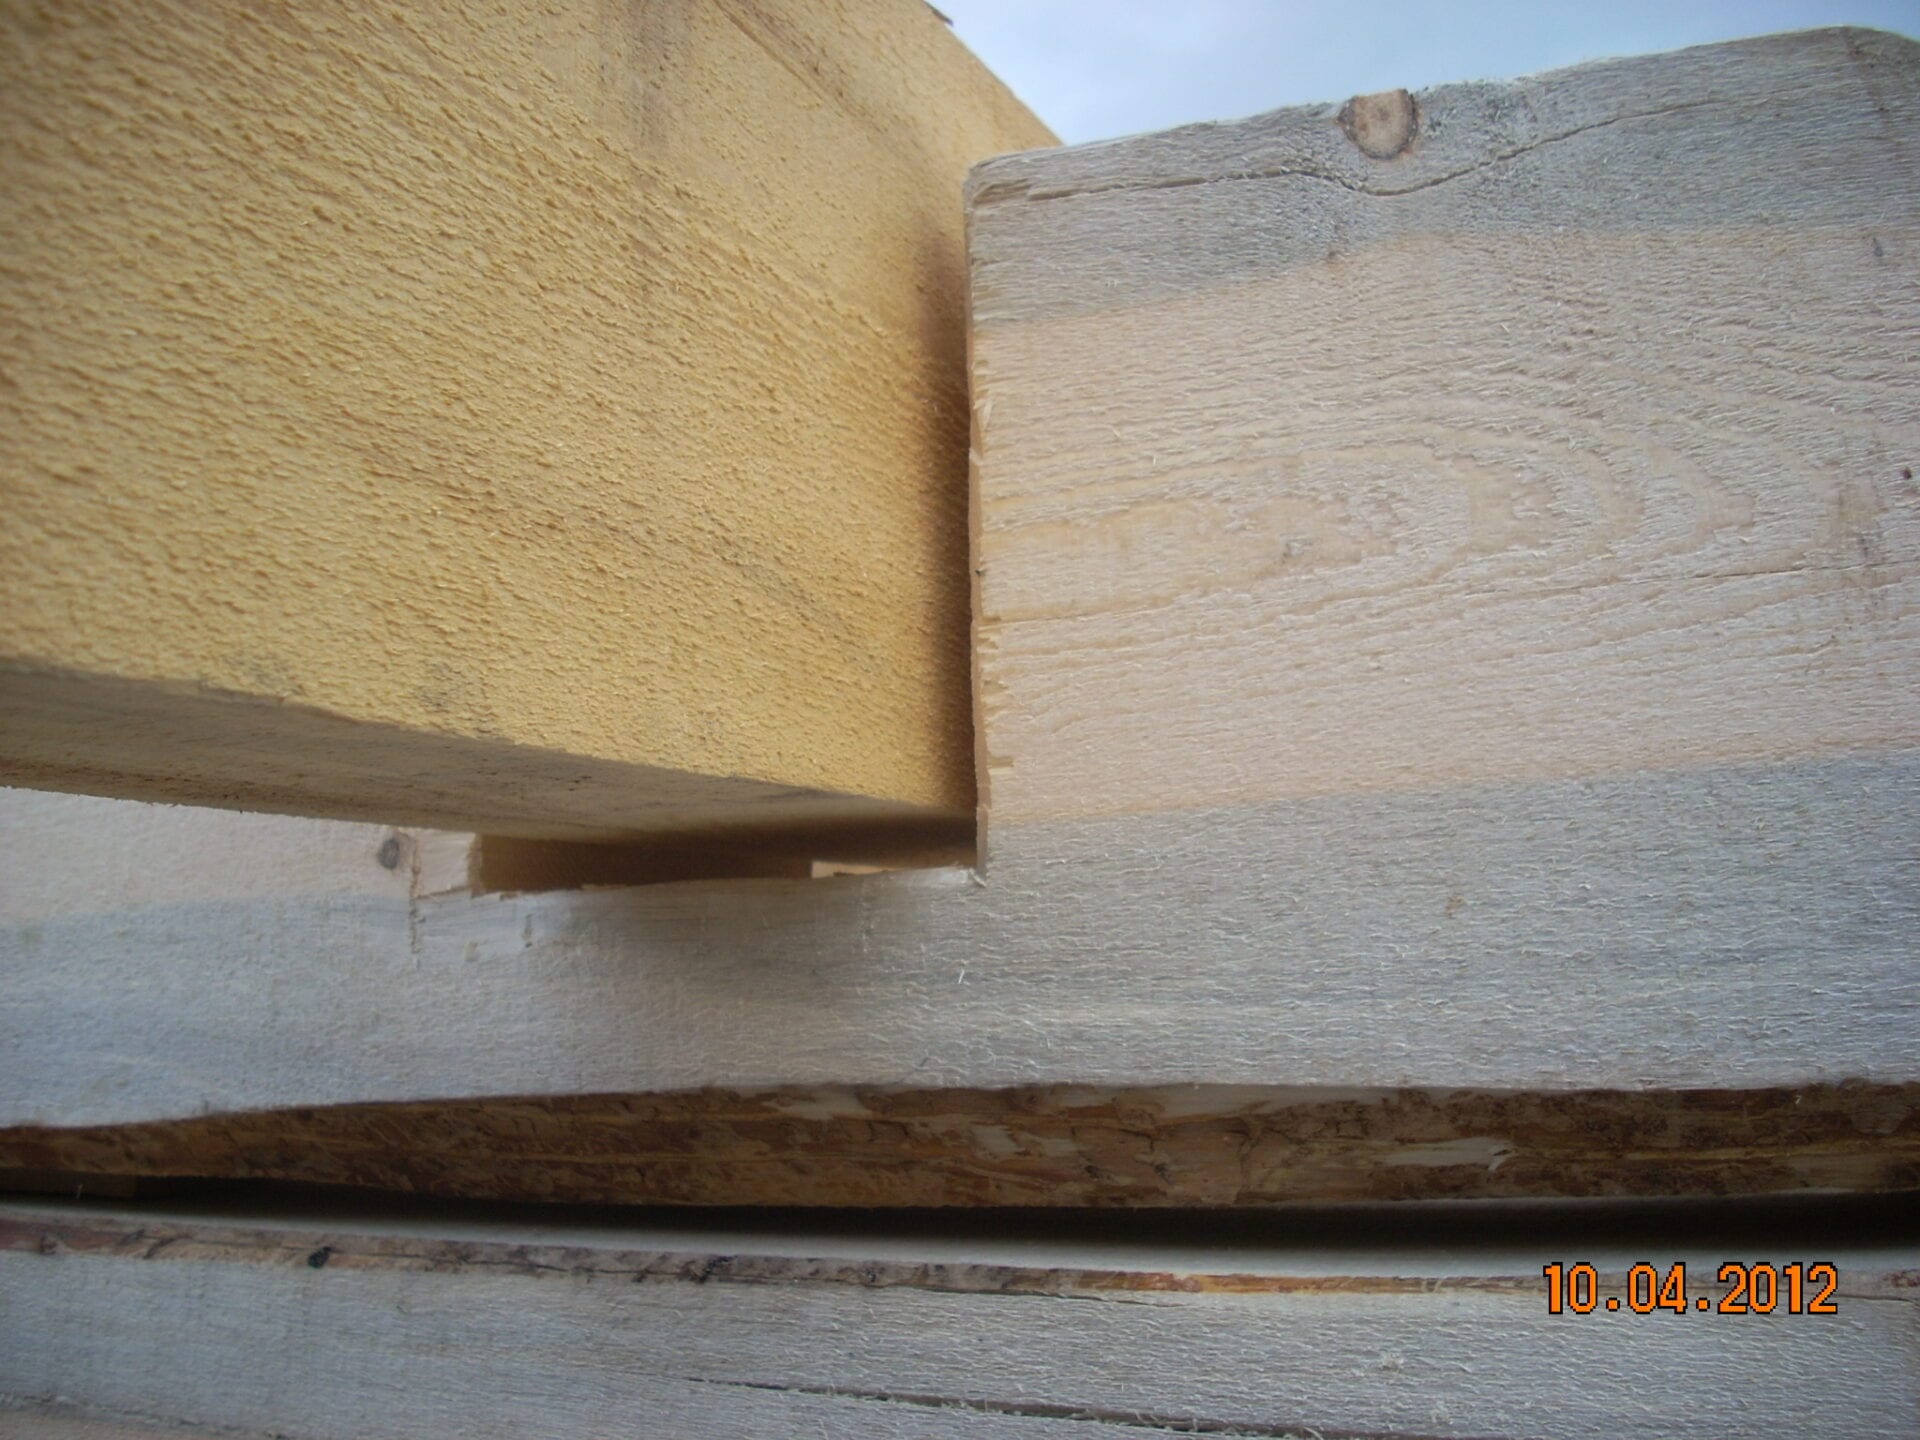
You can also see where I notched the top edge of the top logs. I should not have cut those notches. Later, I reattached the little scraps to replace teh wood there.
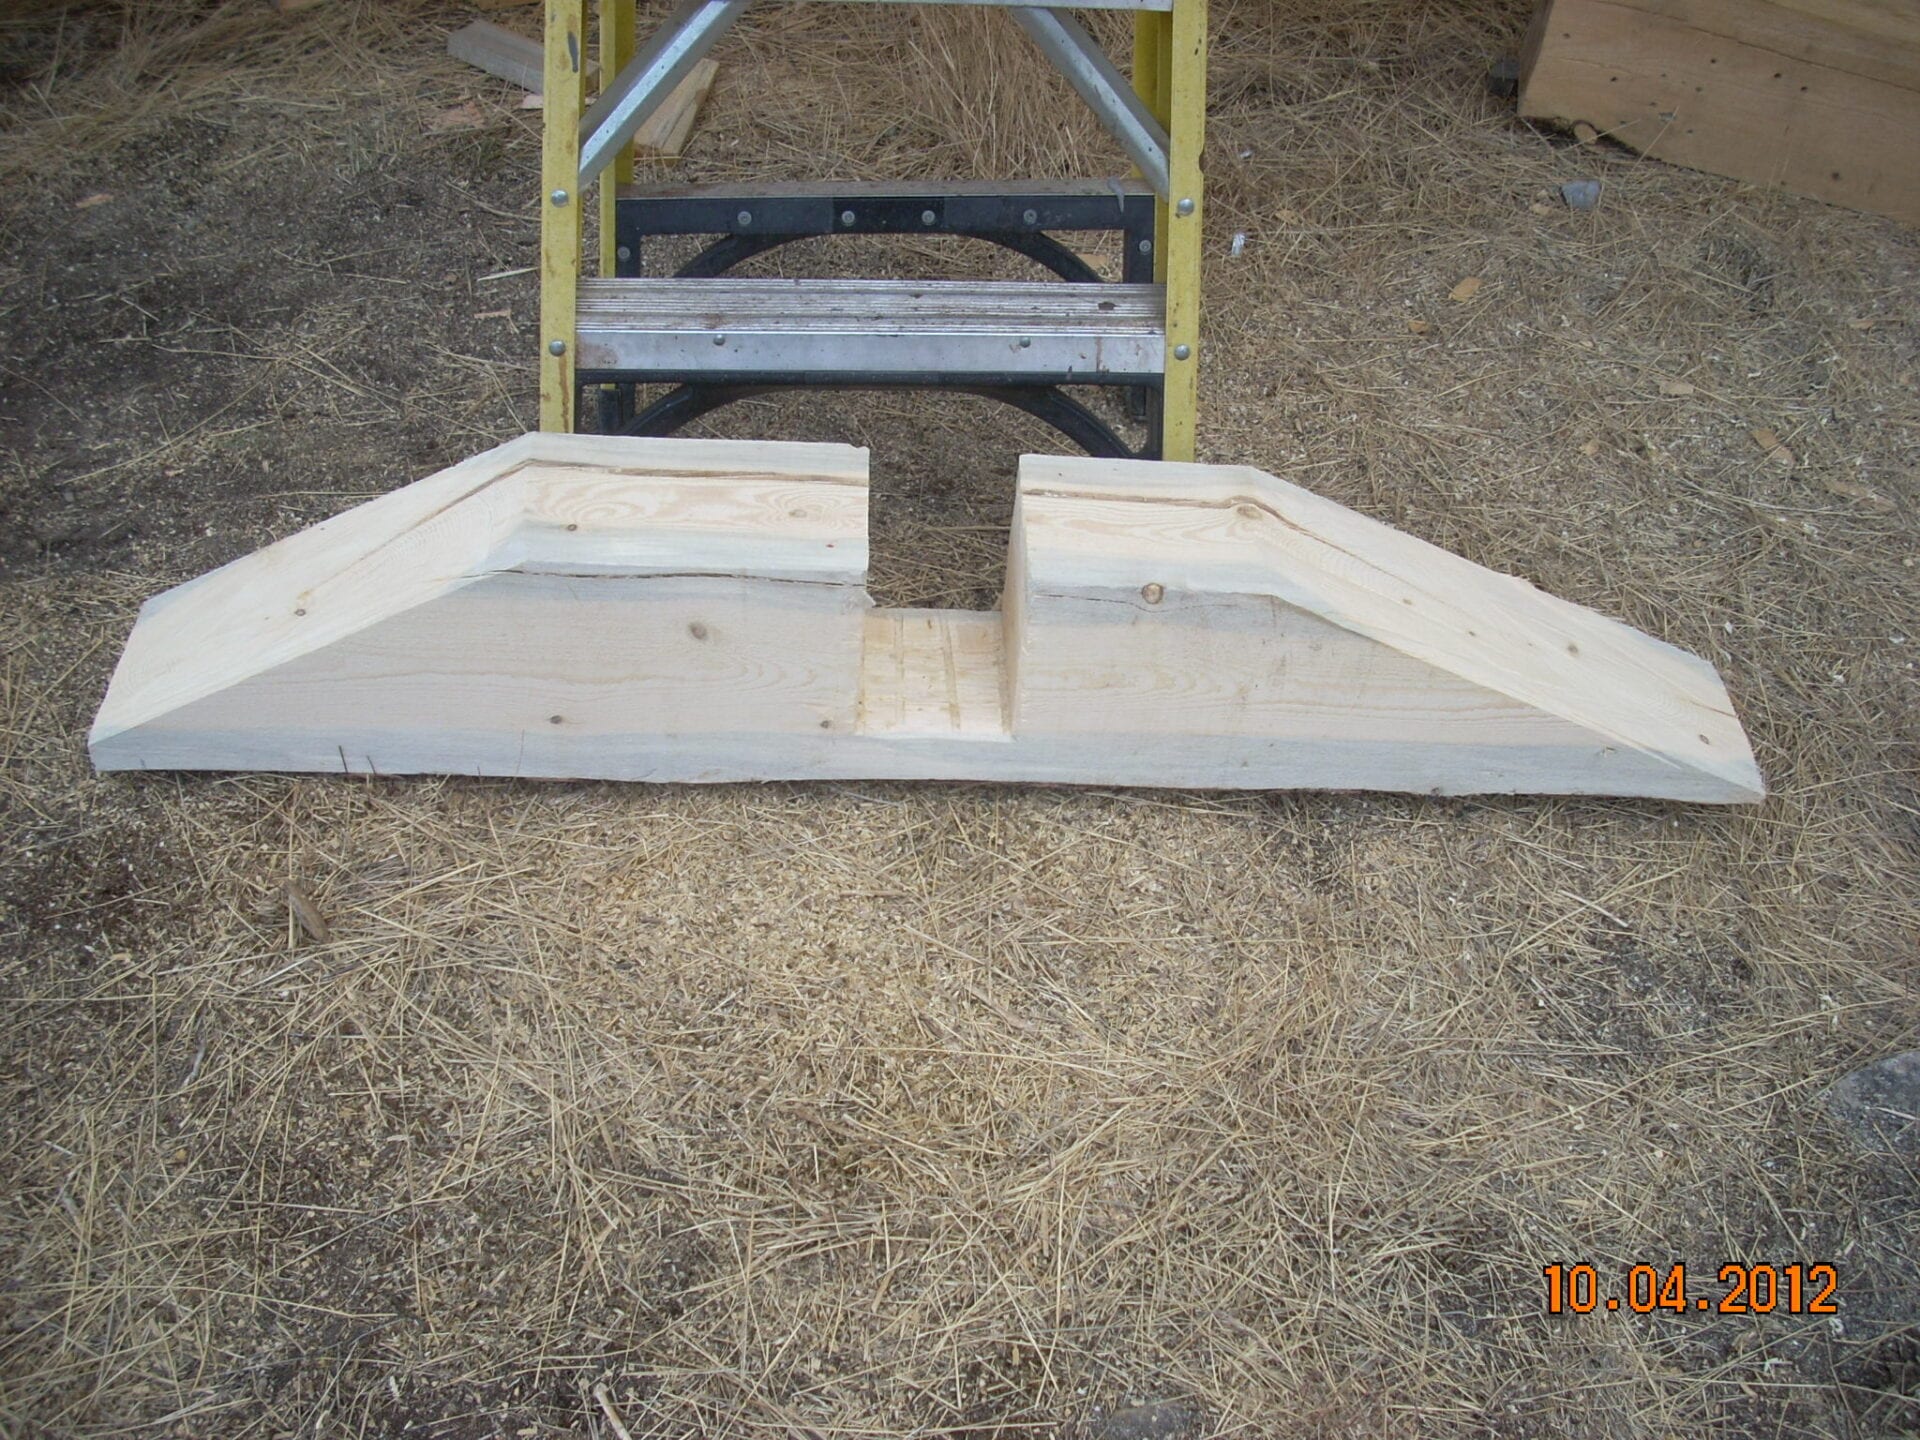
This is one I did cut on the ground. The notch is for the ridge. It is oversized to make it possible to chink.
Here is a view from the inside.
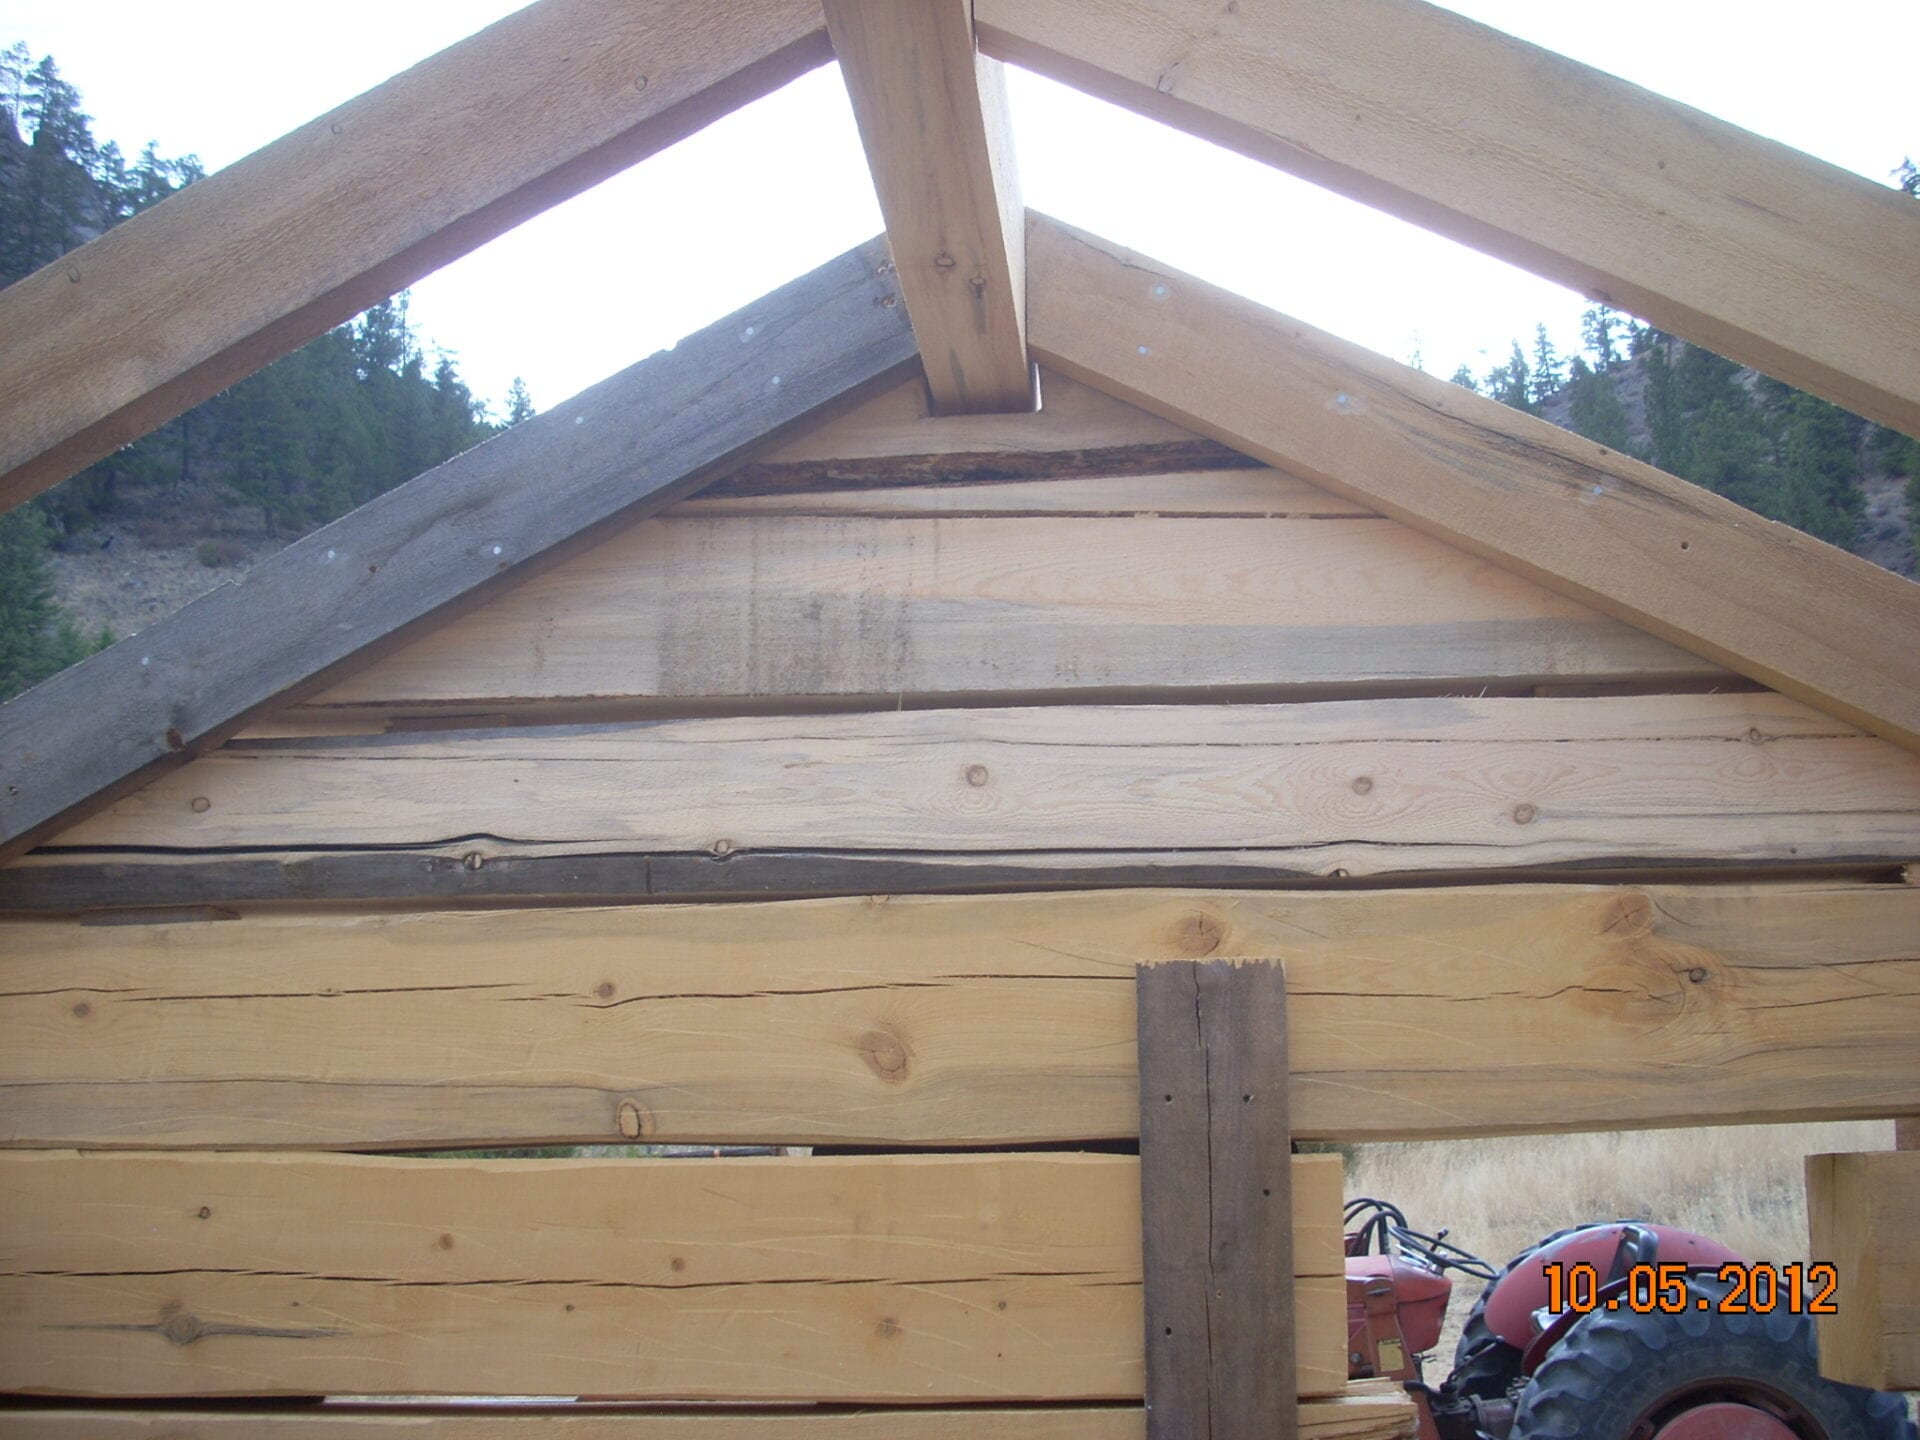
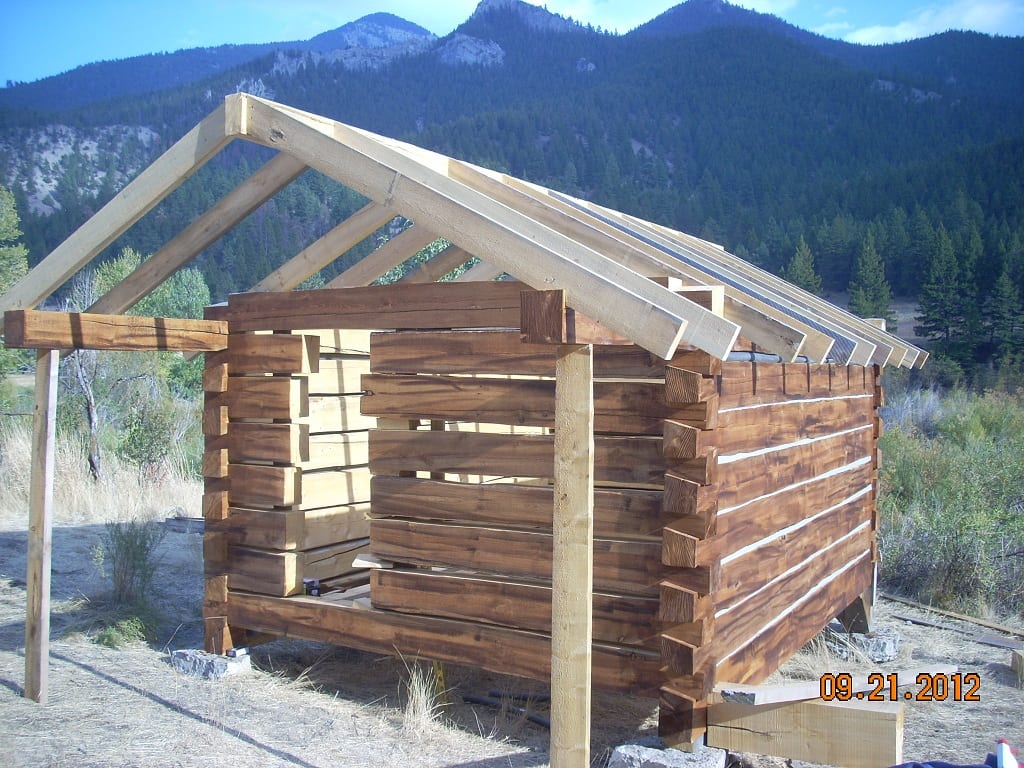
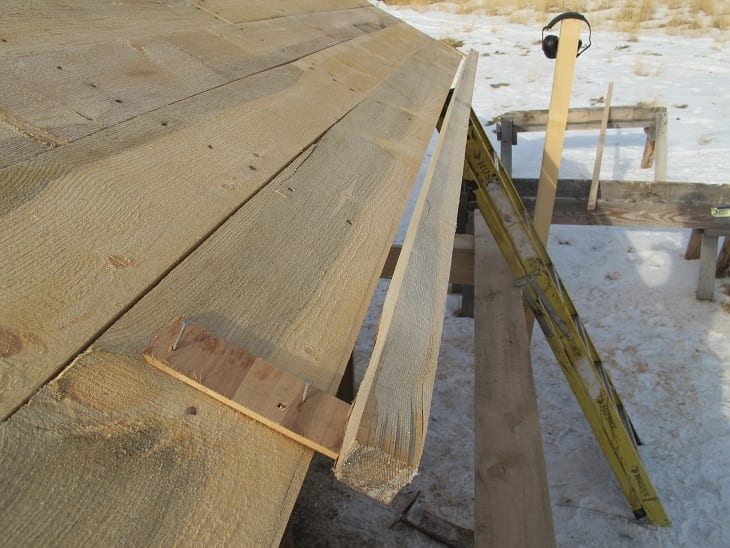
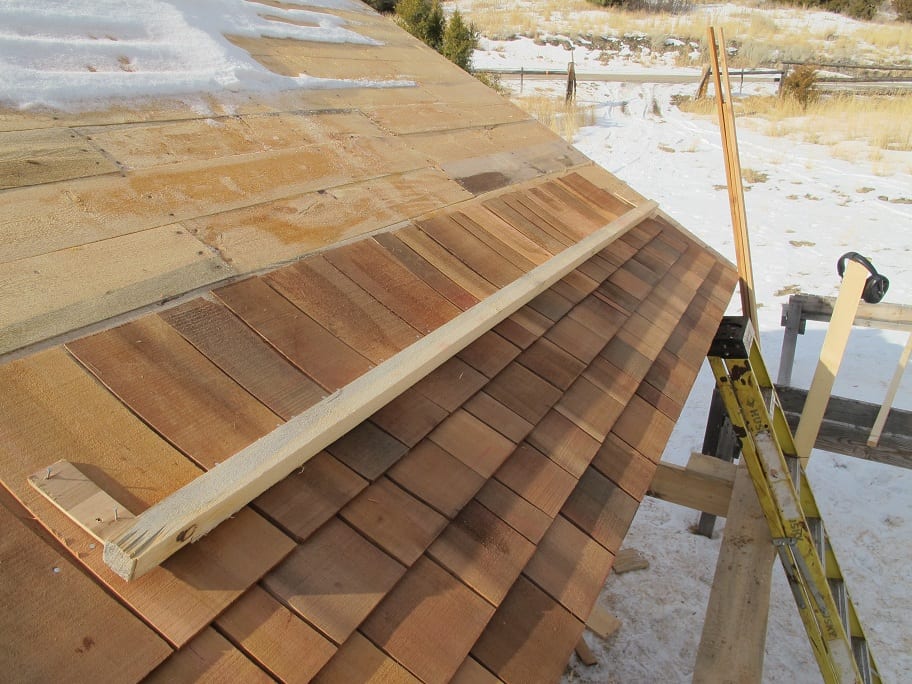
Below, the gable logs have all been placed, the remaining rafters have been set and 1x6 planking is being installed. Later, the ends of the planks were trimmed to overhang the gable rafters by 1.5 inches.
Time to nail on the shingles. Here I have fastened a 2x2 to temporarily hold the first course of shingles.
One thing that I failed to do was to place shingle underlayment on the planks. This is an important step that should be performed in order to prevent moisture from reaching the planks.
The shingles are positioned with about 1/4" gap between each. This is to allow them to expand and contract with changes in moisture..
The first course gets a second layer of shingles. The gaps for this layer should be at least 1.5 inches from the gaps in the underlying shingles.
4 penny galvanized nails are driven 3/4" from each edge of the shingle and 6 inches up from the bottom. Initially, I snapped chalklines at 6 inches up. Later I realized that the shingle hatchet has a yellow band on the handle at 6 inches. By using that to gage the nail location, I was able to speed up the process.
Next comes the second course. I ripped some boards to the shingle exposure dimension (4.5 inches for this roof). The board foms a ledge for couse #2.

Once you get started, it is just a matter of repeating the steps. Note that only the first course is a double layer.
Many of the shingles in the bundles are very wide. It is necessary to split these so that no shingle is larger than 9 inches wide. Otherwise, it will probably split later which could occur over an underlying gap and cause a leak.

11x15 cabin build part 7
I had hoped to find some old window sashes for the cabin since any modern window just wouldn't look right. I couldn't find any so I built my own.
The windows sashes are sized to be the same size as the window frame opening dimension. After they are completed, they can be trimmed slightly with the table saw to the exact size needed to fit in the opening. I decided to hinge the small window in the back wall so that it could swing inward.
Here is how the sashes were built...
First the frame which is made up of 1 3/4 x 2 1/2 pine roughsawn lumber. The wood should be very dry and straight. After I cut these to size, only one face still had the rough sawn surface. This would go on the outside.
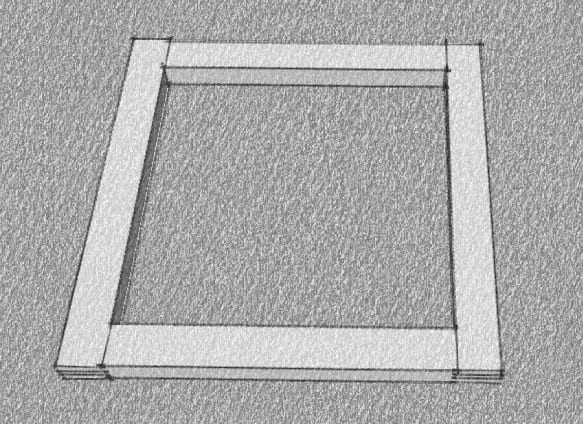
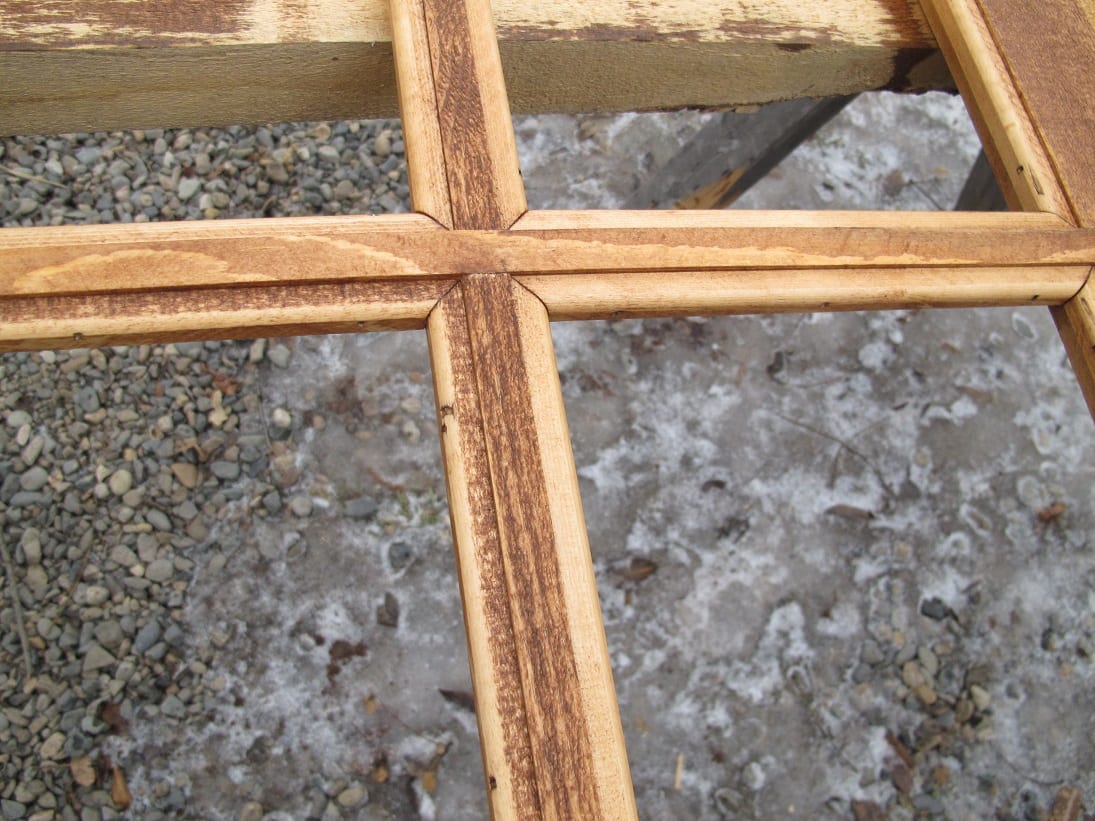
The frame is assembled with bridle joints. I cut the joints on the table saw with a dado set. The muntin notches should be cut before gluing the frame together.
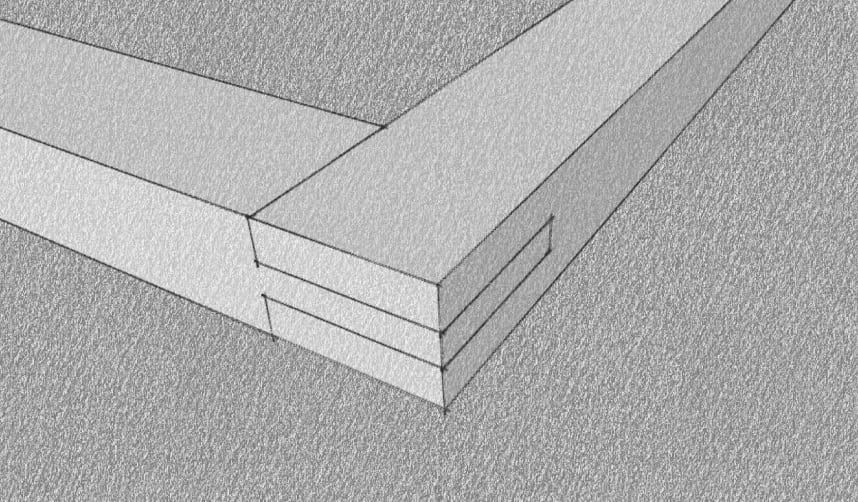
The muntins are 1 3/4 x 1/2 inch. They are half lapped in the center and are cut to be 1/2 inch longer than the interior dimensions of the frame. The frame is notched to receive the ends of the muntins.
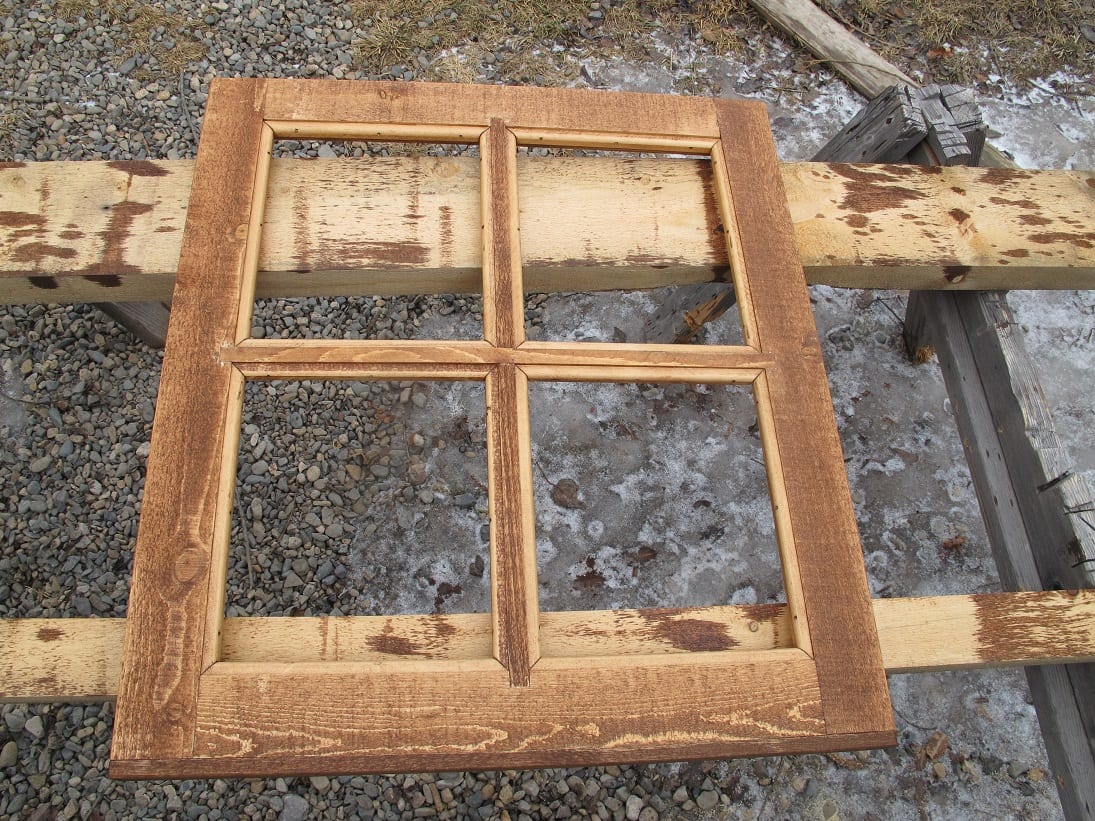
Here is a photo of the muntins after nailing in quarter round moulding. The moulding is recessed slightly in the 4 openings. Later, I installed glass panes. I used some silicone caulk and quarter round on the inside to hold the panes in place.
When staining wood that has some rough sawn faces and some smoother cut faces, apply the stain fairly heavy then wipe off the excess with a rag. The rough faces absorb more stain which gives a nice weathered look.
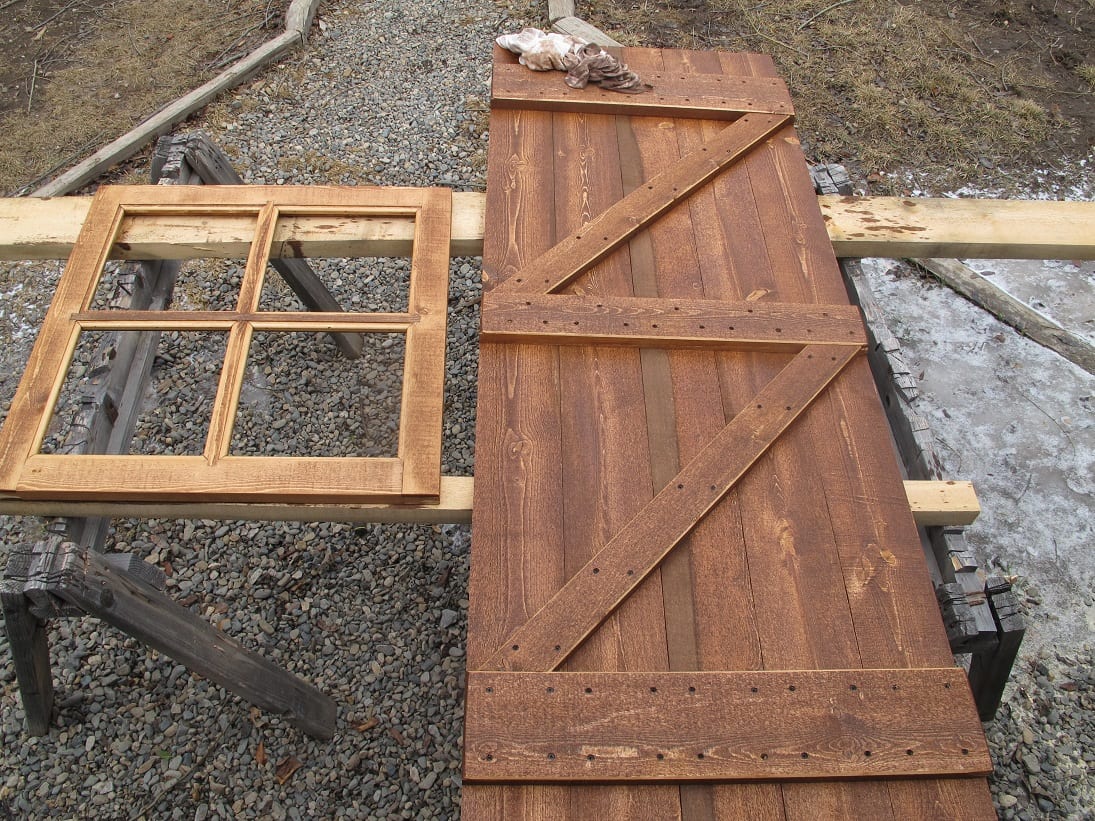
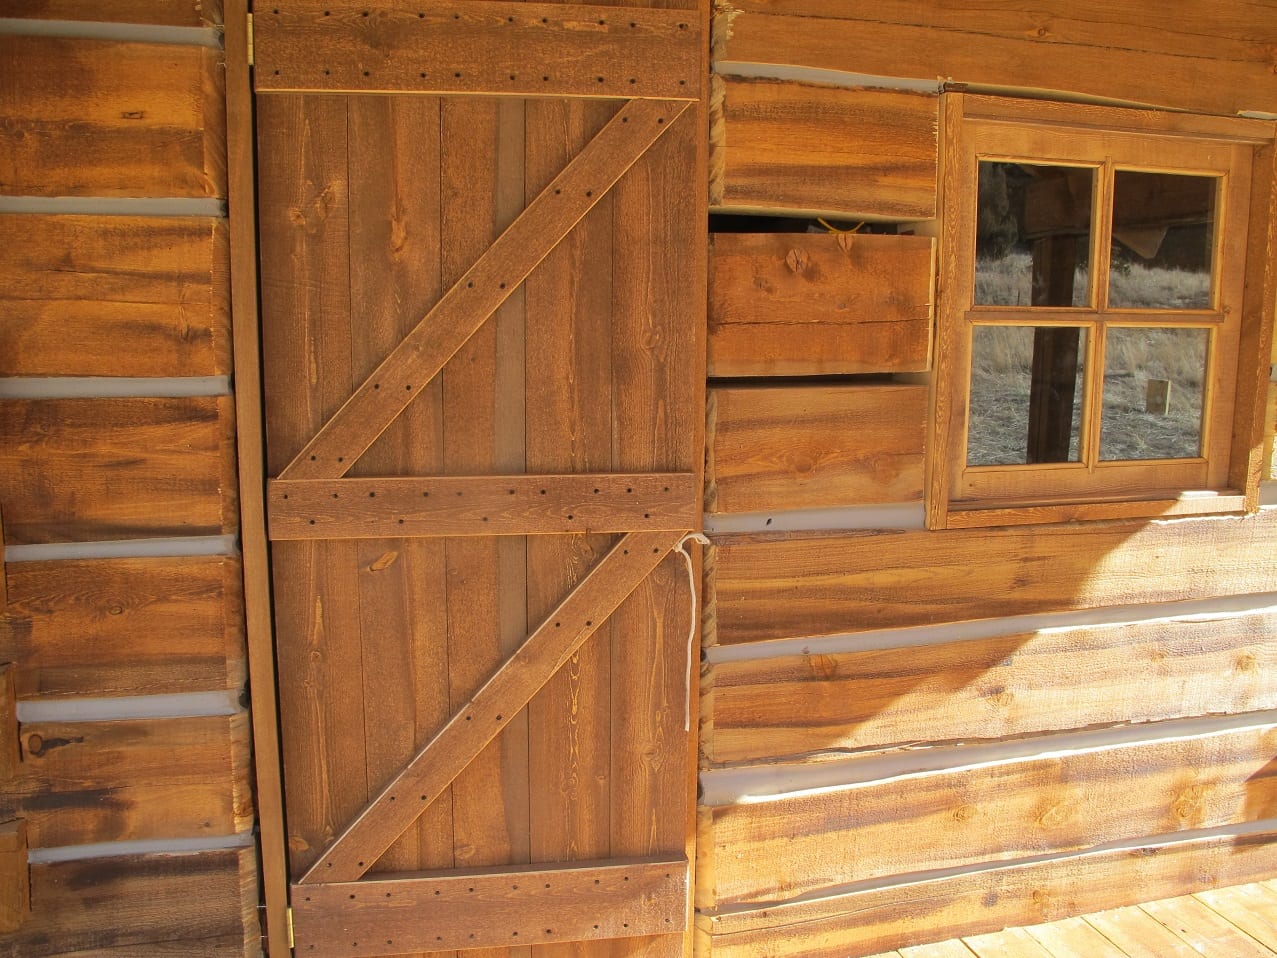
Here the door is hung temporarily until the forged hinges arrive. The front window is installed by trapping it in the opening with some simple stop moulding.
11x15 cabin build part 8

Book
Back in 1997, I picked up the book "Building and Restoring the Hewn Log House" by Charles McRaven. It was a great resource for that first cabin I built. I highly recommend the latest edition if you are considering building a log cabin yourself. (Available on my "Supplies" page below).